Cisco NSO RESTconf examples with Postman are the topic of this section.
We will see the capabilities of the postman and how to connect to NSO via restconf to configure network devices.
From the beginning of the course we learned how to connect to Cisco NSO via CLI, GUI and Python. In this section, we will learn about a new and the most modern method, restconf, to configure network devices through Cisco NSO.
In this section we will use existing NSO Postman collections to take advantage of Postman capabilities and in the next section we will use the Python requests library to connect to NSO and manage network devices.
To get started with this section, make sure you download and install the free postman software.
In the first step, we download existing Cisco NSO postman collections and import them into Local postman software.
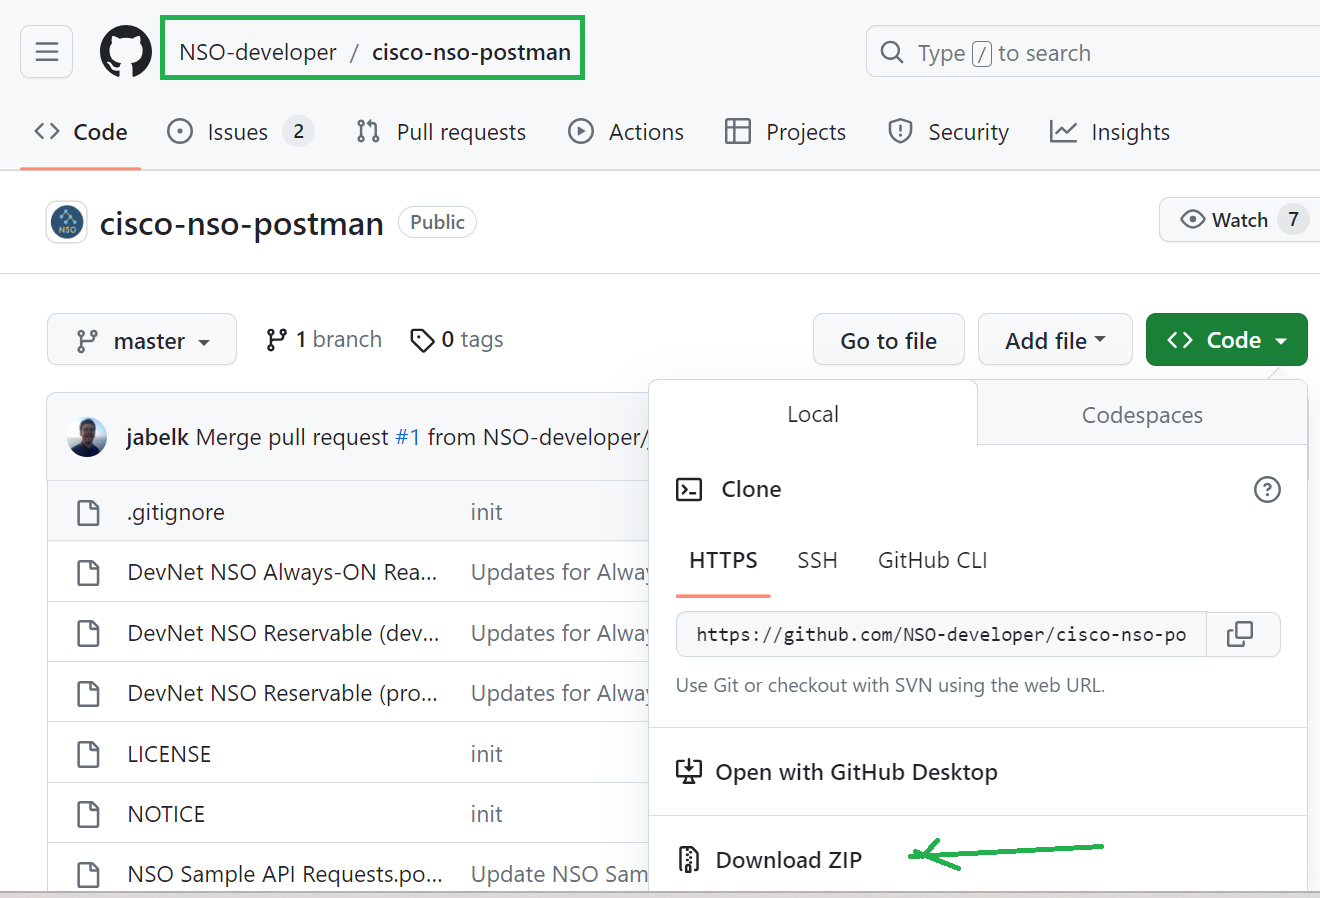
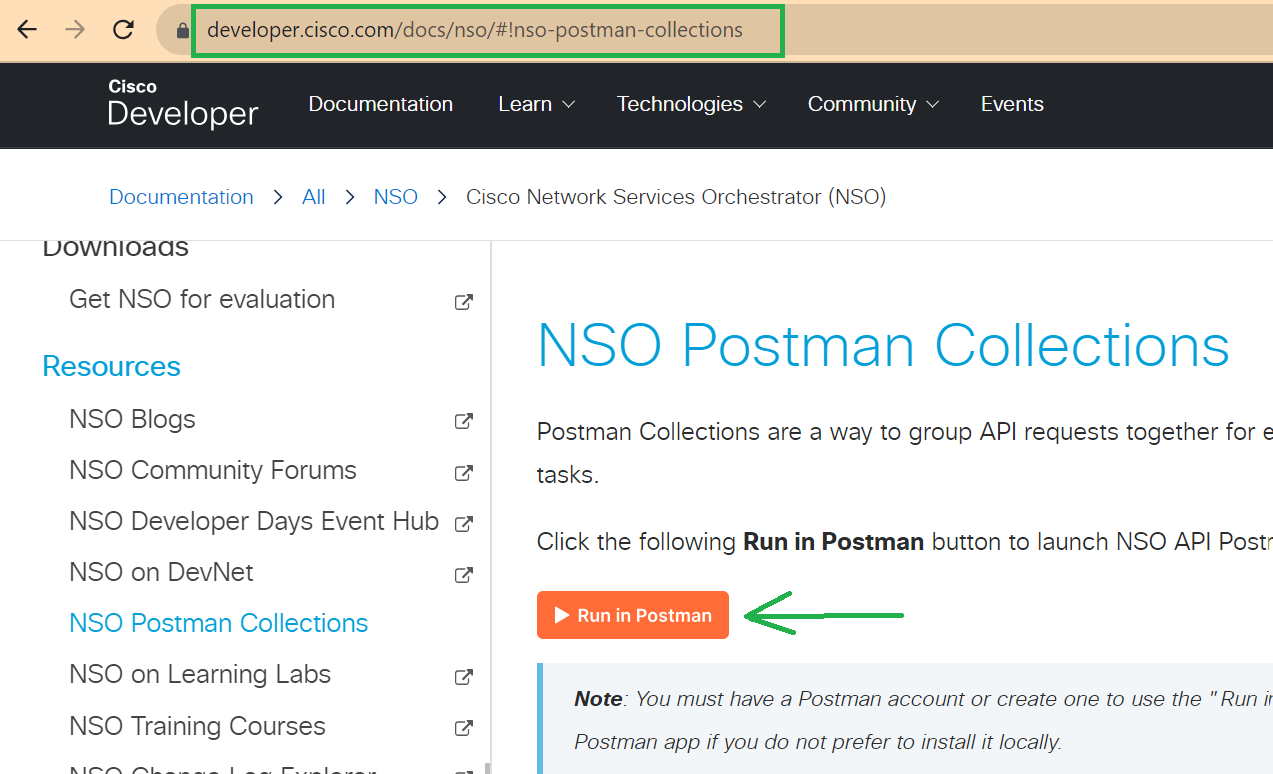
Cisco NSO postman Collections can be downloaded from github or exported from online postman collections. You can find the link to cisco nso online collection on the Cisco Developer website.
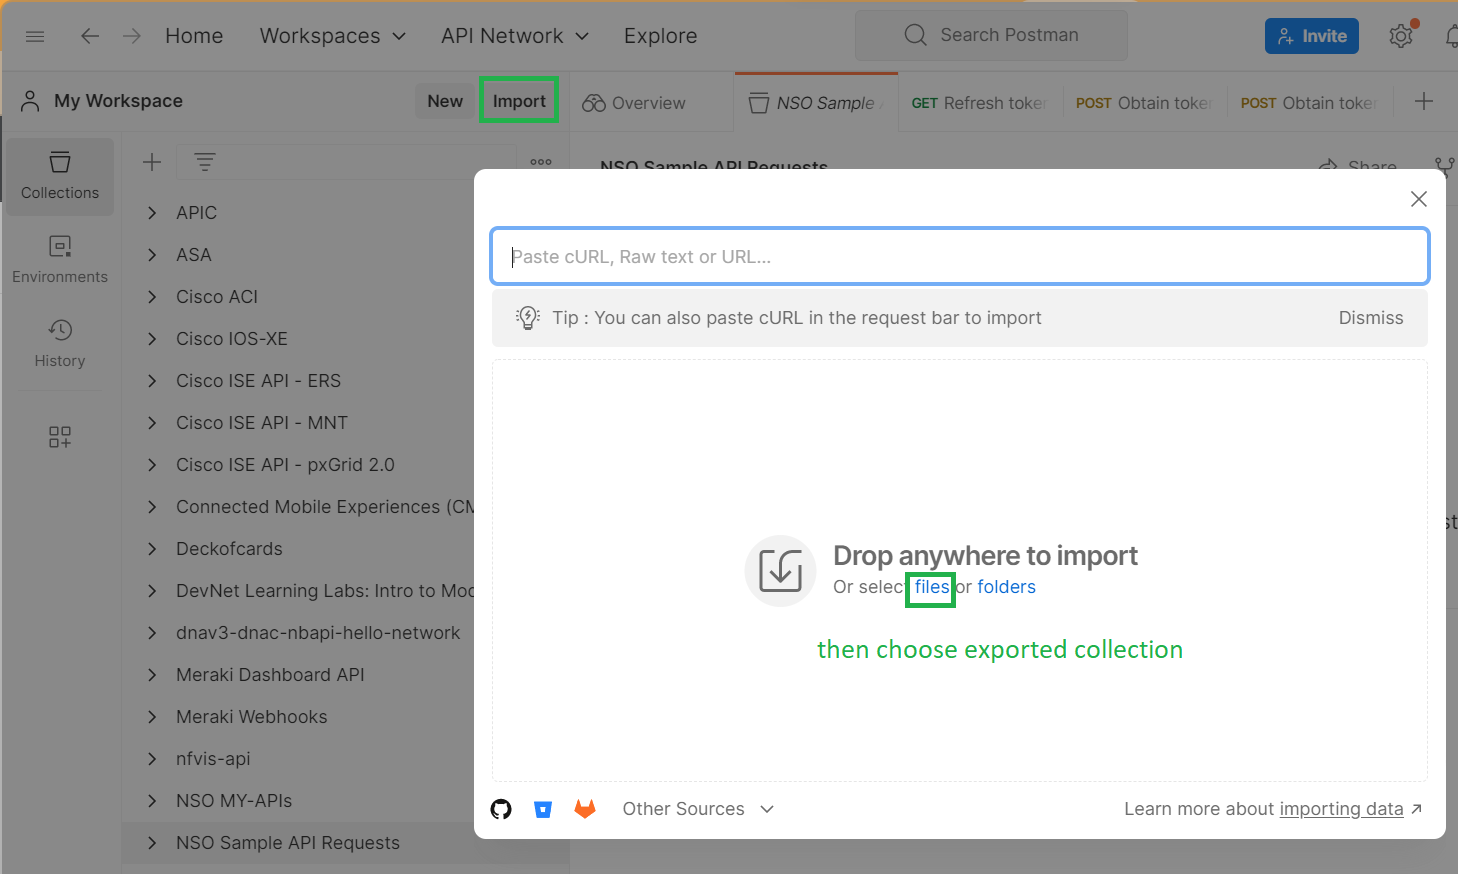
If you download from github, you need to import the JSON files into your local Postman software.
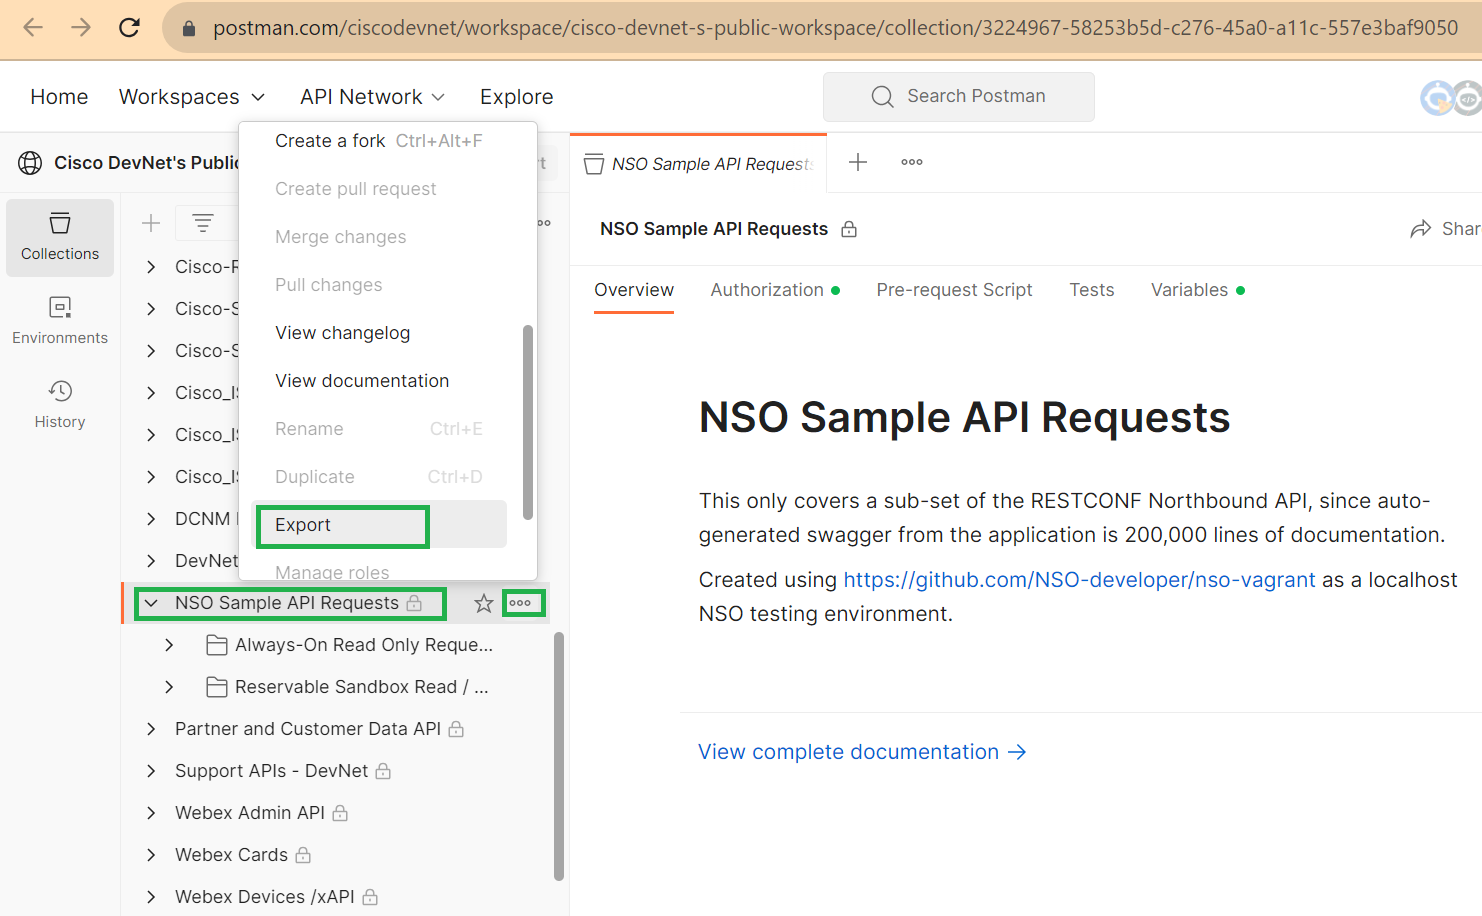
The other options is to export from online postman collection and then import it into your local postman software.
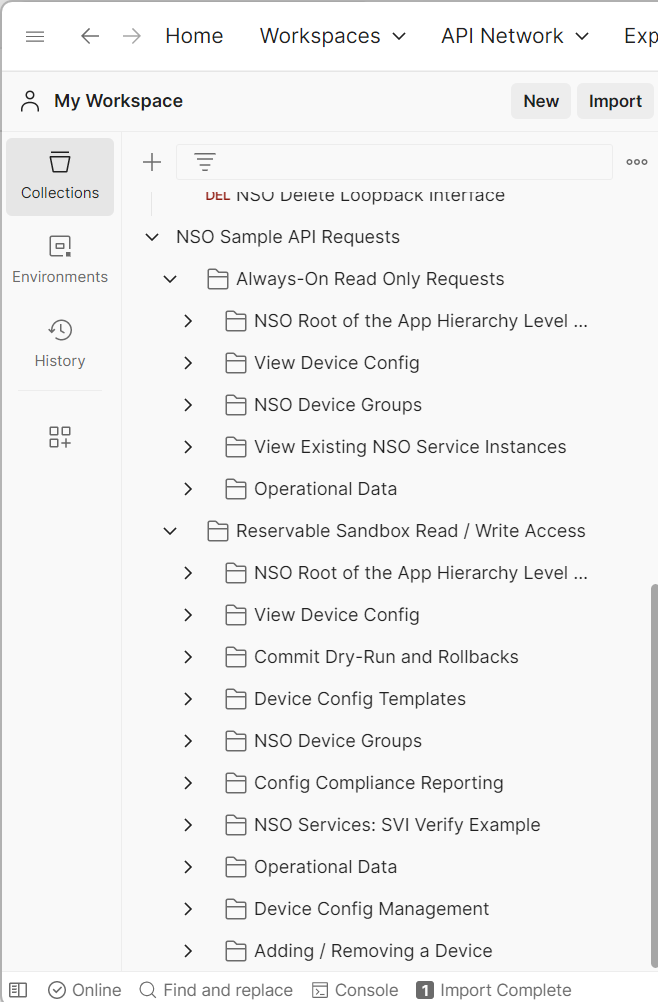
A new folder named “NSO Sample API Requests” will be added to your local postman software. If you examine the subcategories, you will see APIs that allow you to view configuration, add configuration, delete configuration and also run operational mode commands.
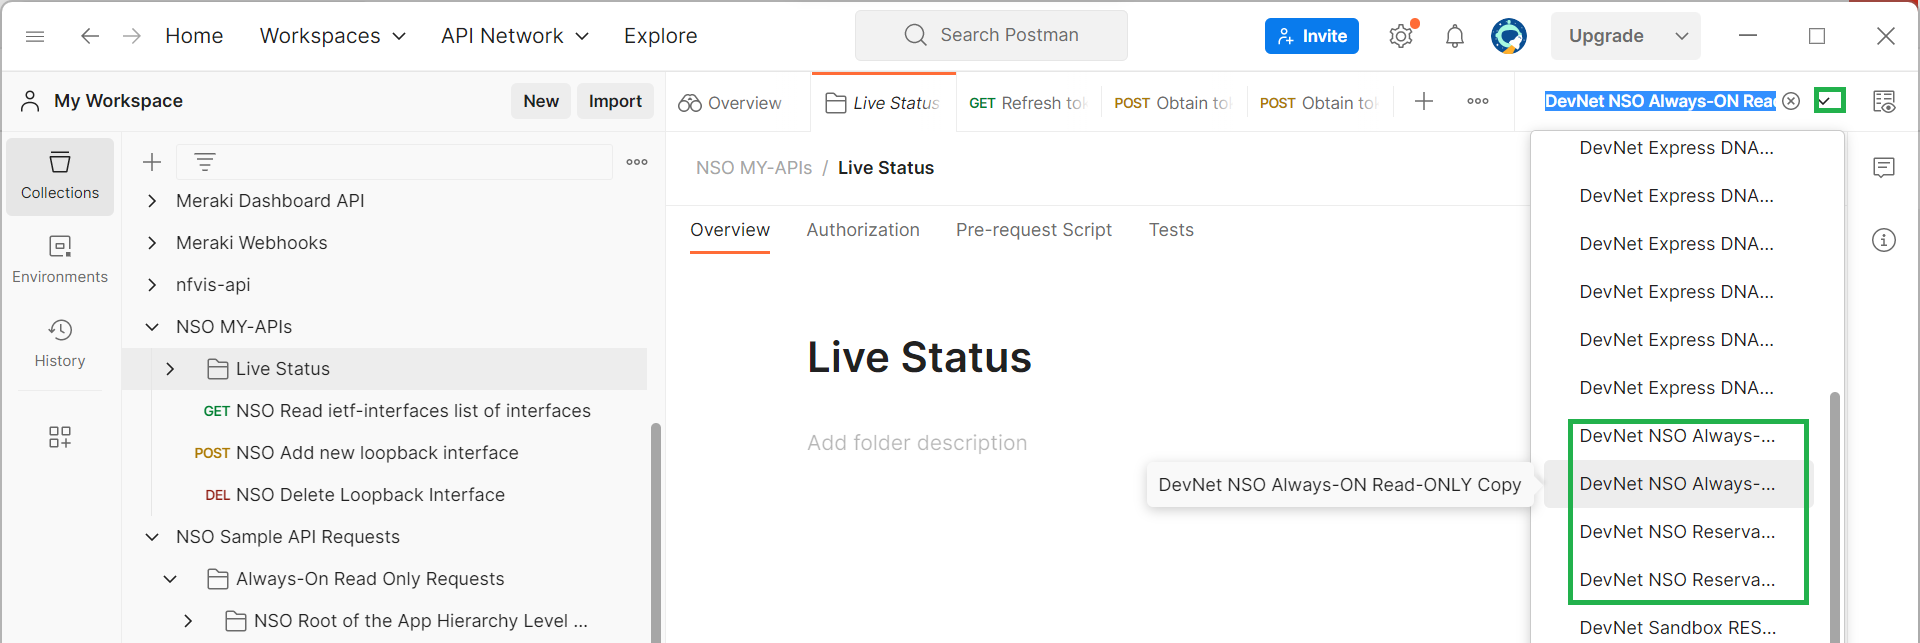
Importing NSO collections also downloads new environment variables to your local postman software.
In the upper right pane of the postman software you will see the list of environment variables.
Environment variables whose names contain NSO are downloaded with new postman collections.
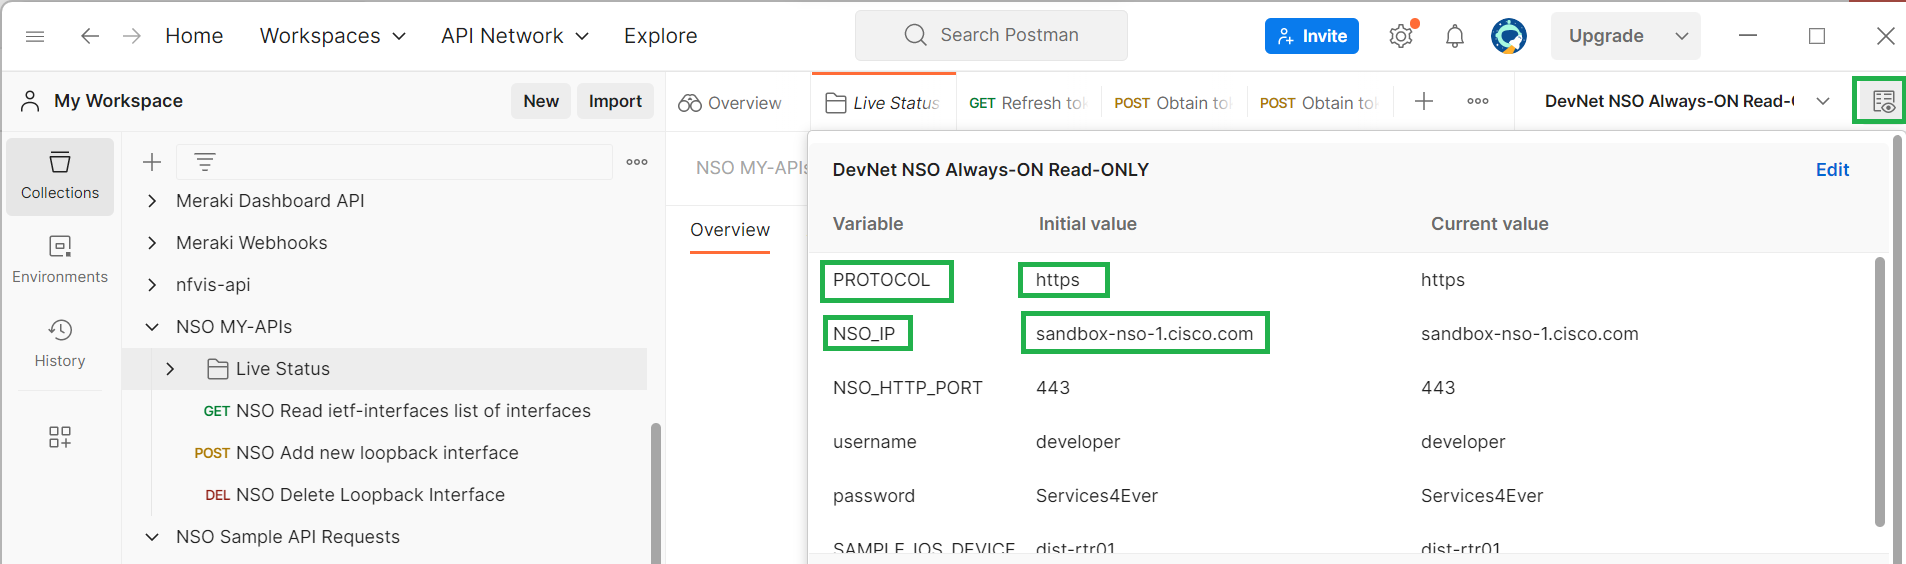
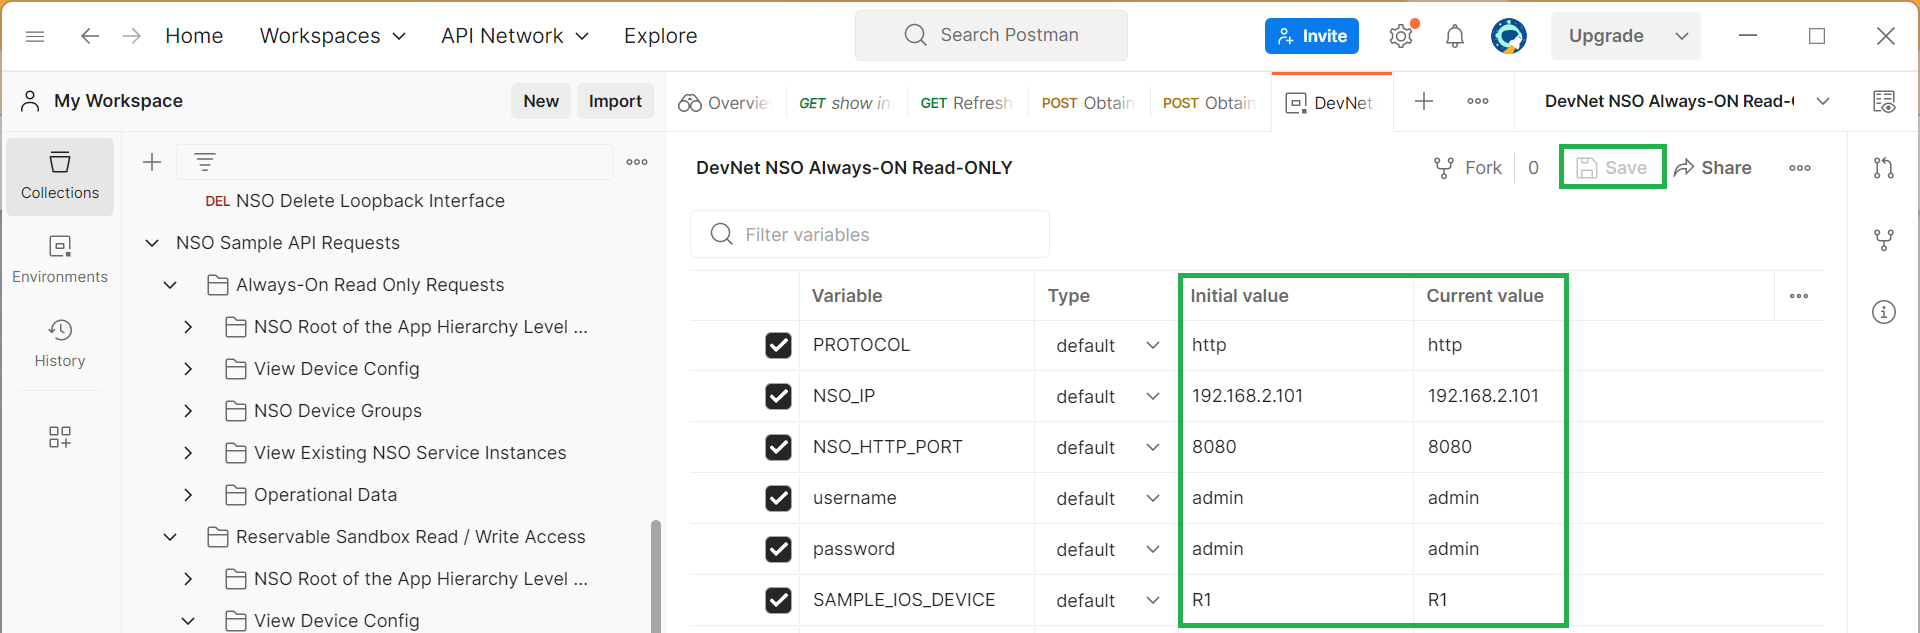
With clicking the button „environment quick look“ at up right section of postman software you can see the variables configured and their values.
The configured variables are „PROTOCOL“, „NSO_IP“, „NSO_HTTP_PORT“, „usernme“, „password“ and „SAMPLE_IOS_DEVICE“ and their values are used to connect to Cisco NSO Lab in the Cisco Sandbox website.
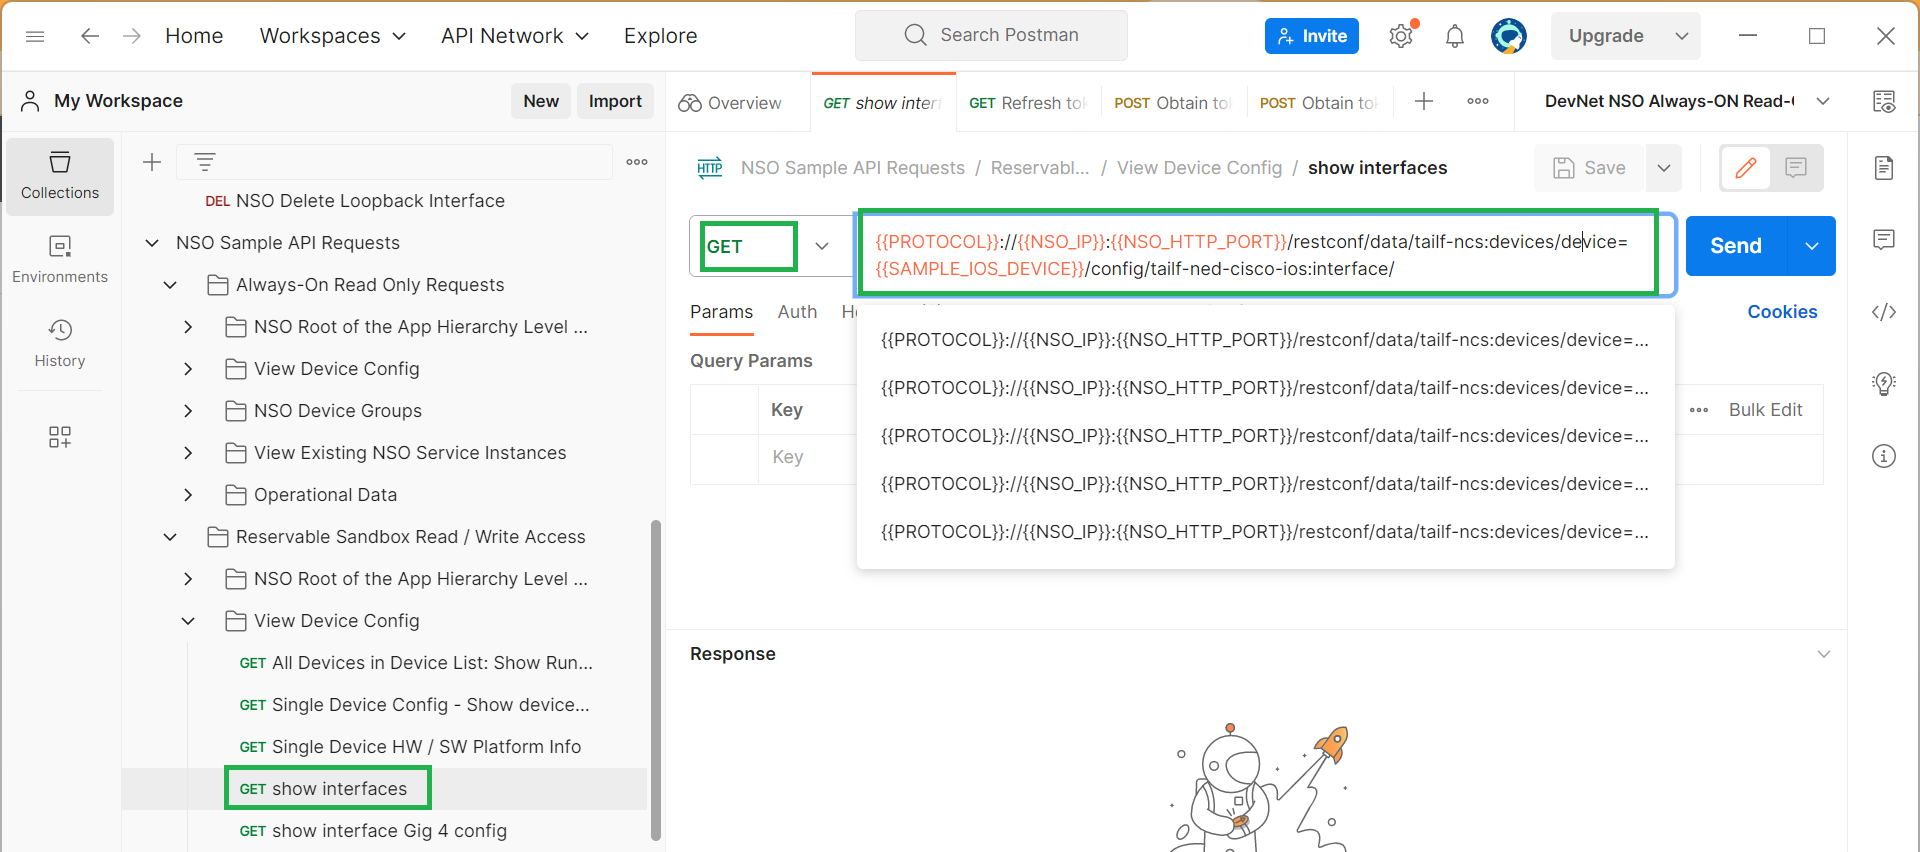
If you select one of the restconf requests in the NSO collection, you will see that these variables are used in the URL and the variables will be replaced with the values configured in the selected environment variable when we run the restconf request.
We change the value of variables according to our NSO configuration. NSO’s IP address is 192.168.2.101. We use HTTP port 8080 to connect to the Cisco NSO. The username and password is admin/admin and the device on which I will send the restconf request is “R1”.
After changing the value of environment variables, just to check an example, in the subcategory „View Device Config“, there is a restconf request called „show interfaces“ which is used to display the list of interfaces.
The http method is “GET” because we will only read the configuration from the server. The URL or path to get an interesting part of the configuration can be extracted using the Cisco NSO “display xpath” option, which will be discussed in a few minutes.
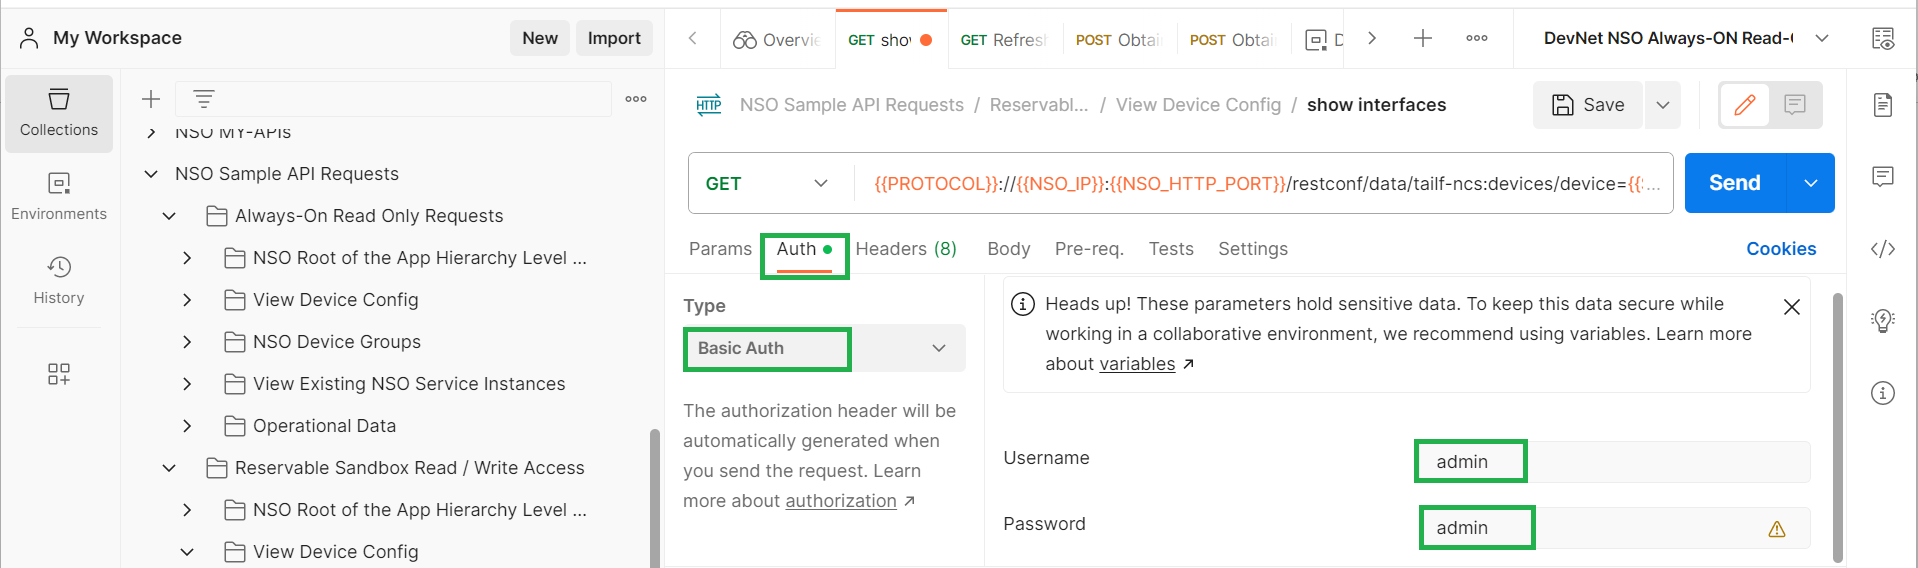
In the “Auth” tab you can manually change the authentication information, but this is not necessary as it is already configured in the environment variables.
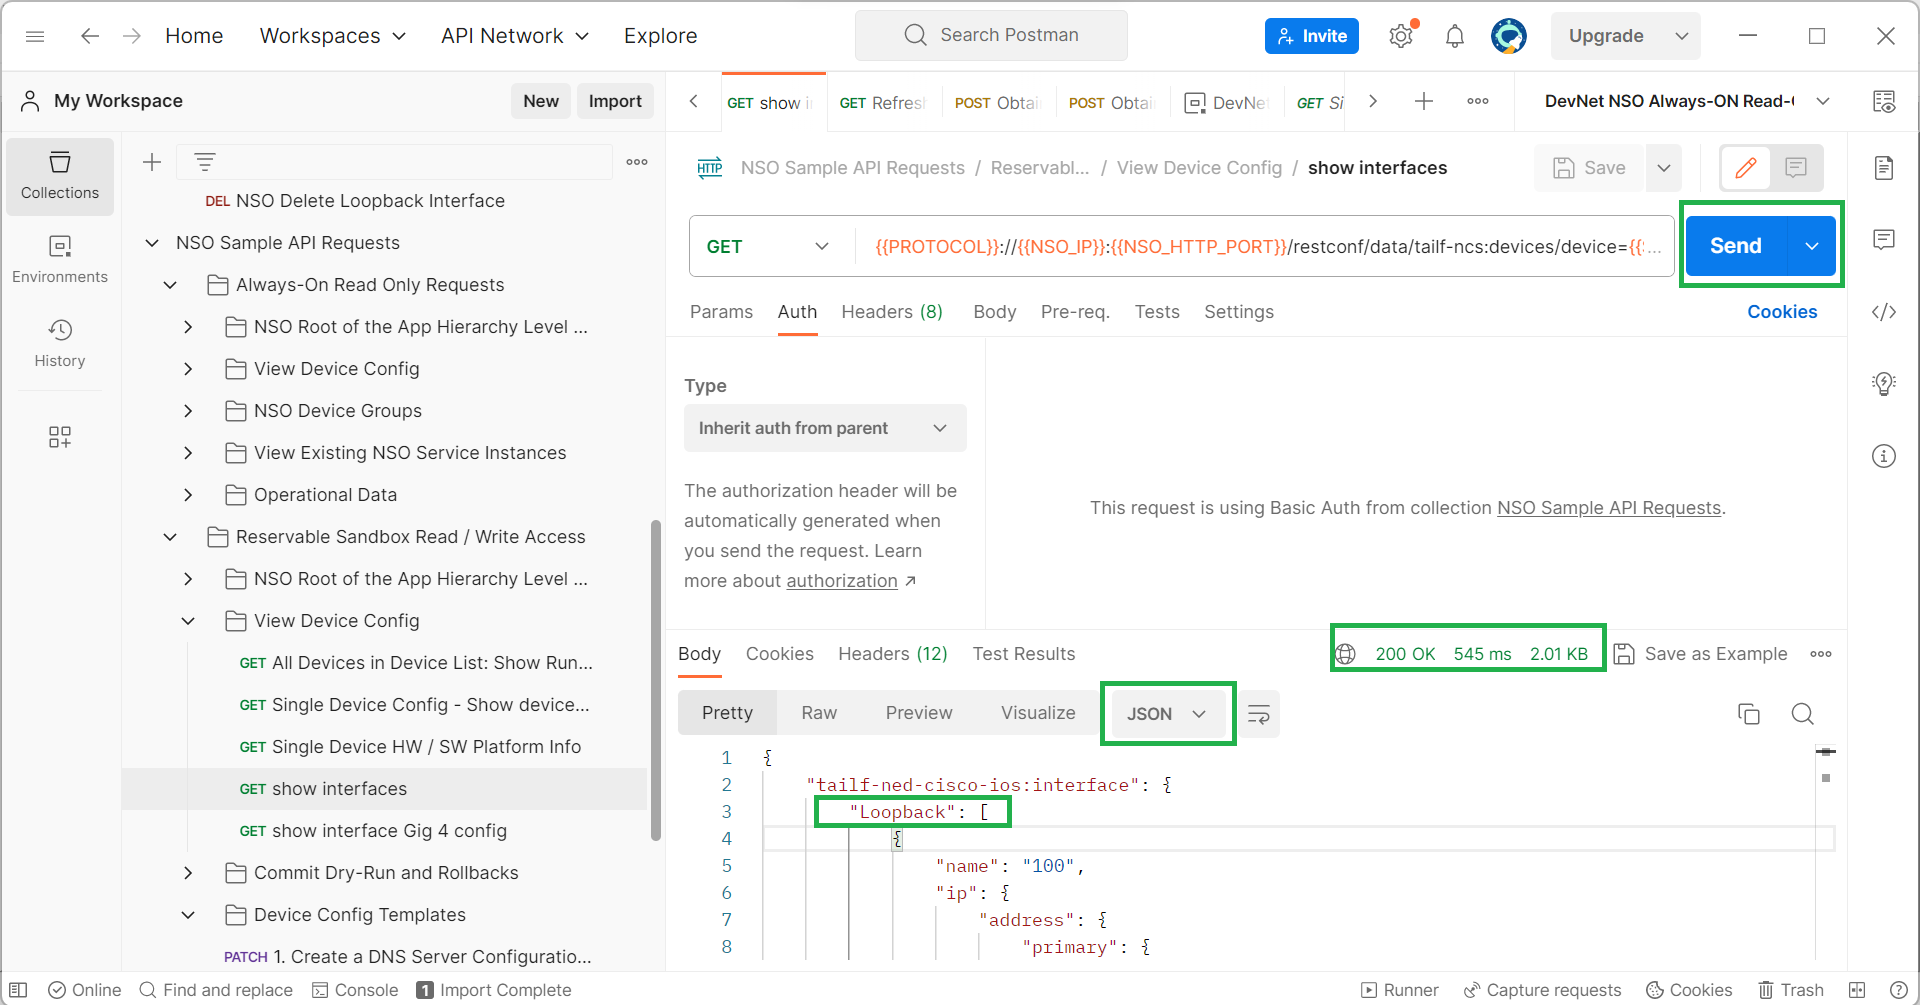
When we send the request by clicking the “Send” button, the result code will be displayed at the bottom of the software.
The code “200” means that the request was processed successfully and the device responded. The list of interfaces with JSON format is displayed in the output.
{
    "tailf-ned-cisco-ios:interface": {
        "Loopback": [
            {
                "name": "100",
                "ip": {
                    "address": {
                        "primary": {
                            "address": "4.5.6.7",
                            "mask": "255.255.255.0"
                        }
                    }
                }
            },
            {
                "name": "150",
                "ip": {
                    "address": {
                        "primary": {
                            "address": "1.1.1.1",
                            "mask": "255.255.255.255"
                        }
                    }
                }
            }
        ],
        "GigabitEthernet": [
            {
                "name": "1",
                "negotiation": {
                    "auto": true
                },
                "mop": {
                    "xenabled": false,
                    "sysid": false
                },
                "ip": {
                    "address": {
                        "primary": {
                            "address": "192.168.2.91",
                            "mask": "255.255.255.0"
                        }
                    }
                }
            },
            {
                "name": "2",
                "negotiation": {
                    "auto": true
                },
                "mop": {
                    "xenabled": false,
                    "sysid": false
                },
                "ip": {
                    "no-address": {
                        "address": false
                    }
                },
                "shutdown": [
                    null
                ]
            },
            {
                "name": "3",
                "negotiation": {
                    "auto": true
                },
                "mop": {
                    "xenabled": false,
                    "sysid": false
                },
                "ip": {
                    "no-address": {
                        "address": false
                    }
                },
                "shutdown": [
                    null
                ]
            }
        ]
    }
}
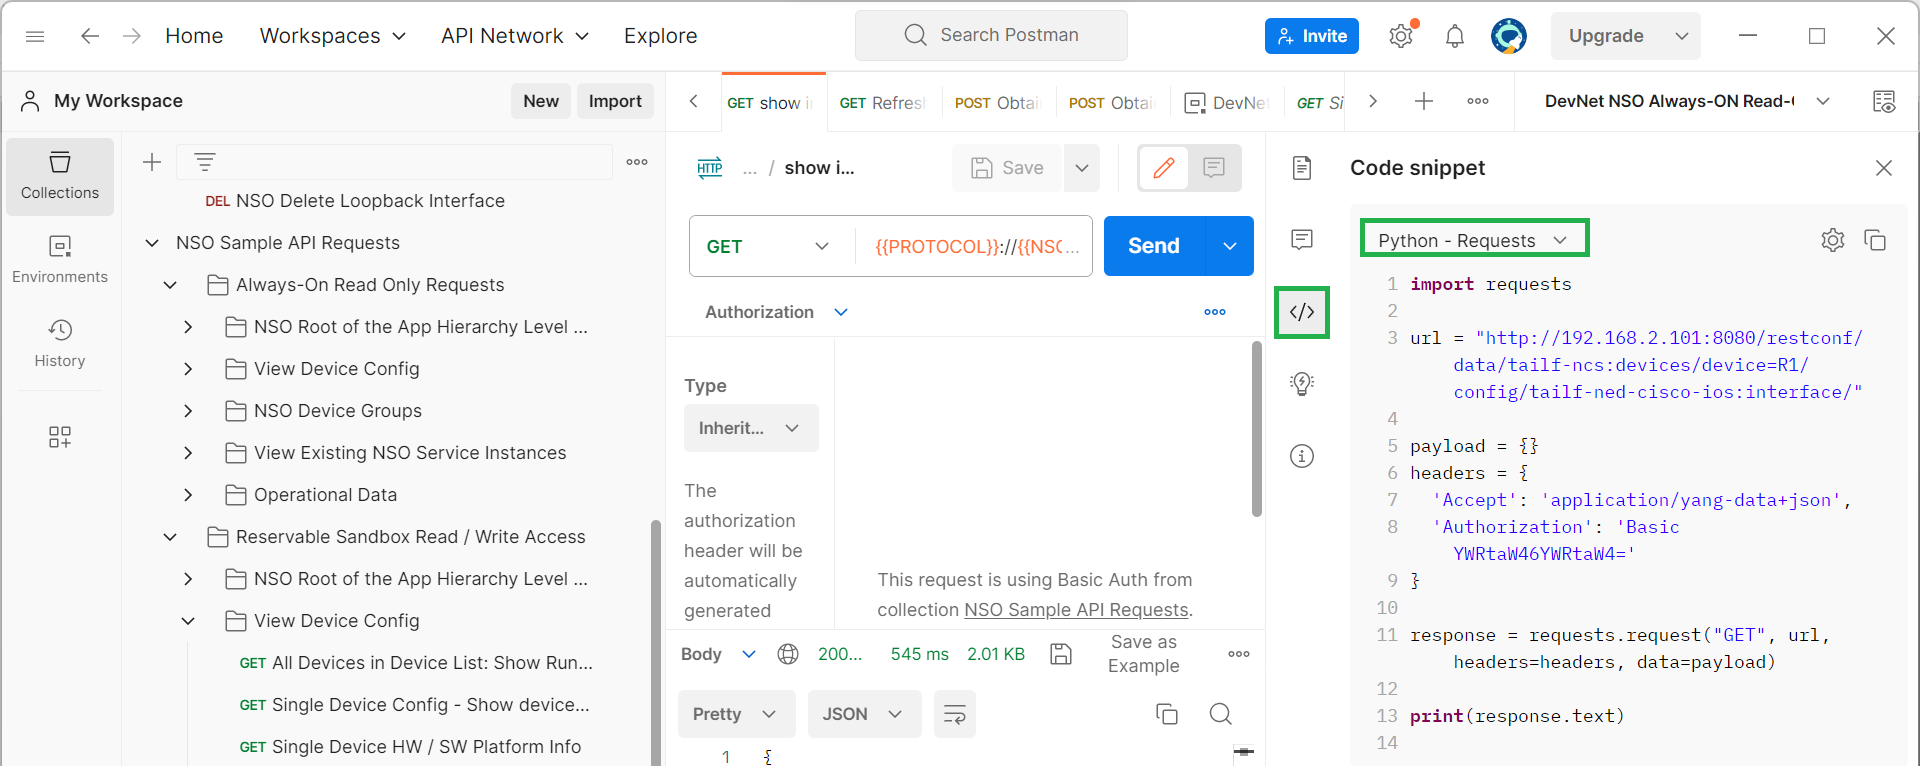
Another interesting feature of postman is that for each restconf API you can have a corresponding code snippet of your interesting programming language.
If you click on the “code” sign, you can select your programming language and find the code that executes this restconf request via script, which is the main topic of the next section in which we manage network devices through retconf protocol in python script.
If you select Python language with „Requests“ library, you will see the code snippet to get the list of interfaces through python script which we run in the next section.
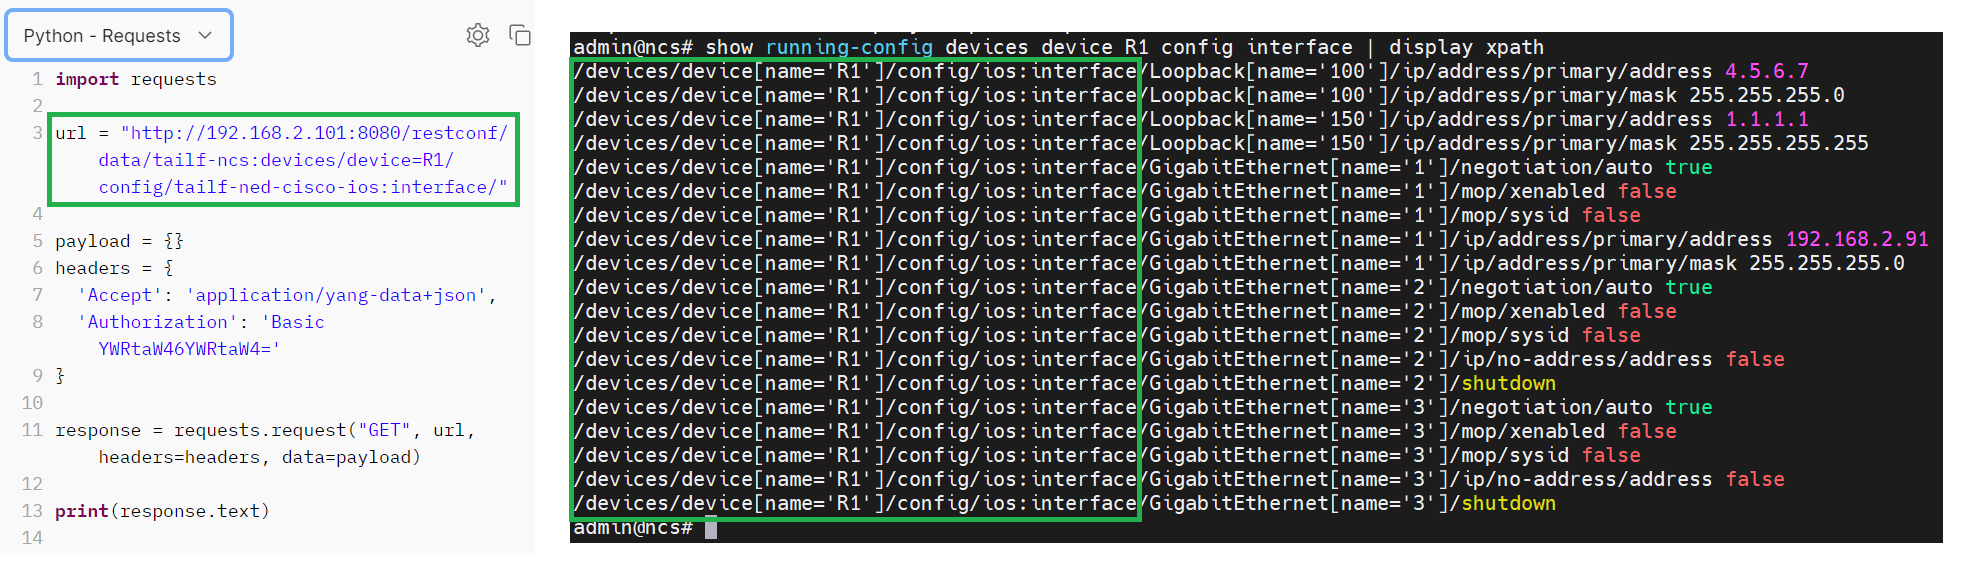
In the code snippet you see a url variable which points to the interesting part of the configuration to get the list of interfaces.
As you learned in the Python Maagic library, you can find the path to any section of the configuration easily and through Cisco NSO’s “display xpath” option.
Let’s try to find the path to get the list of interfaces using the Cisco NSO XPath function and compare with the path used in postman api.
With the command „show running-config devices device R1 config interface | display xpath“, you can find the restconf path to see the list of interfaces.
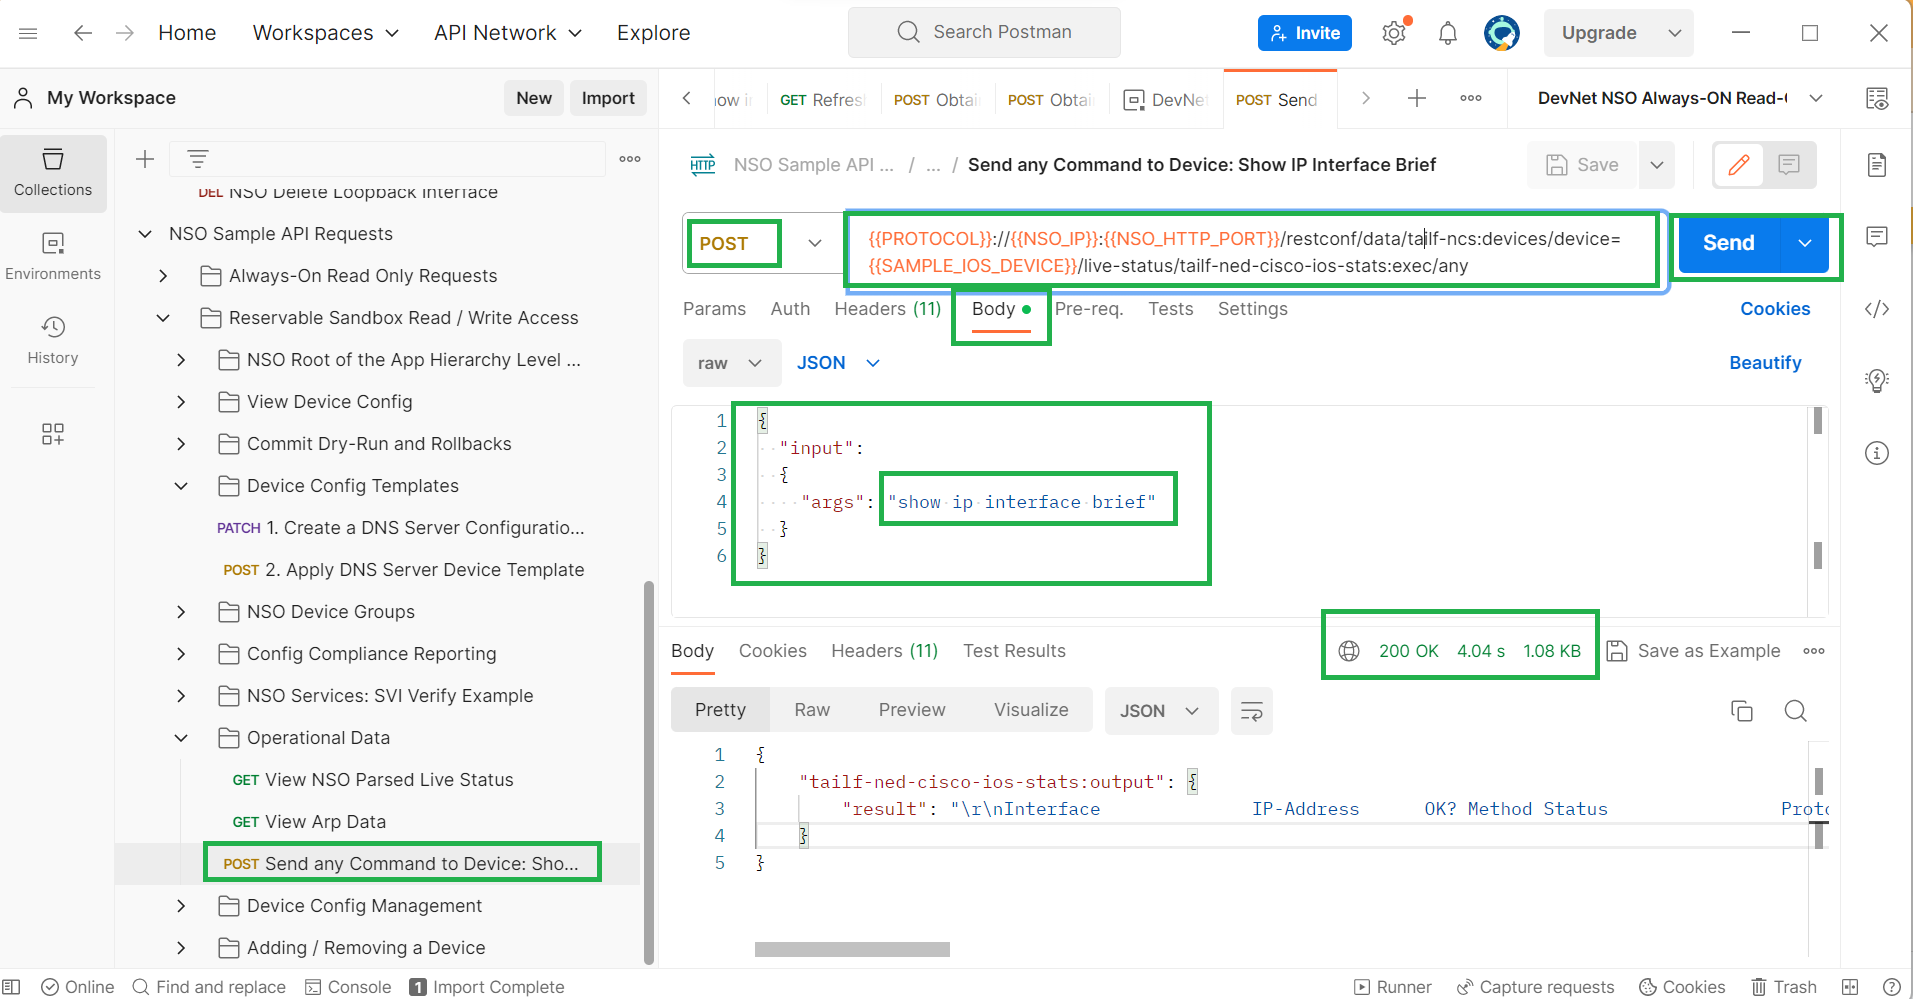
Just to see one other example. let’s run an operational command in a network device through postman restconf example.
We run „show ip interface brief“ command in the router „R1“ which will be run through cisco nso live-status feature.
The HTTP method to execute an operational command in a network device is POST command because we need to send a command to the network device.
The url can also be find through python maagic „dir“ option and cisco nso xpath feature as we have also done in python maagic library examples but it is still easier to get the URL from sample postman collections.
In the body of the restconf request, we send the command itself as an argument to input variable. Here we send „show ip interface brief“ command in network devices.
With running the request the list of interfaces and their IP address will be returned.
{
    "tailf-ned-cisco-ios-stats:output": {
        "result": "\r\nInterface              IP-Address      OK? Method Status                Protocol\r\nGigabitEthernet1       192.168.2.91    YES NVRAM  up                    up      \r\nGigabitEthernet2       unassigned      YES NVRAM  administratively down down    \r\nGigabitEthernet3       unassigned      YES NVRAM  administratively down down    \r\nLoopback100            4.5.6.7         YES NVRAM  up                    up      \r\nLoopback150            1.1.1.1         YES NVRAM  up                    up      \r\nR1#"
    }
}
GET and POST are not the only HTTP methods to get or add configuration from or to network devices. PATCH and DEL are also other methods used in restocnf to change or delete the configuration.
In the next section we will see examples from all HTTP methods through python „requests“ library.