


mitmproxy is an interactive proxy to monitor and manipulate HTTP and HTTPS traffic.
In the F5 Advanced WAF (AWAF) course, mitmproxy serves as a powerful tool for analyzing and modifying web traffic and simulating attack scenarios to test and strengthen security measures.
This section shows how to use mitmproxy to intercept and analyze communication between clients and web application.
To begin using mitmproxy, start by downloading and installing the latest version from the mitmproxy official website.
Once installed, navigate to the “bin” directory within the installation folder (C:\Program Files\mitmproxy\bin) to access the executable files. mitmproxy offers two interfaces: the command-line interface (CLI) version, `mitmproxy.exe`, and the web interface version, `mitmweb.exe`.
Although the web interface provides a graphical user interface for ease of use, I had some performance issues experience. As a result, I prefer using the CLI version, `mitmproxy.exe` during the course.
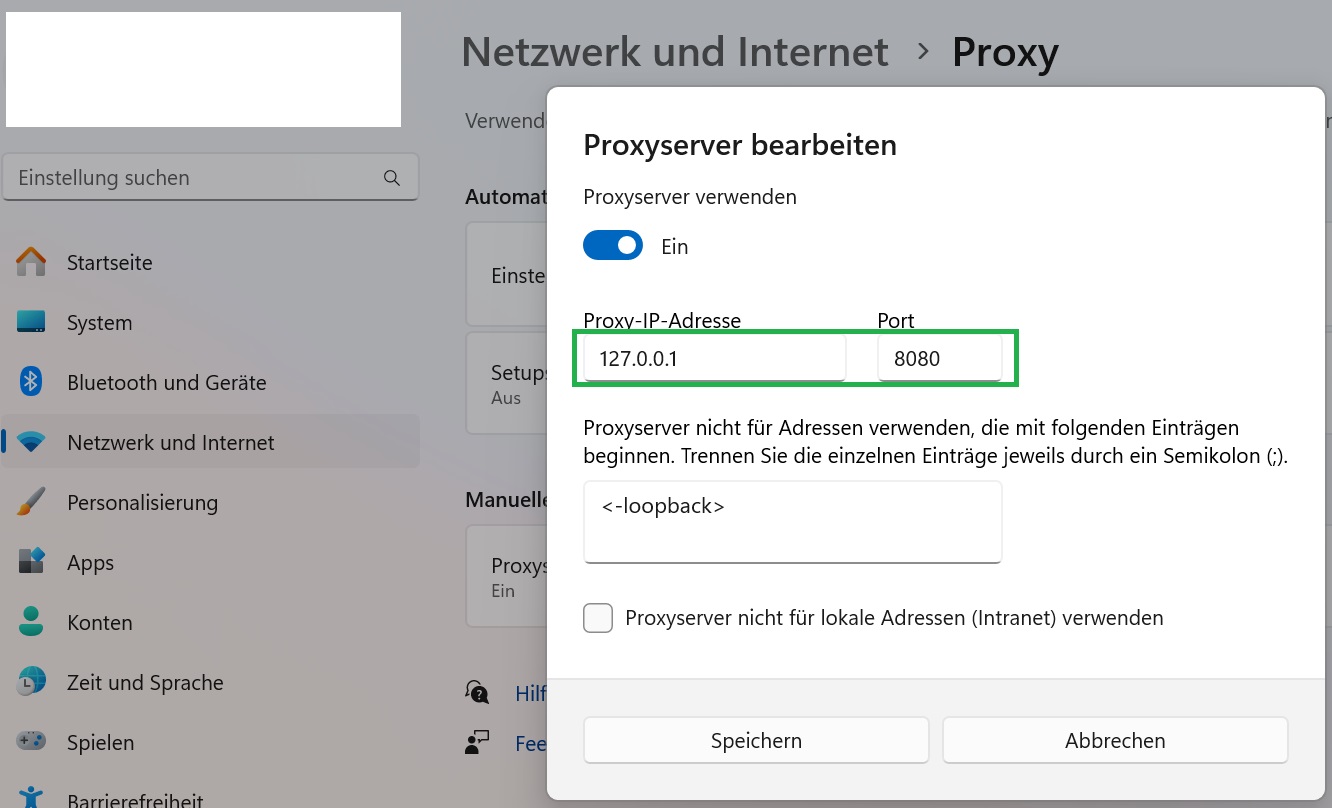
Then we need to change windows proxy setting so that the traffic is routed through the proxy.
To confirm that your traffic is correctly routed through the proxy, navigate to “http://mitm.it” in your web browser. If the page loads successfully, this indicates that the proxy is functioning as intended.
Next, proceed with download and installation of the mitmproxy certificate as a trusted certificate authority. This step is crucial for establishing a trusted connection.
Actually it is not necessary but you can prepare a PAC file to ensure that only traffic directed to the vulnerable web applications are processed through the proxy server and other traffic is not affected.
In a summary:
I crafted a PAC file named “pac.js” and placed it in the Windows IIS root directory at “C:\inetpub\wwwroot”. Obviously windows IIS feature is already installed.
function FindProxyForURL(url, host) {
// If the hostname matches 'f5demo.com', use the proxy
if (shExpMatch(host, "*.f5demo.com")) {
return "PROXY 127.0.0.1:8080";
}
// Otherwise, connect directly without a proxy
return "DIRECT";
}
I registered the MIME Type “application/x-ns-proxy-autoconfig” within the MIME Types settings of the IIS default website.
I have configured the Windows proxy settings to utilize the PAC file, which can be accessed at “http://127.0.0.1/pac.js”.
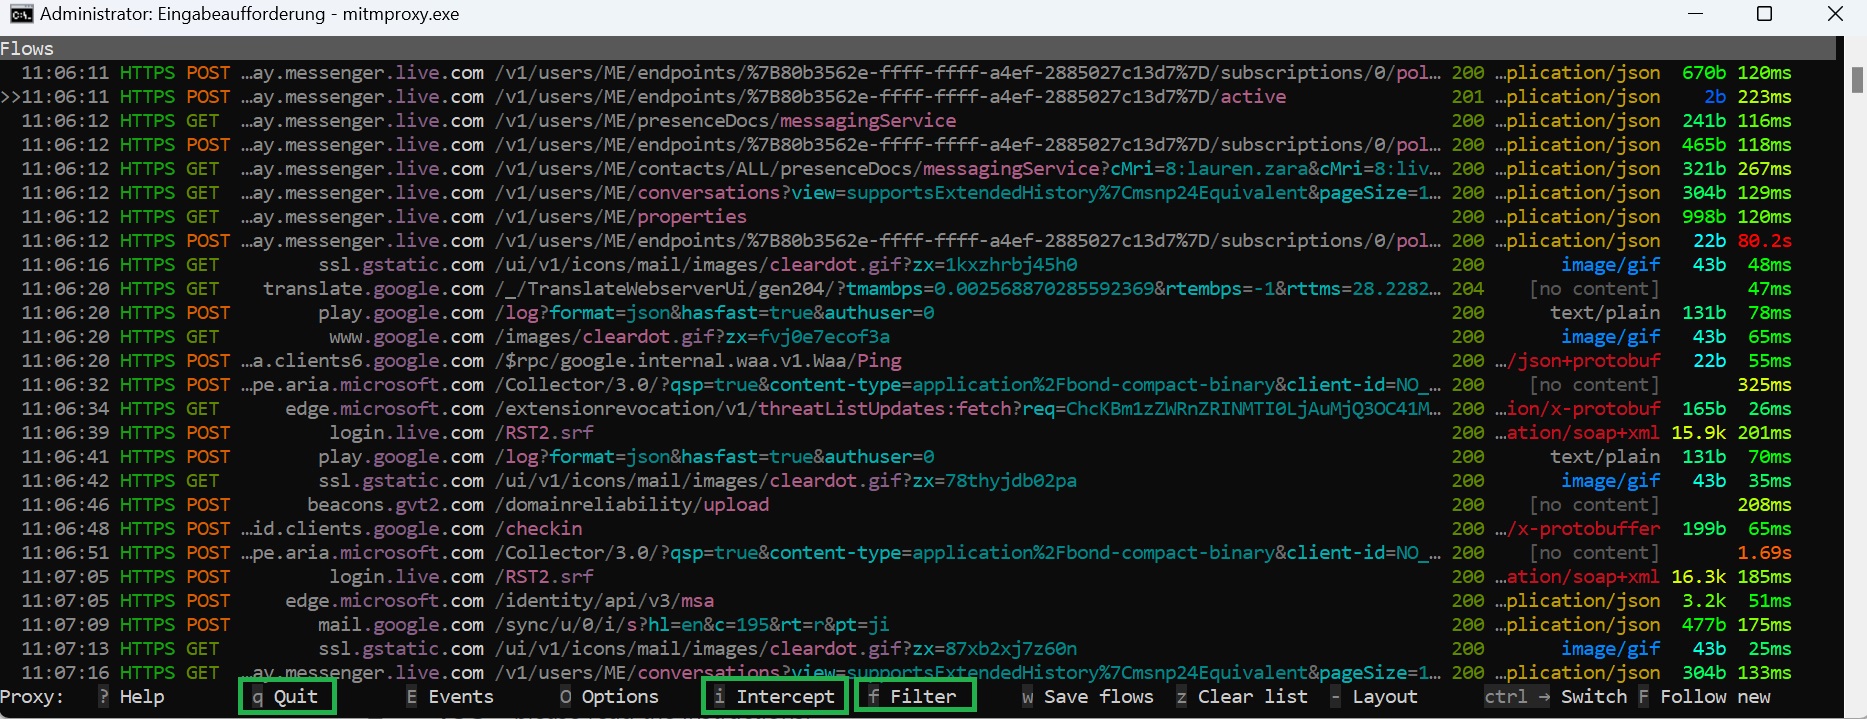
Once you’ve confirmed that your traffic is successfully passing through mitmproxy, you see many traffic over mitmproxy page. You may wish to narrow down the visibility of the traffic to a particular domain. This can be achieved by applying a filter within mitmproxy.
To filter the traffic, press the “f” key to bring up the filter input field. Then enter the filter expression “~u f5demo.com” to to display only the traffic associated with f5demo.com.
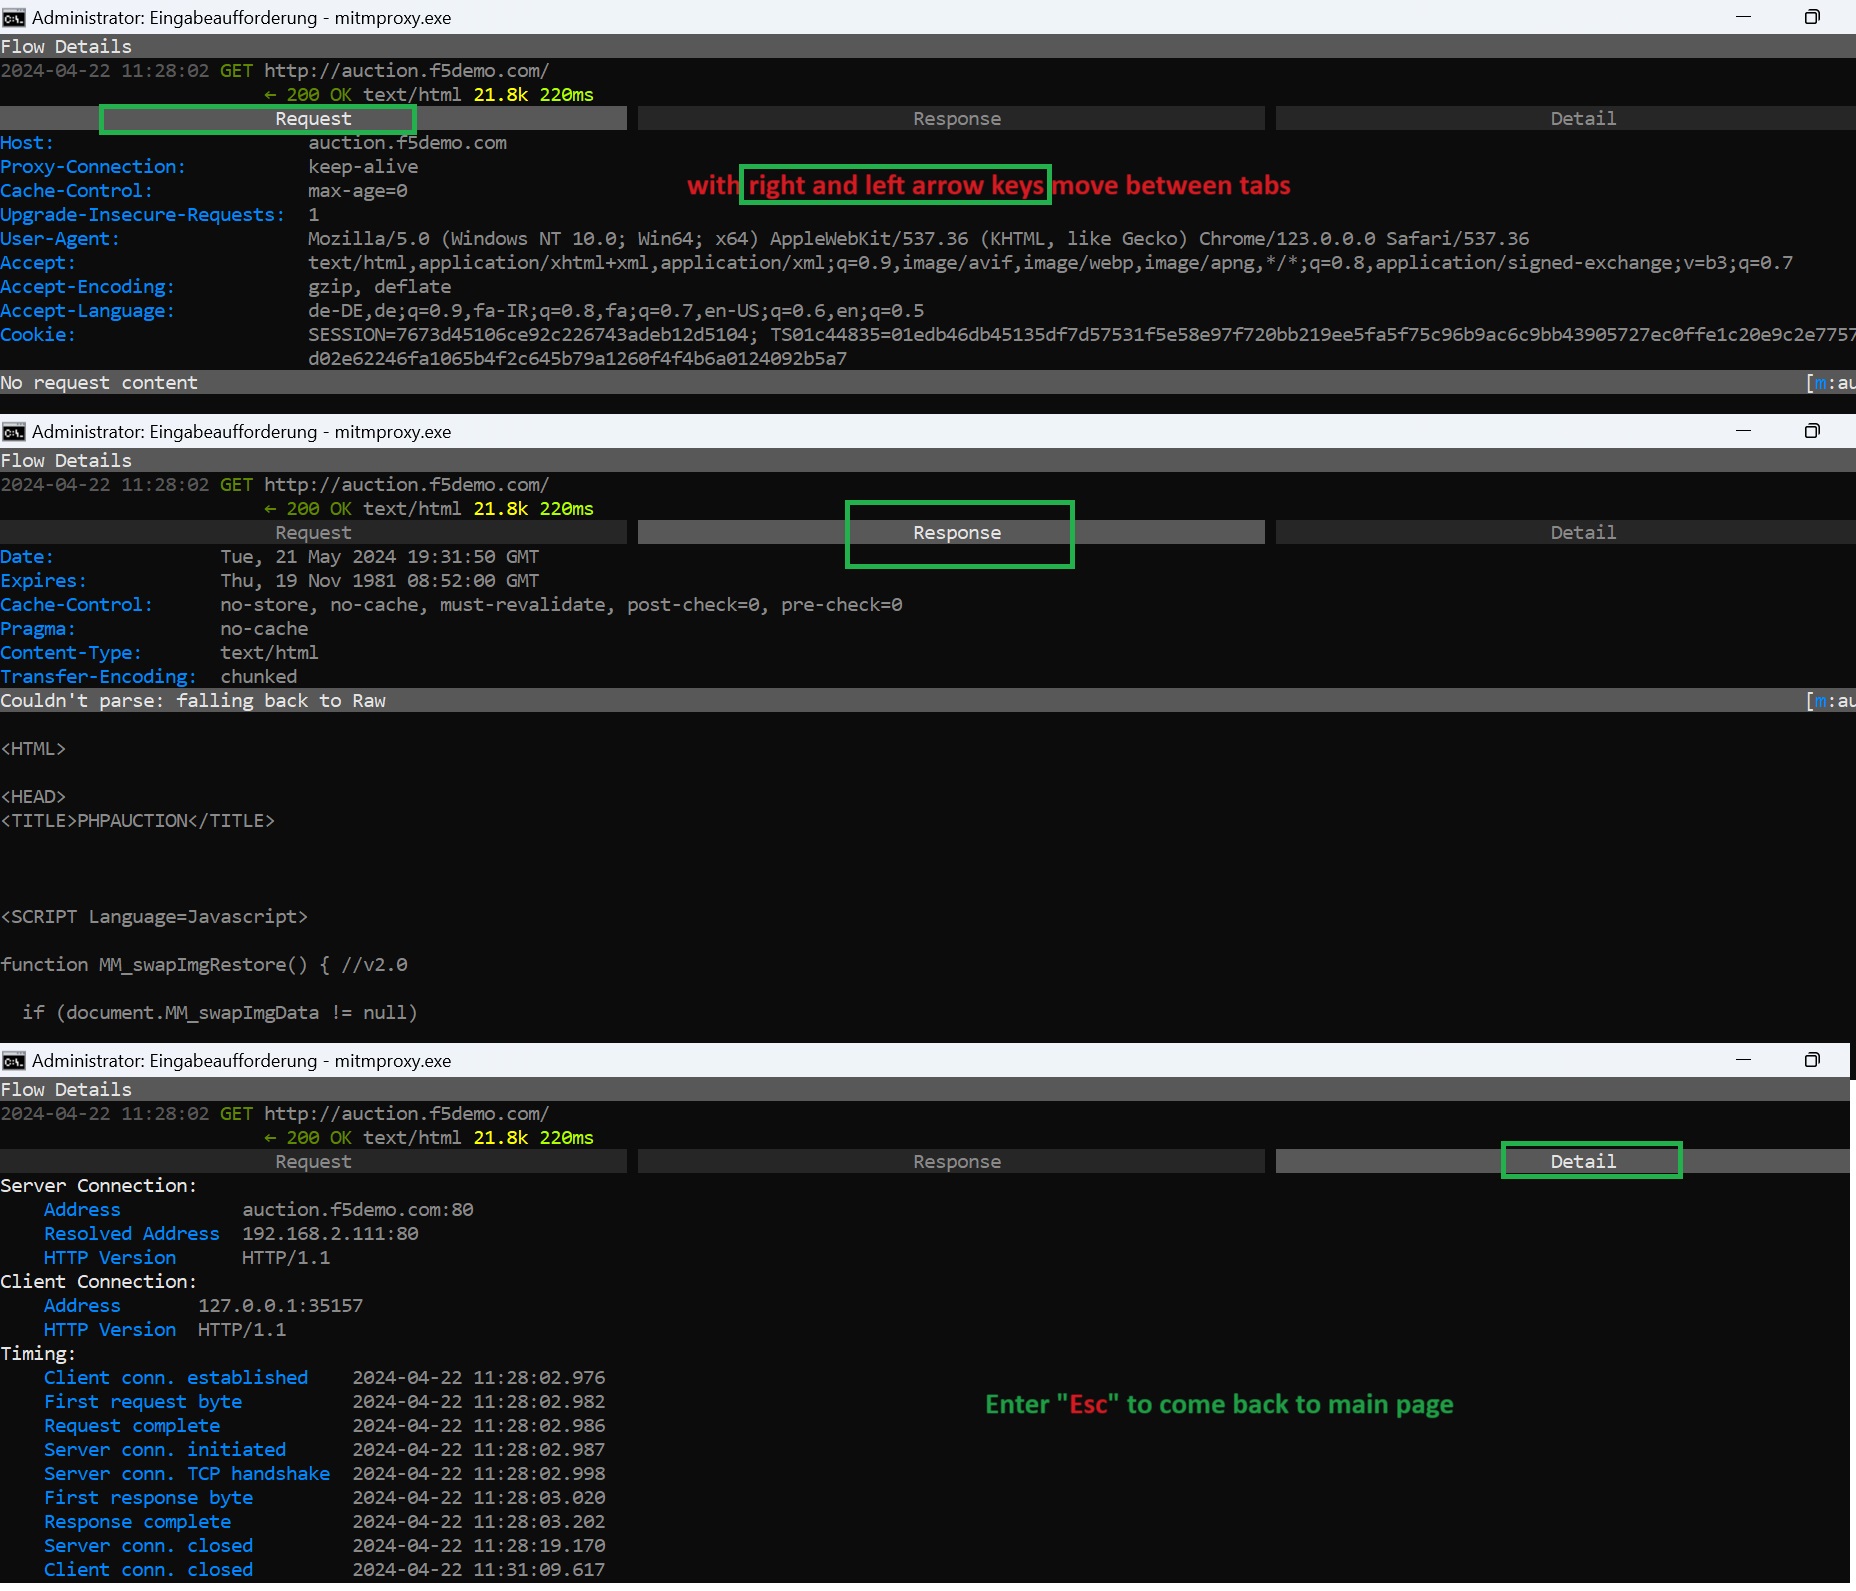
Then use the up and down arrow keys to move between traffic. Then when you press “enter” on any traffic, you can see the details of the traffic.
Inside the traffic, with right and left arrow key, you can move between header, response and detail to check request header, response header and details of traffic.
Within Traffic, you have the ability to examine various aspects of traffic. To do this, use the right and left arrow keys to switch between request header, response header and traffic details.
A key feature of mitmproxy that we’ll frequently utilize in this course is its ability to intercept and alter network traffic. This includes modifying request and response headers, cookies, and other data elements I will demonstrate this now.
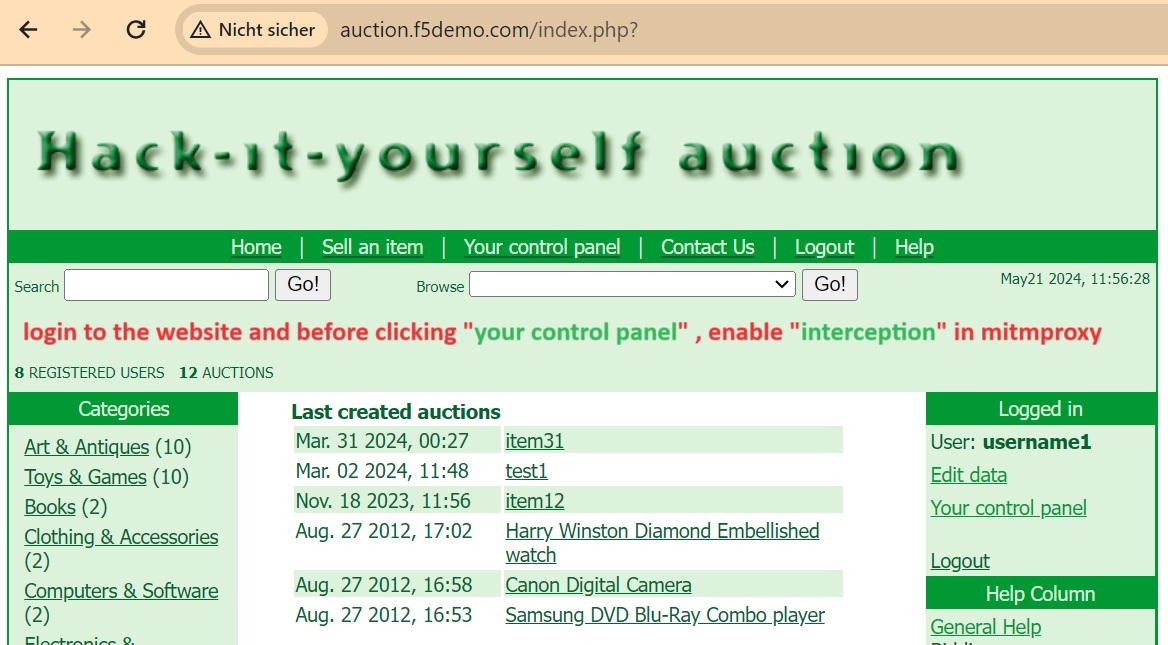
To demonstrate interception, let’s first log in to the vulnerable web application auction.f5demo.com that we prepared in the previous lesson. But before we click on “Your Control Panel”, we enable interception in mitmproxy.
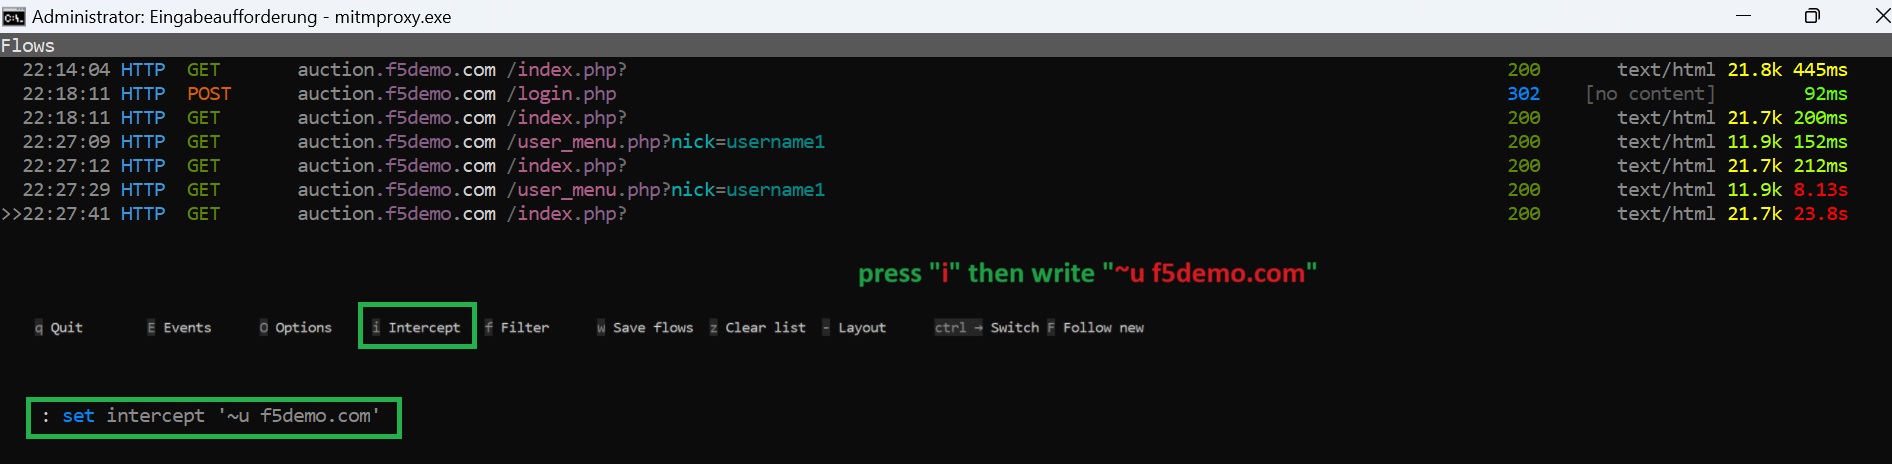
To enable interception, we press “i”. To intercept traffic from a specific domain “f5demo.com”, use the filter “~u f5demo.com”.
Then, in your web browser, click on”Your Control Panel“. The page will not load because it has been intercepted by mitmproxy.
Switch back to the mitmproxy CLI environment. You’ll notice that the intercepted traffic is highlighted in red color to indicate its status.
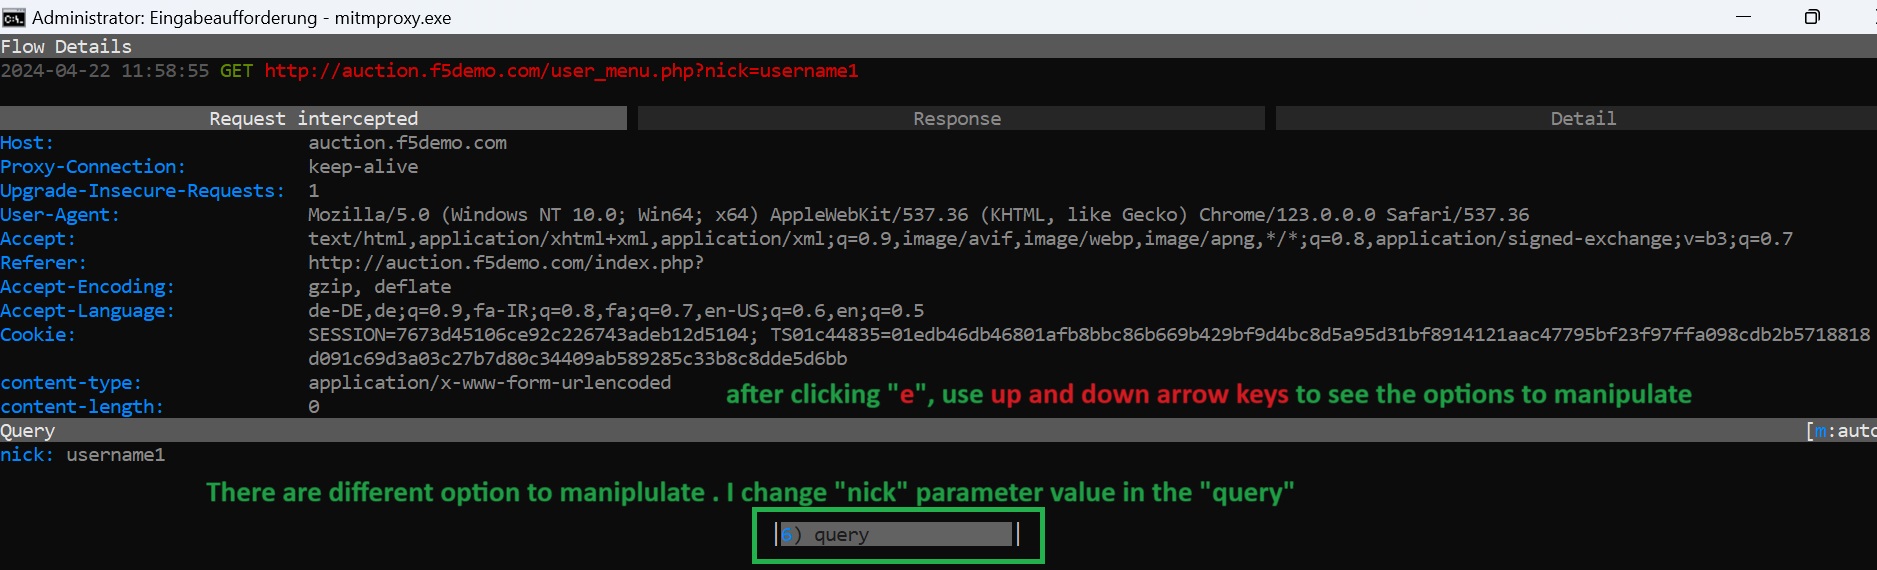
Select the intercepted traffic entry and press”e“to edit it.
You will be prompted to select a section of the traffic to edit. Choose”query“to modify the URL query parameters.
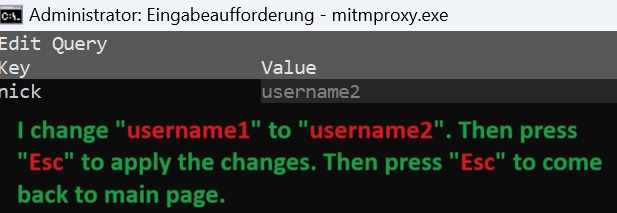
To edit any field, press”enter“. This allows you to change the value of the selected field.
We have already logged into the web application as”username1“. We change the value to”username2“. Press”Esc“to confirm the new value. Press”Esc“again to exit the editing mode and return to the main mitmproxy interface.
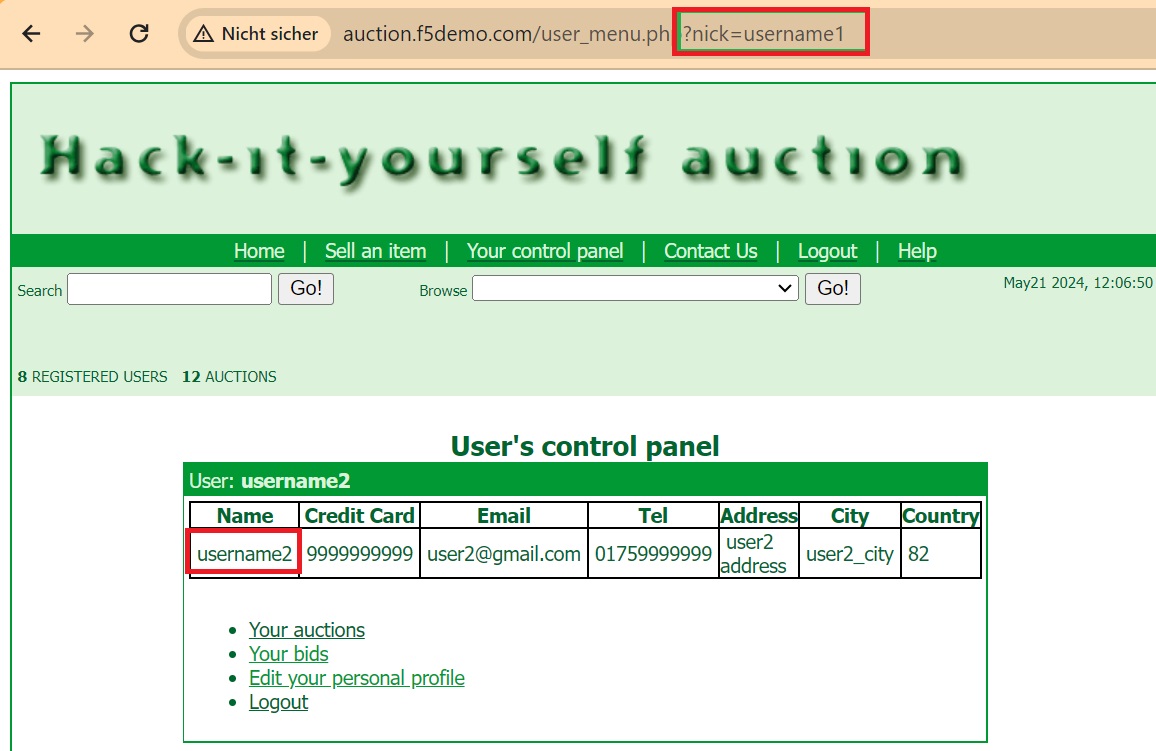
To resume the session, press”a“multiple times until the intercepted traffic resumes.
Now if you revisit again your web browser, you see that the page is now open but instead of showing “username1” control panel, it shows the control panel associated with „username2“.