


Building on the previous lessons, we successfully prepared two intentionally vulnerable web applications: the “Hack-It-Yourself PHP Auction” and “DVWA”.
In this section, we will go through the initial setup of the F5 device according to the network topology using a trial license key. We will publish these two web applications via the F5 LTM module. Additionally, we activate the F5 AWAF module, an essential component that will be actively used throughout the course to protect the web applications from potential threats.
The first step is to download the virtual edition of F5 BIG-IP and get a trial key.
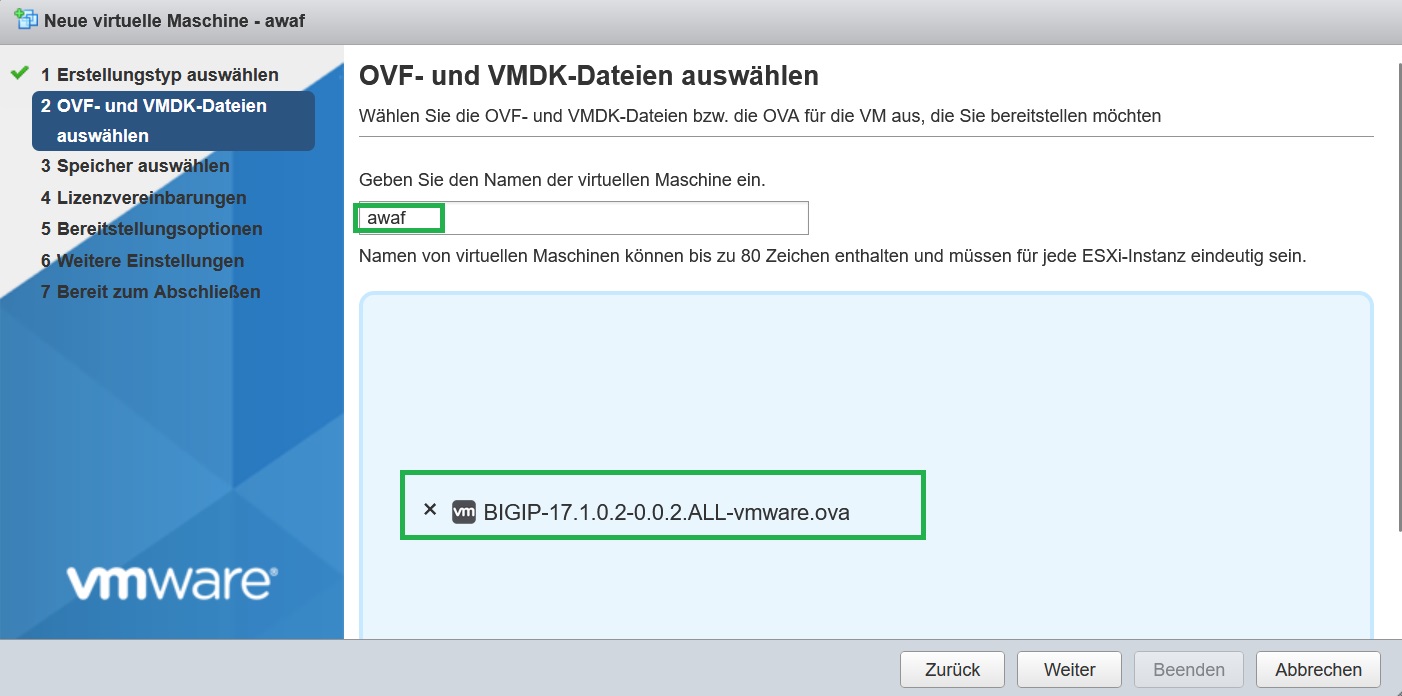
I have already downloaded „BIGIP-17.1.0.2-0.0.2.ALL-vmware.ova“, which I will install on VMware ESXi server. I have already received also a trial license.
Then I import the OVA file into VMware ESXi.
The only important point to consider is the hardware provisioning.
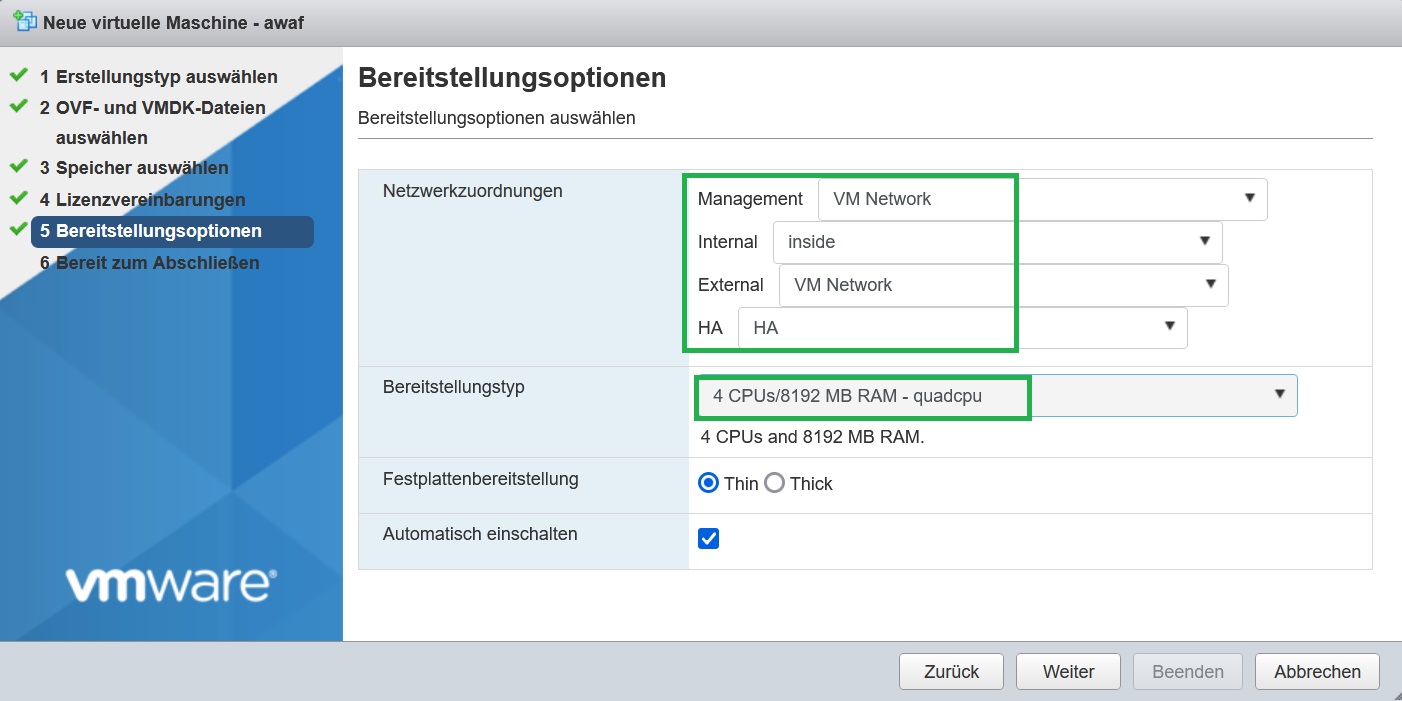
We place network interfaces in the appropriate port group based on your VMware network topology and port groups. As it is written, the first network adapter is the management interface, internal, external and HA are the next network interfaces in order.
It is also important to select the right amount of CPU and memory to be able to enable both LTM and AWAF modules. I will change the deployment type to 4 CPU and 8GB RAM.
After importing the OVA file, we wait a few minutes for the machine to load.
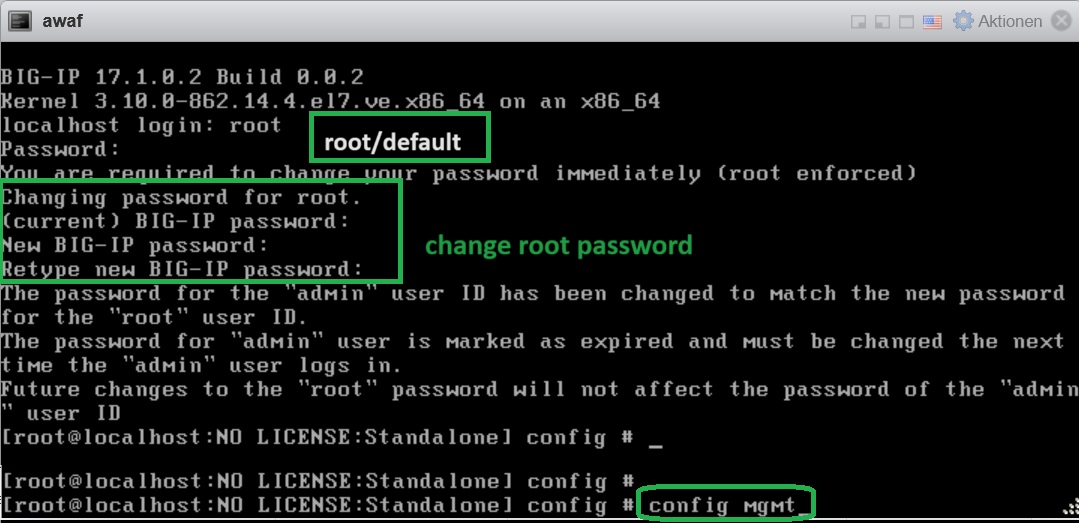
The default user name and password for logging into the machine are “root/default”.
The first time you log in, you will be asked to change the root password.
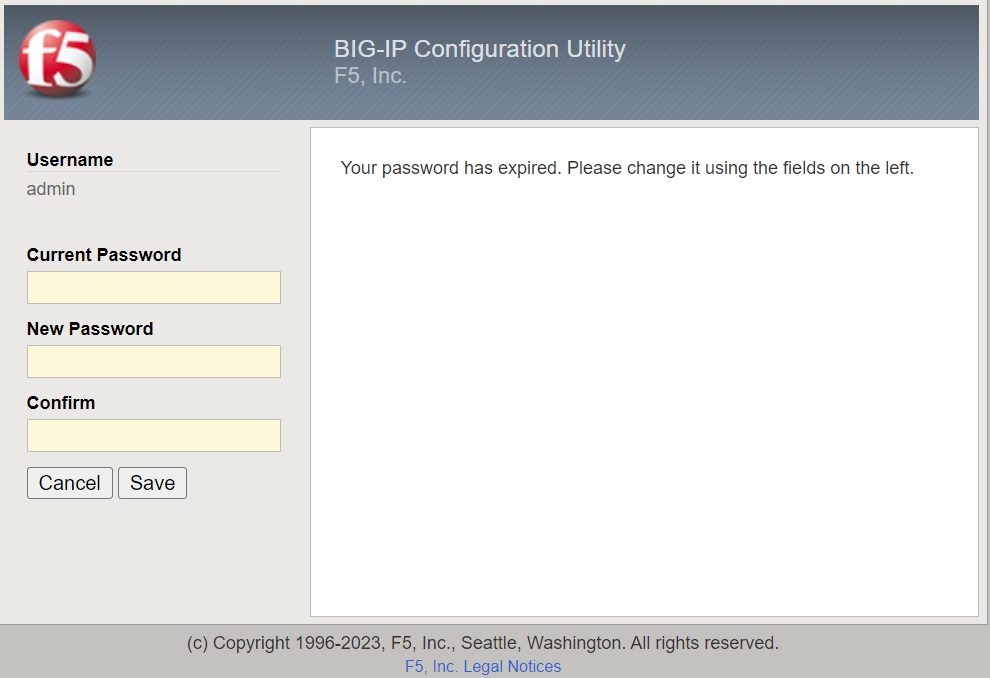
The same password, but with the username admin, is used to log in to the GUI. However, the first time you log in to the GUI, you will be asked to change the GUI password.
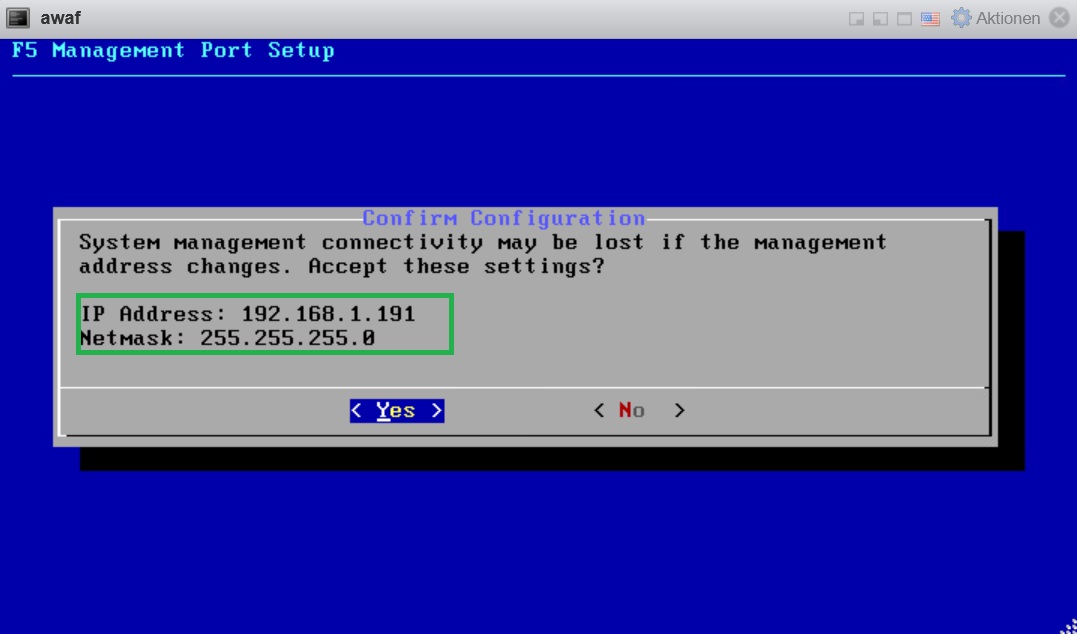
After you log in to the F5 BIG-IP machine, use the “config mgmt” command to configure the management interface. According to my topology, the IP address of my management interface is “192.168.1.191”
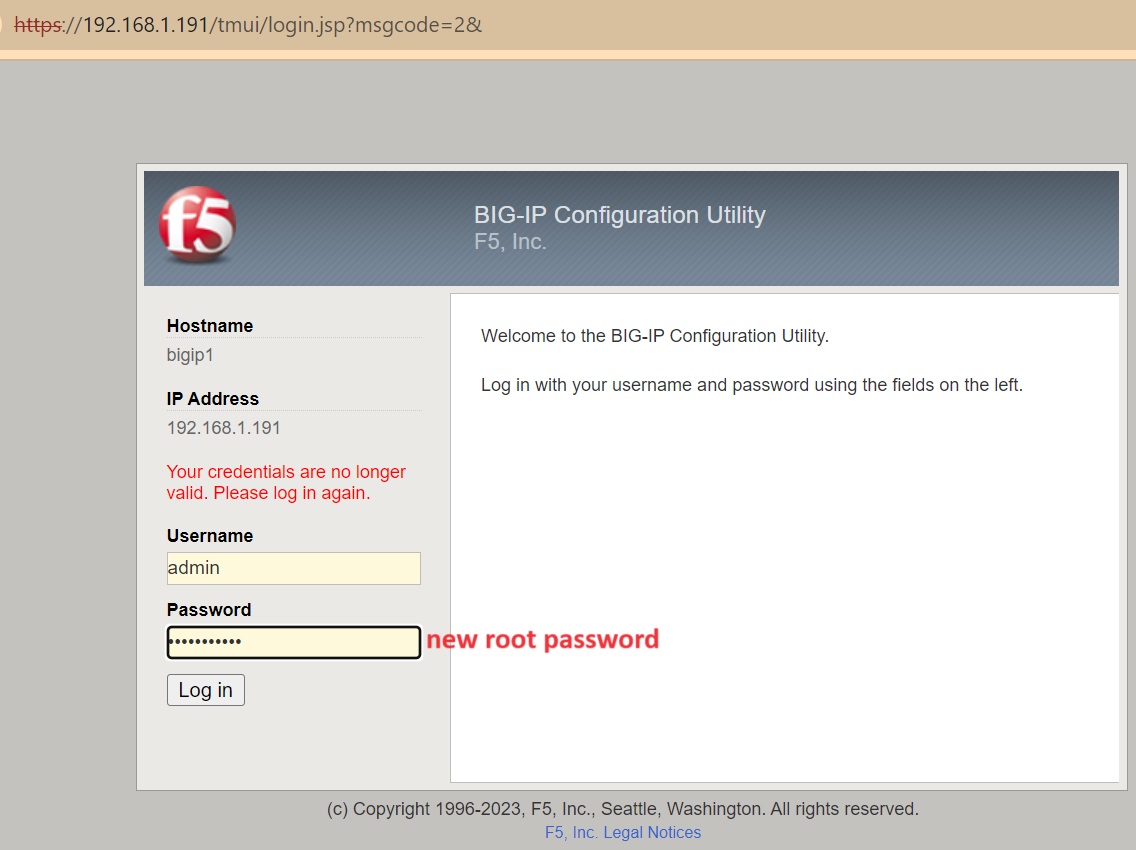
You need to wait a few minutes for F5 BIG-IP to initialize. You can then log in with the username “admin” and the password you configured for the root user.
The first time you log in, you will be asked to change the GUI admin password. I used the same password again without getting an error message.
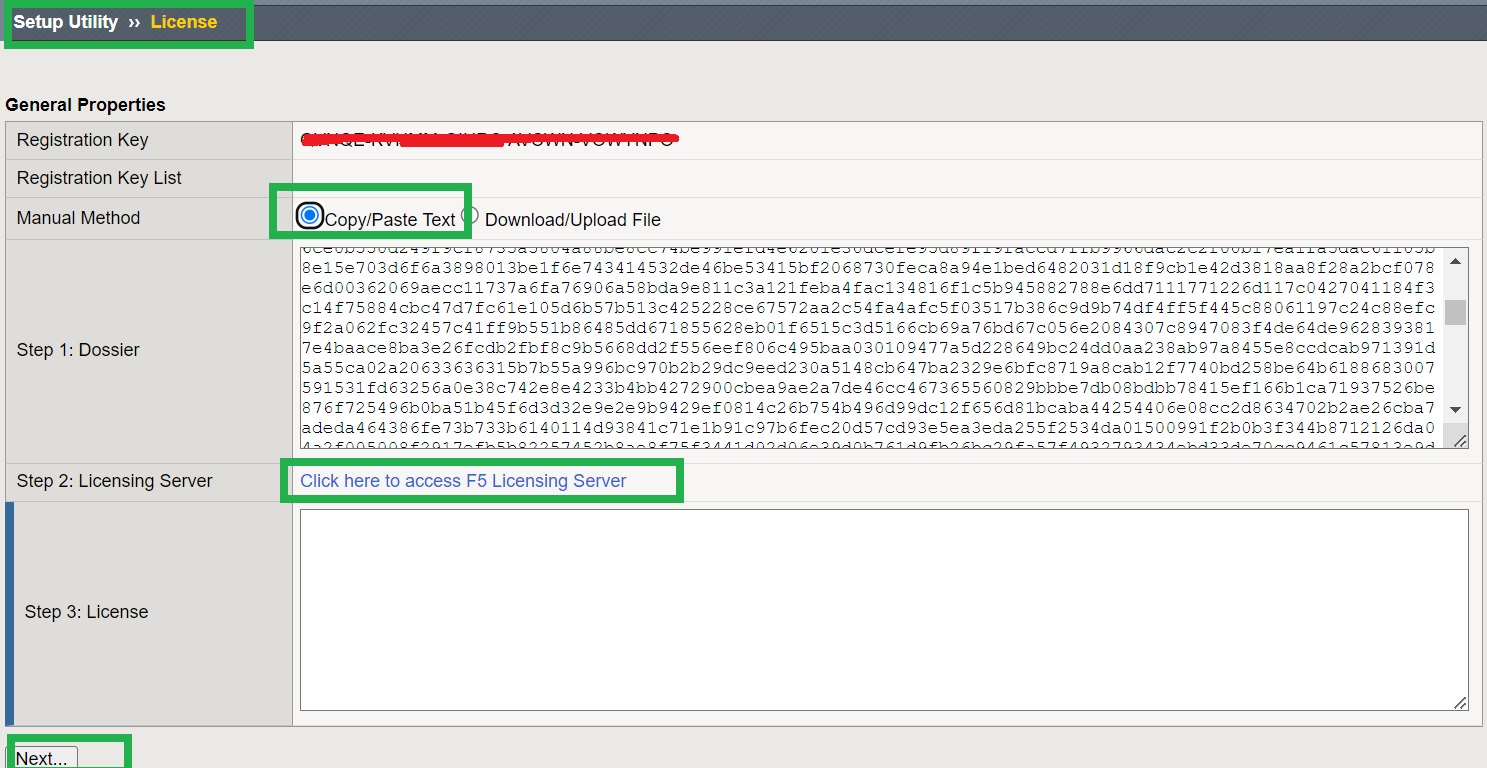
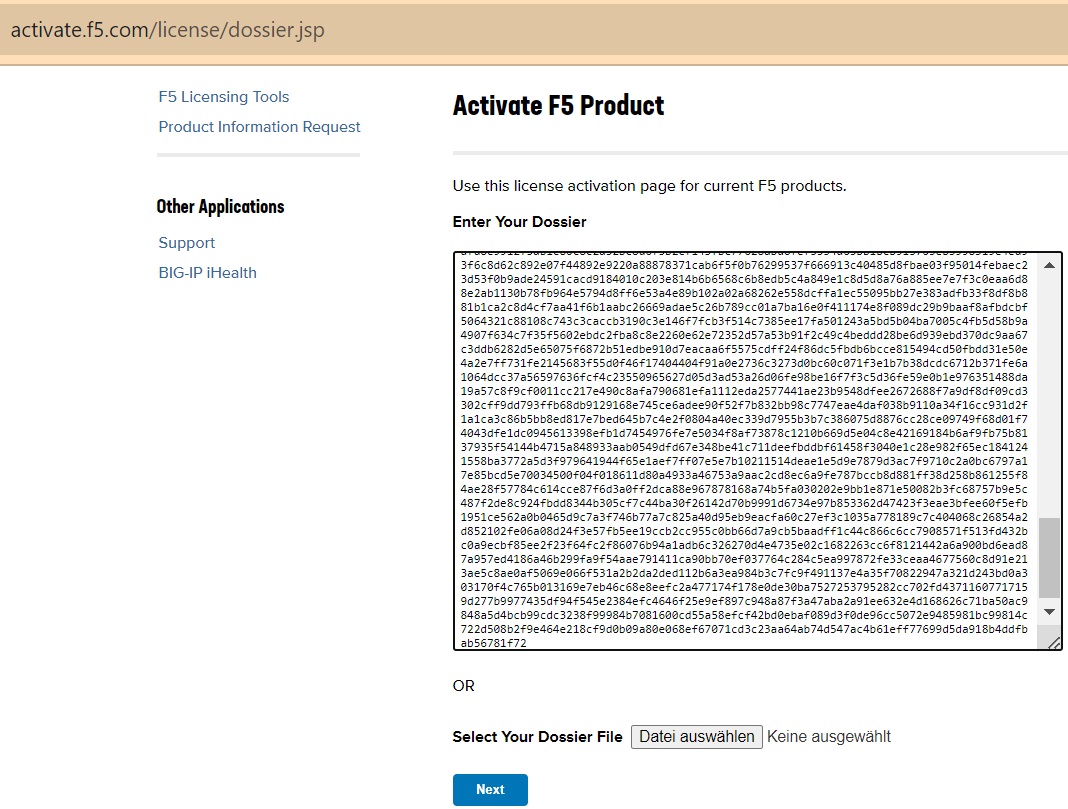
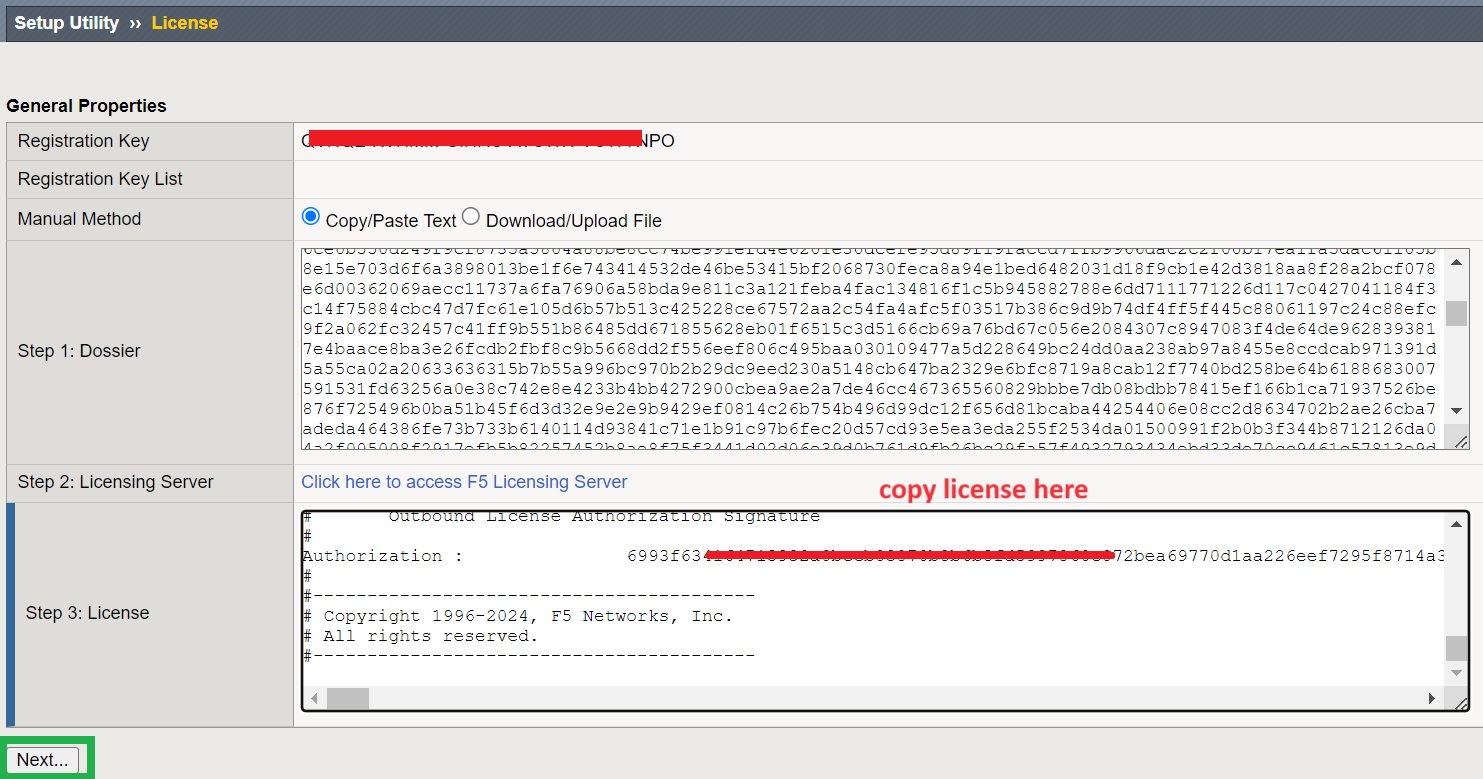
Then we need to activate F5 BIG-IP with the trial key. I enter my trial activation key and choose the manual method to activate the machine. I will copy the given output and paste into the given online link to get a license.
I then copy the license in the license section of the activation page to enable use of the machine.
On the resource provisioning page, we ensure that both LTM and ASM (AWAF) are licensed and provisioned.
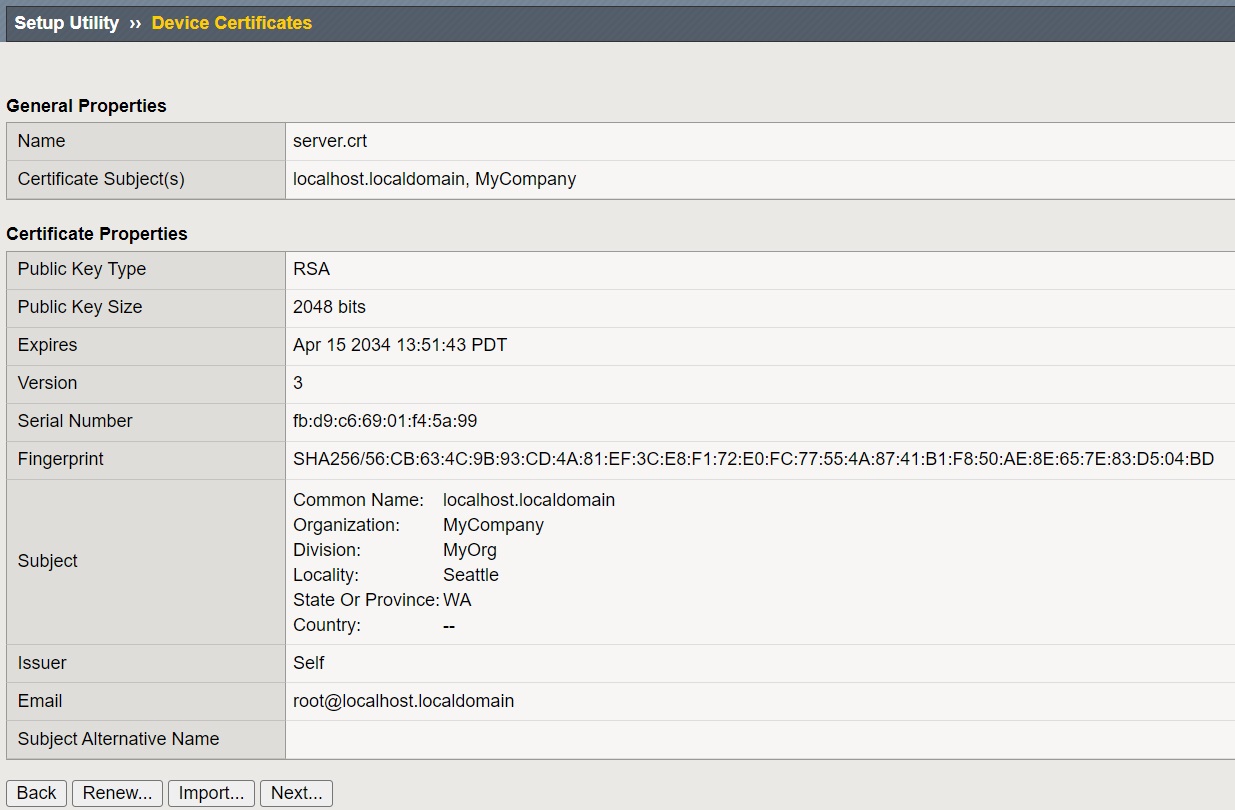
On the certificate page we don’t change anything and use the default certificate.
We are then asked to complete the configuration of the platform, including the management IP address, management gateway, host name, time zone and SSH access.
We disable HA for this course. The configuration of HA is already discussed in the F5 LTM course lesson 17 to 20.
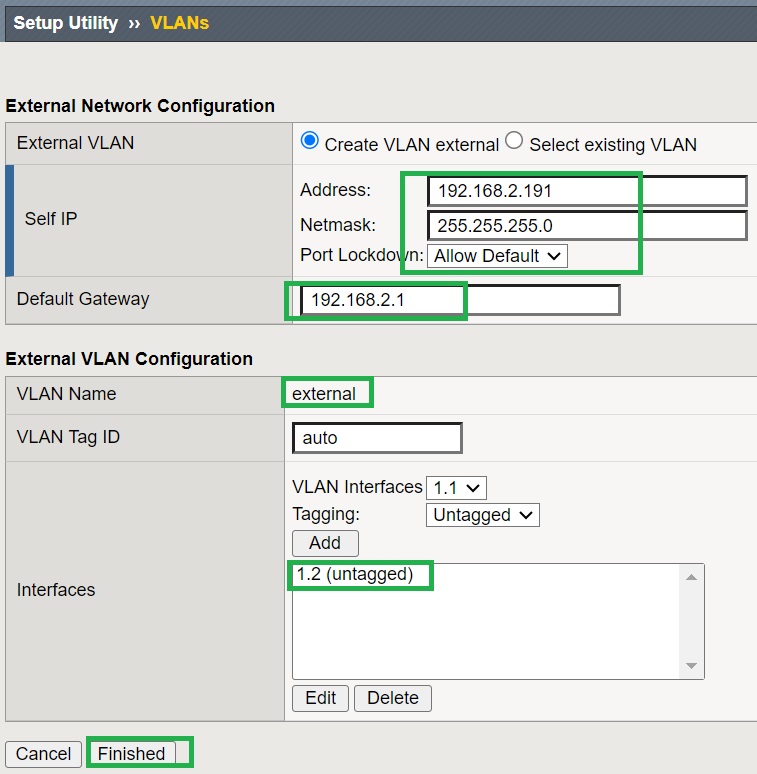
We then continue with the configuration of the internal and external interfaces according to the topology.
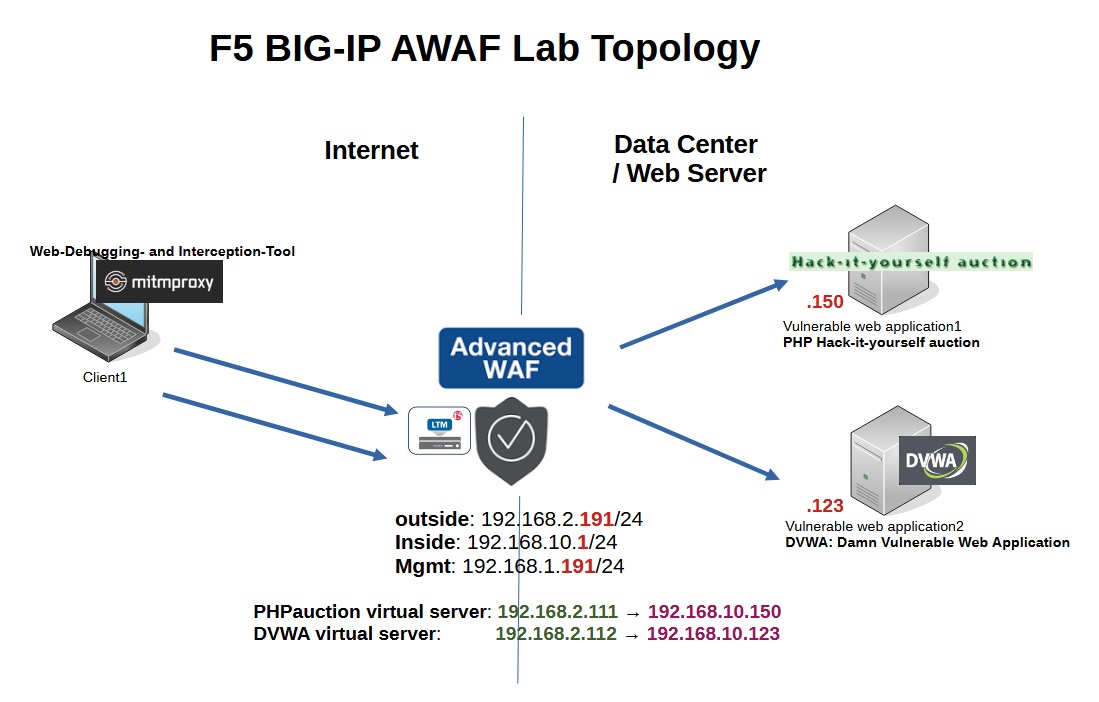
For the internal interface we configure the IP address 192.168.10.1/24. We change the port blocking to the default setting so that important traffic such as HA traffic is open to F5 BIG-IP itself. We select the first interface “1.1” as the internal interface.
A similar configuration is applied to the external interface, with the IP address 192.168..2.191 and 192.168.2.1 as the gateway. We also select the second interface “1.2” as the external interface.
To see the summary of your F5 BIG-IP initial configuration, you can check the sections „Network > Interfaces > Interface List“ to see the list of interfaces, „Network > Routes“ to see the configured routes, „Network > Self IP“ to see IP address configurations, „Network > VLANs > VLAN List“ to see the list of VLANs and finally „System > Platform“ to review the system and management configuration.
After the initial setup of F5, the next step is to publish two vulnerable web applications prepared in the previous lessons via the F5 LTM module.
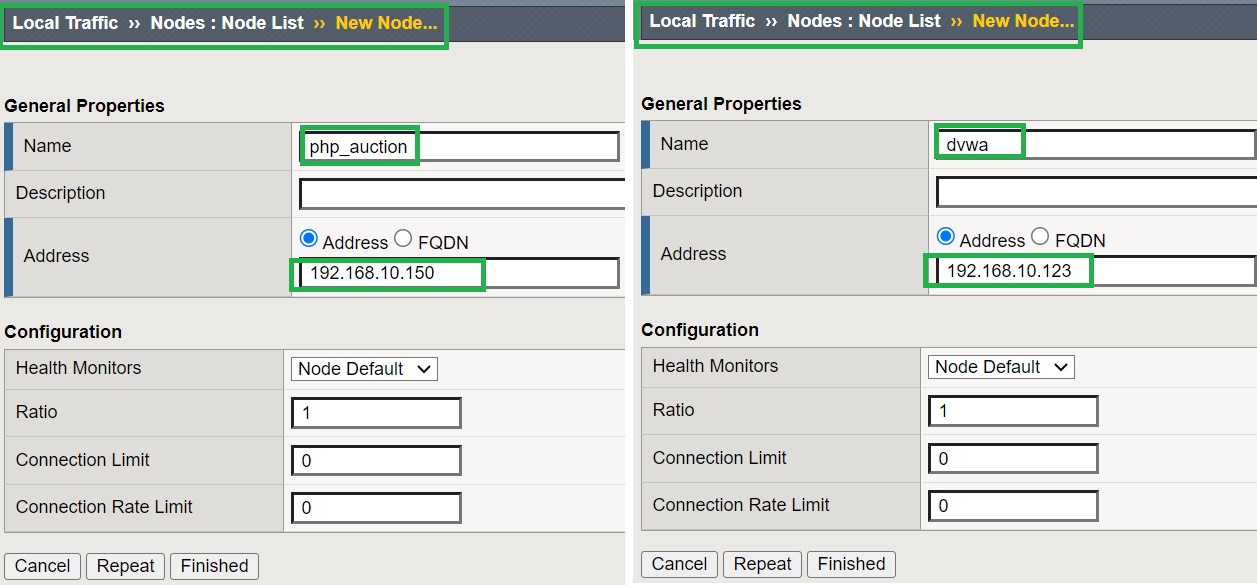
According to the topology, we have two vulnerable web applications, DVWA with IP address 192.168.10.123 and “Hack-It-Yourself PHP Auction” with IP address 192.168.10.150.
To publish them we use the F5 LTM module. First we create two nodes for these two applications.
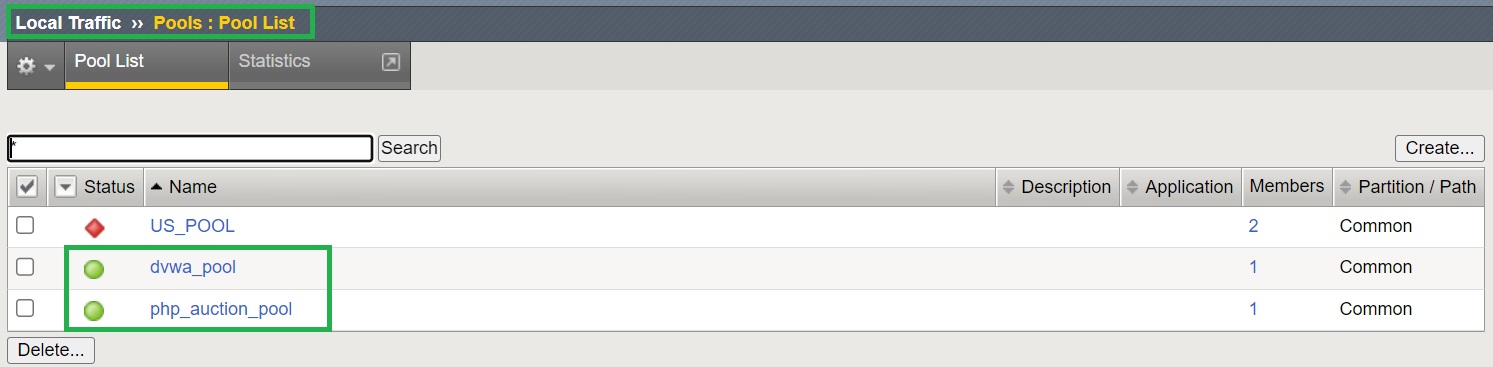
We then create two pools for these two applications for the HTTP (port 80) service. We also enable health monitoring with “http” profile.
After creating the required pools, we check the section „Local traffic > Pools > Pool List“ to make sure of the availability of the LTM pools.
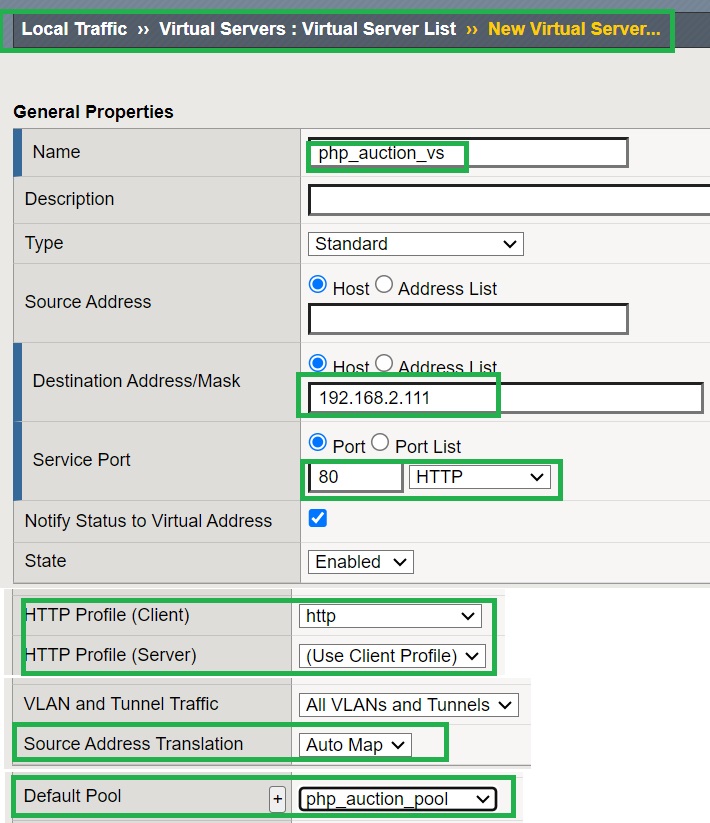
Finally, we create two virtual servers, one for each application.
According to the topology, we create a virtual server named “php_auction_vs” with IP address 192.168.2.111 and service HTTP.
It is important to enable the “http“ profile of the web application, otherwise we cannot secure it using the F5 AWAF module. We also activate source NAT using “Auto MAP” and assign the configured pool to the virtual server.
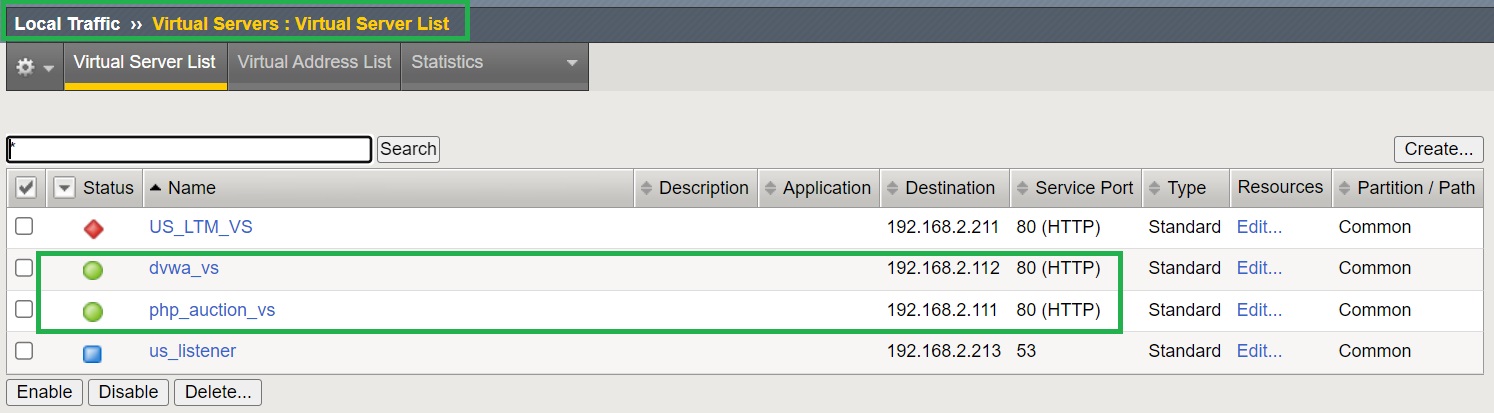
Another virtual server called “dvwa_vs” with the IP address 192.168.2.112 and the HTTP service.
The rest of the configurations are the same as the previous virtual server.
Then we need to make sure that both virtual servers are active. In the section “Local Traffic > Virtual Servers > Virtual Server List”, you can view the list and status of virtual servers.
Now the connection to the web application is expected to be made using the virtual IP addresses 192.168.2.111 and 192.168.2.112.
In the final step, we select an FQDN name for each of these two applications so that we can connect to them using their name and not their IP address.
We use „C:\Windows\System32\drivers\etc\hosts“ files to select a name for each of these two web applications.
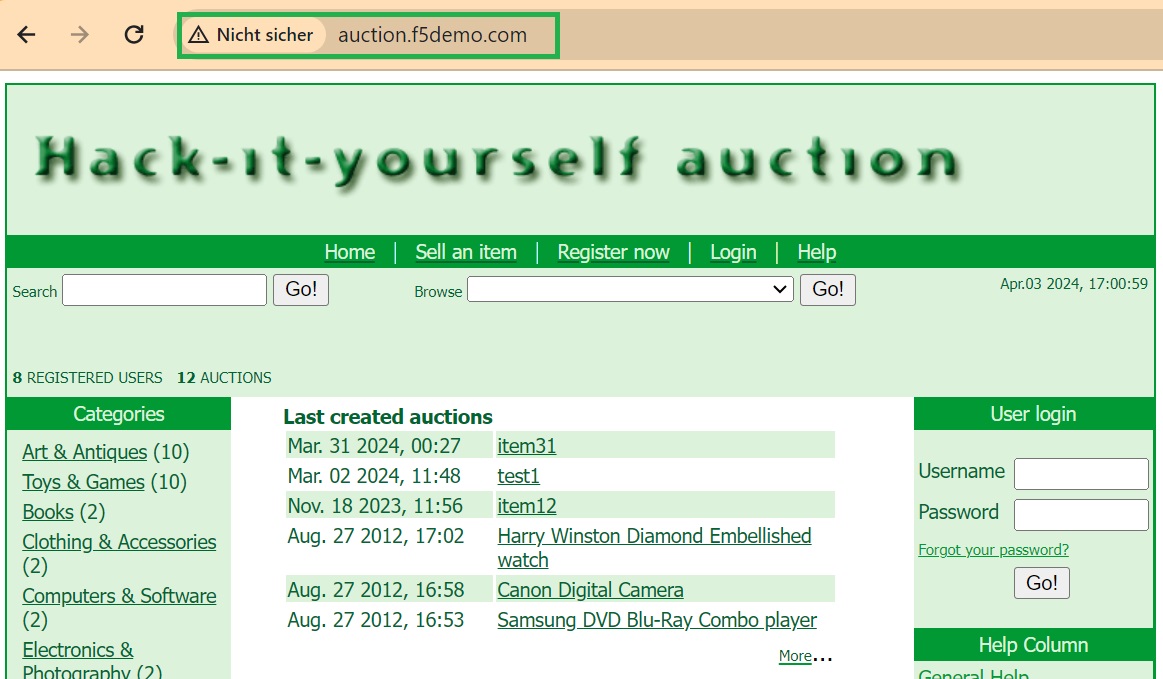
We choose the name “auction.f5demo.com” for the IP address “192.168.2.111” and the name “dvwa.f5demo.com” for the IP address “192.168.2.112”.
Now it is expected that we can connect to web applications through their names instead of IP address.