Junos SSH public key authentication is the feature that allows administrators to log in to the Juniper devices without a password. It is attractive and secure at the same time. It is not only useful in normal SSH connection but particularly useful in network automation.
SSH Public key authentication Fundamental
public key authentication implementation procedure
How to implement SSH public key authentication in Juniper devices?
However, this process is not limited to Juniper devices, but we will implement it in SRX device.
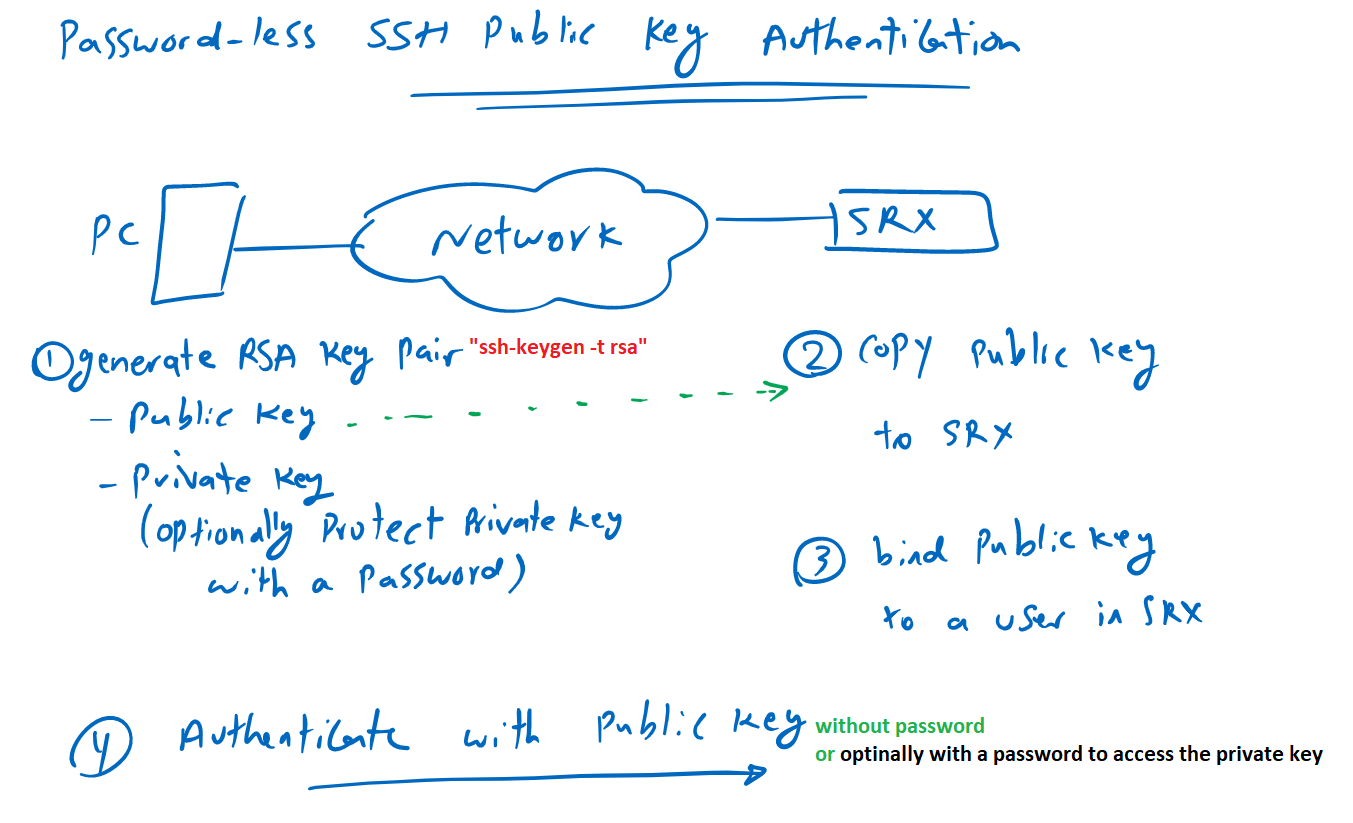
In the first step, we have to generate an RSA key pair. A public key and a private key. There are many ways to generate RSA key pairs in different operating systems. But as an example in Linux distributions, it can be generated using the “ssh-keygen -t rsa” command.
If there is no suitable software for generating RSA key pairs, this command can also be used in the Juniper shell environment. If you remember, you can start the juniper shell environment with “start shell” in operational mode.
The property of these keys are so that whatever is encrypted with public key, it will be decrypted only with it’s own private key.
Due to the importance of the private key, it is optionally possible to protect the private key with a password. If the private key is protected, you must provide a password to access the private key.
In the second step, we copy the public key into juniper device.
In the third step, we will bind the public key to a user in Junos device.
Now you can authenticate yourself to the Juniper device just by sending your public key and with no password.
if you have protected your private key then you have to provide the password to access the private key. this password is not related to the user in juniper device.
public key authentication process
You’re probably asking how public key authentication works behind the scenes.
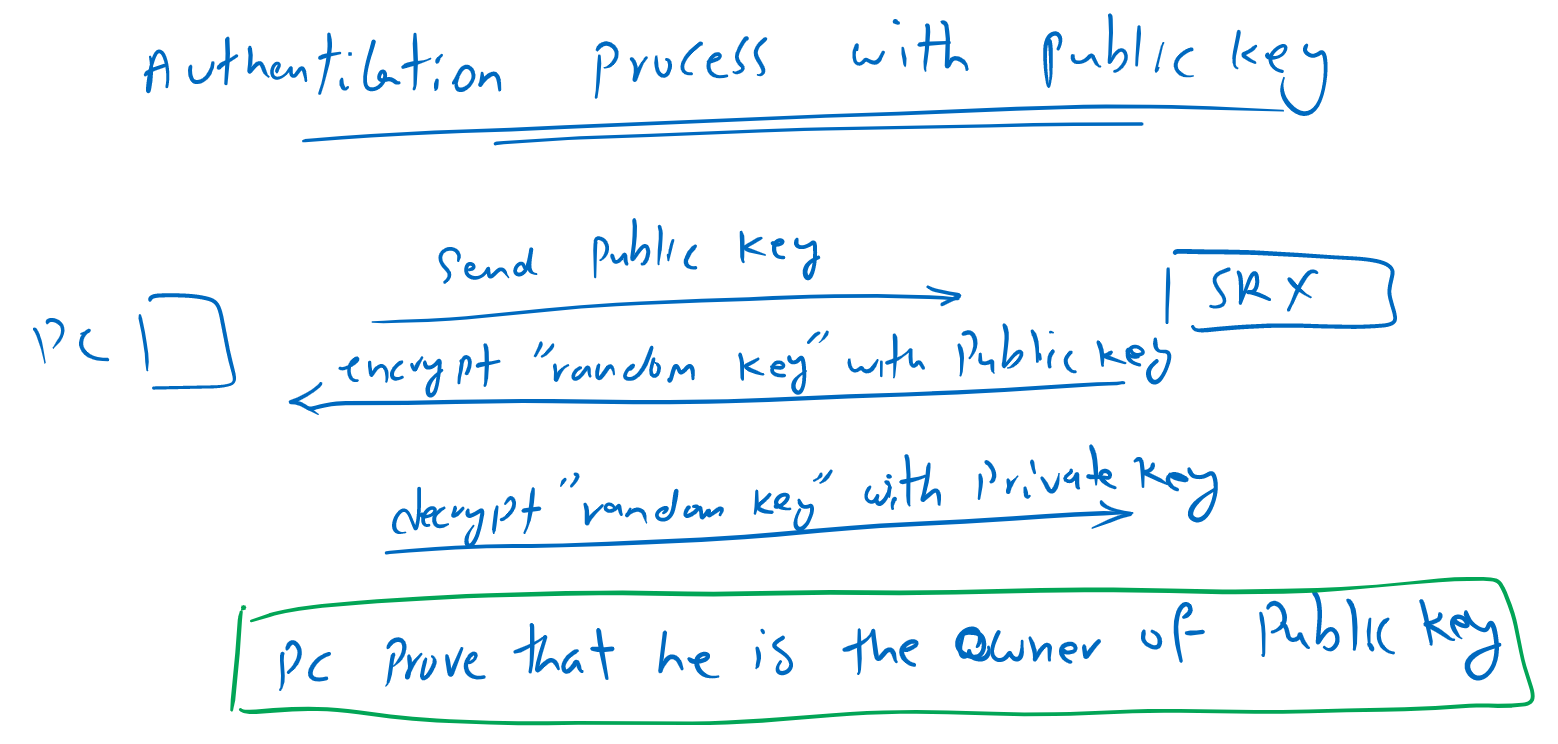
The process is easy. The public key is already connected to the user in juniper device. When you send your public key, Then you are actually that user, with the condition that you can prove that you are the owner of that public key.
To prove that, the juniper device, encrypt a random key with your public key and send it to you. you have to decrypt the random key with the corresponding private key and send it back to the juniper device.
If you can decrypt the random key with your private key, that means you are actually the owner of that public key since you have the corresponding private key.
The private key is very important and needs strong protection.
SSH Public key authentication configuration
To configure password-less SSH public key authentication, we need four steps as we discussed earlier.
In the first step, we generate an RSA key pair in the Linux machine with command “ssh-keygen -t rsa”.
When generating the RSA key pair, you will be asked if you want to protect your private key with a password. You can ignore private key protection if you wish but it is not recommended.
Your private key, will be stored by default in the “id_rsa” file in the “.ssh” folder in your home directory. In my machine, it is located in “/home/majid/.ssh/id_rsa“.
Your public key with the default name “id_rsa.pub” will be stored in the same path.
majid@192-168-1-111:~$ ssh-keygen -t rsa
Generating public/private rsa key pair.
Enter file in which to save the key (/home/majid/.ssh/id_rsa):
Enter passphrase (empty for no passphrase):
Enter same passphrase again:
Your identification has been saved in /home/majid/.ssh/id_rsa.
Your public key has been saved in /home/majid/.ssh/id_rsa.pub.
The key fingerprint is:
SHA256:9+zmhnvwGkWKNxL7Z9g2O6zTAMLKKx7+Tw9glVBNxP4 [email protected]
The key's randomart image is:
+---[RSA 2048]----+
|    ...=o        |
|     . .o        |
|     .o..   .    |
|     .o o+ o     |
|   .o. .So= .    |
|   .o.   =EB     |
|  .  .o   +BO    |
| ..... o  o*Oo   |
| .oo... . +X+.   |
+----[SHA256]-----+
majid@192-168-1-111:~$
majid@192-168-1-111:~$ ls -al /home/majid/.ssh/
total 20
drwx------ 2 majid majid 4096 May 17 15:52 .
drwxr-xr-x 3 majid majid 4096 May 17 13:38 ..
-rw------- 1 majid majid 1843 May 17 15:52 id_rsa
-rw-r--r-- 1 majid majid  416 May 17 15:52 id_rsa.pub
-rw-r--r-- 1 majid majid  222 May 17 13:25 known_hosts
In the second step, we copy the public key to the juniper device.
majid@192-168-1-111:~$ scp /home/majid/.ssh/id_rsa.pub [email protected]:/var/home/rayka/
Password:
id_rsa.pub                                                                                                        100%  416    90.5KB/s   00:00
majid@192-168-1-111:~$
In the third step, we create a new user and connect the public key to the user.
[edit]
rayka@vSRX# set system login user rayka20 uid 2020

[edit]
rayka@vSRX# set system login user rayka20 class super-user

[edit]
rayka@vSRX# set system login user rayka20 authentication load-key-file /var/home/rayka/id_rsa.pub

[edit]
rayka@vSRX# commit
commit complete

[edit]
rayka@vSRX#
And now we are ready to connect to the juniper device without any password.
majid@192-168-1-111:~$ ssh [email protected]
--- JUNOS 22.1R1.10 Kernel 64-bit  JNPR-12.1-20220221.2b3c81a_buil
rayka20@vSRX>

rayka20@vSRX>