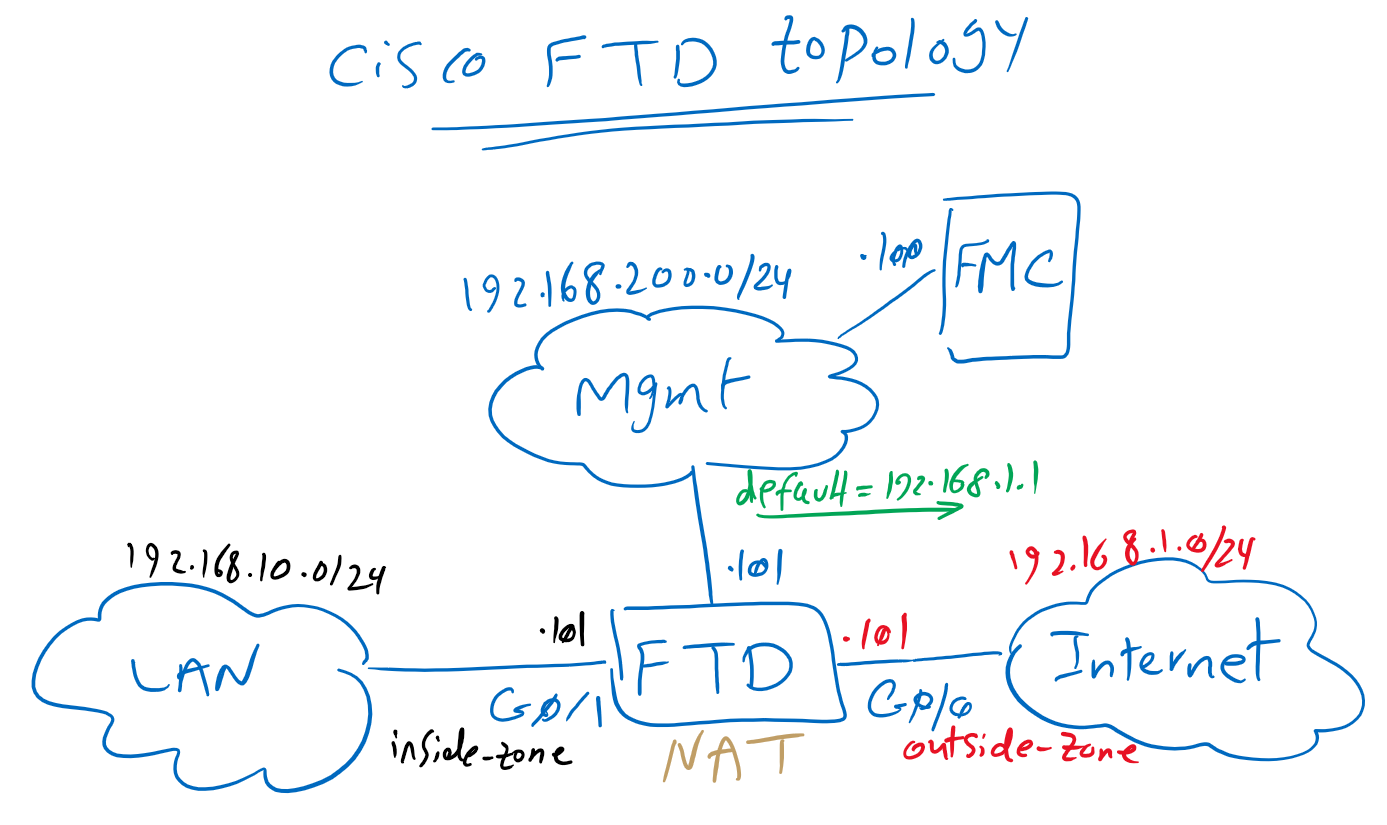


FTD access control policy is the first policy that we implement since it is the most normal policy that anycone configure in any firewall. With FTD ACL policy, we can, not only filter the traffic in layer 3 and layer 4, but many applications and micro-applications can be controlled through ACL policy. In this section we will only control traffic up to Layer 4.
In the previous section, in initial FTD configuration, we have configured FTD to permit all traffic and just inspect traffic for any intrusions.
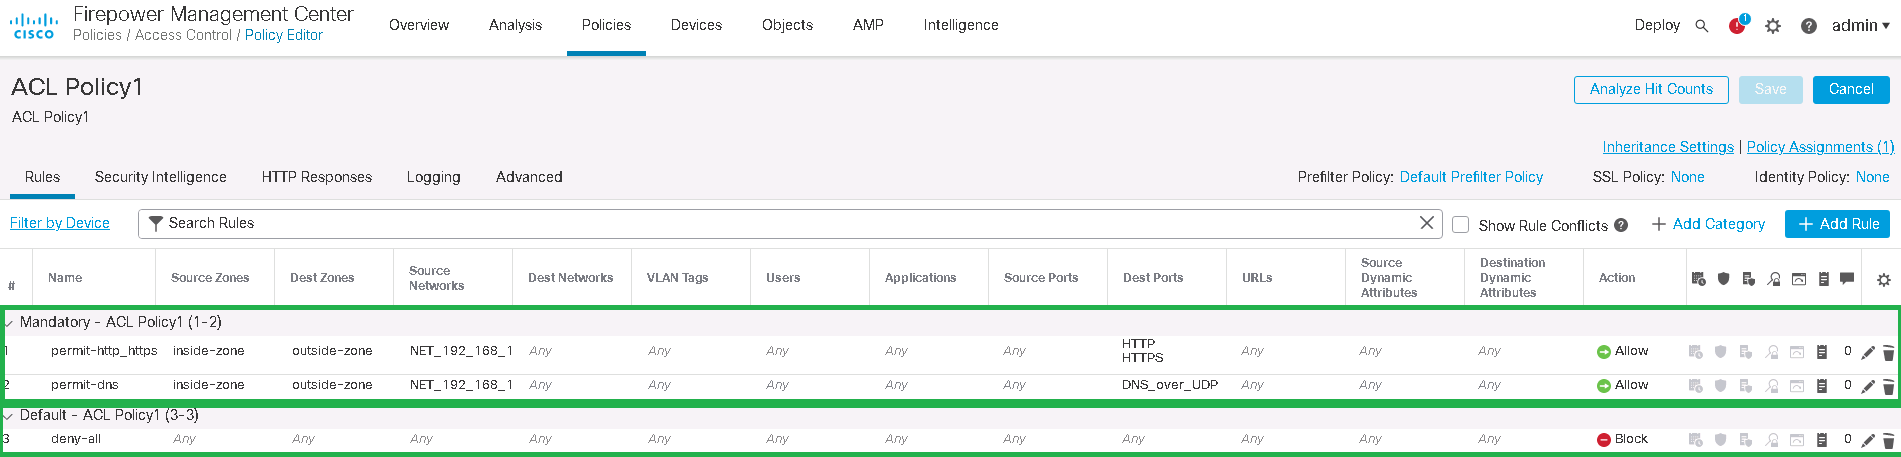
In this section, we will add a default rule to block every traffic. Then above default block rule, we will add two rules to permit WEB and DNS traffic.
we will also discuss various actions that can be configured in each rule in addition to Block and Allow. We will have a definition for each action and test some of these actions.
We’ll also learn how to log interesting traffic and monitor connections in real time, which is critical to troubleshooting.
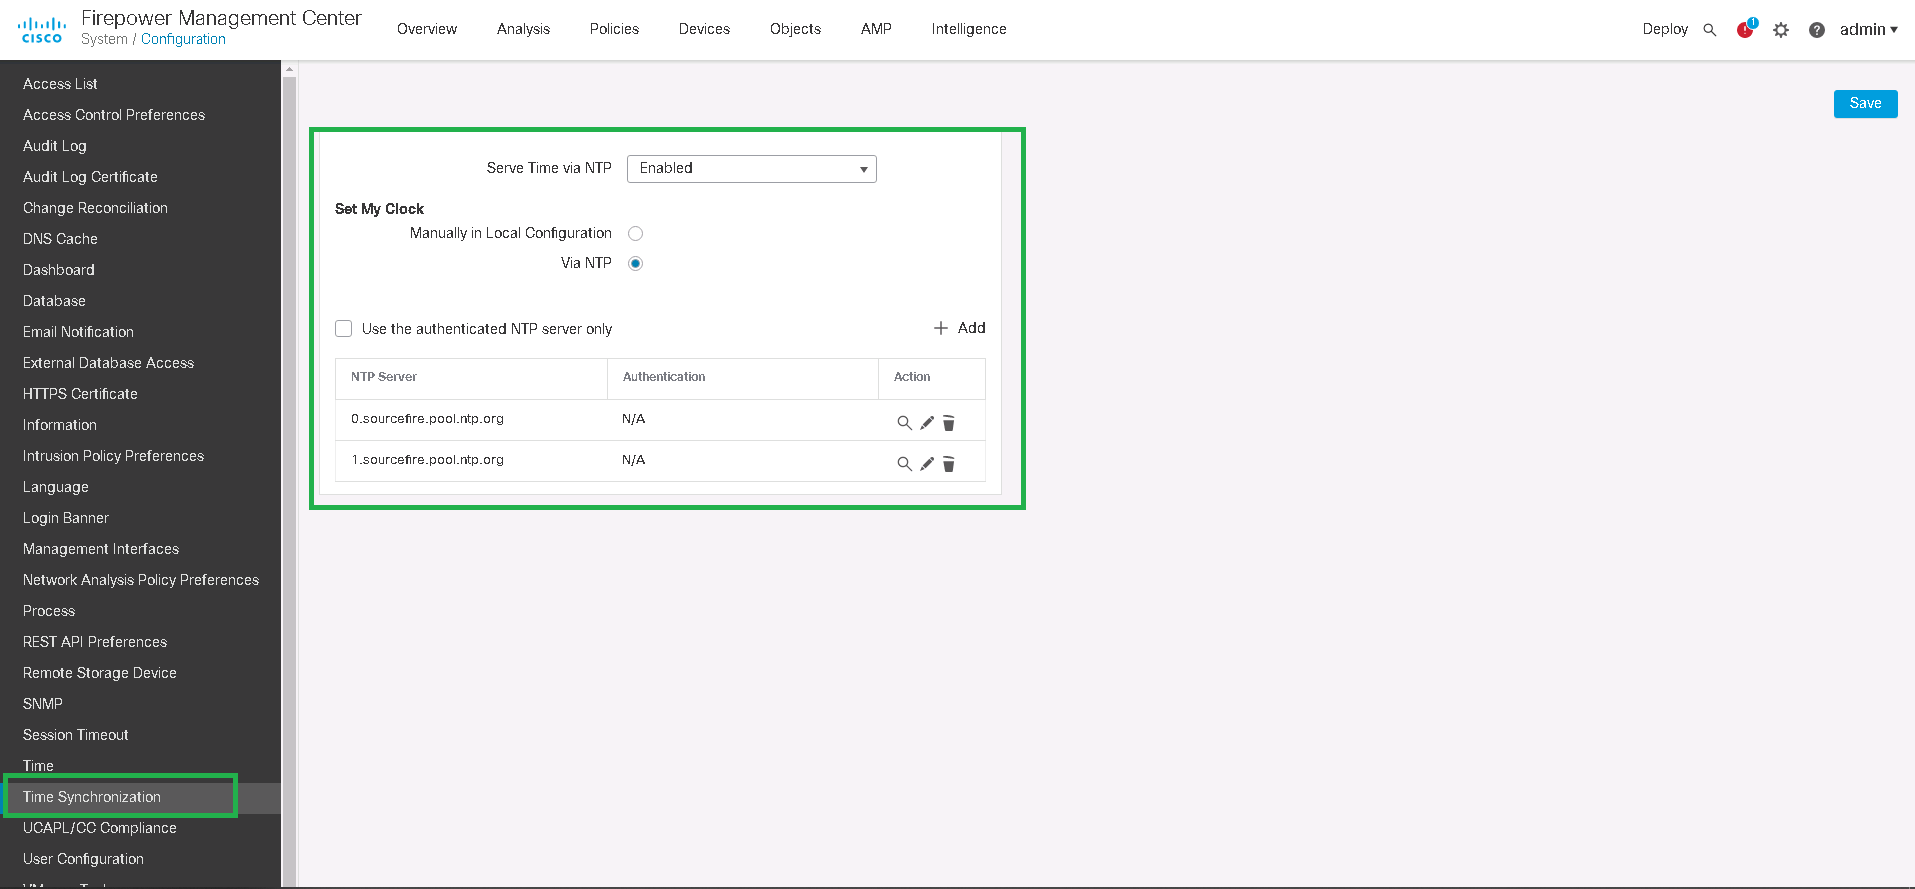
In the first step, make sure that time and time zone is correctly configured. Since it is very important to analyze logs to troubleshoot.
admin -> user prefrences -> General -> Time ZoneSetting -> Configuration -> TIme Synchronization -> set time through NTP or manualIn the previous sections we have permitted all traffic and the traffics are being inspected just to find any intrusions.
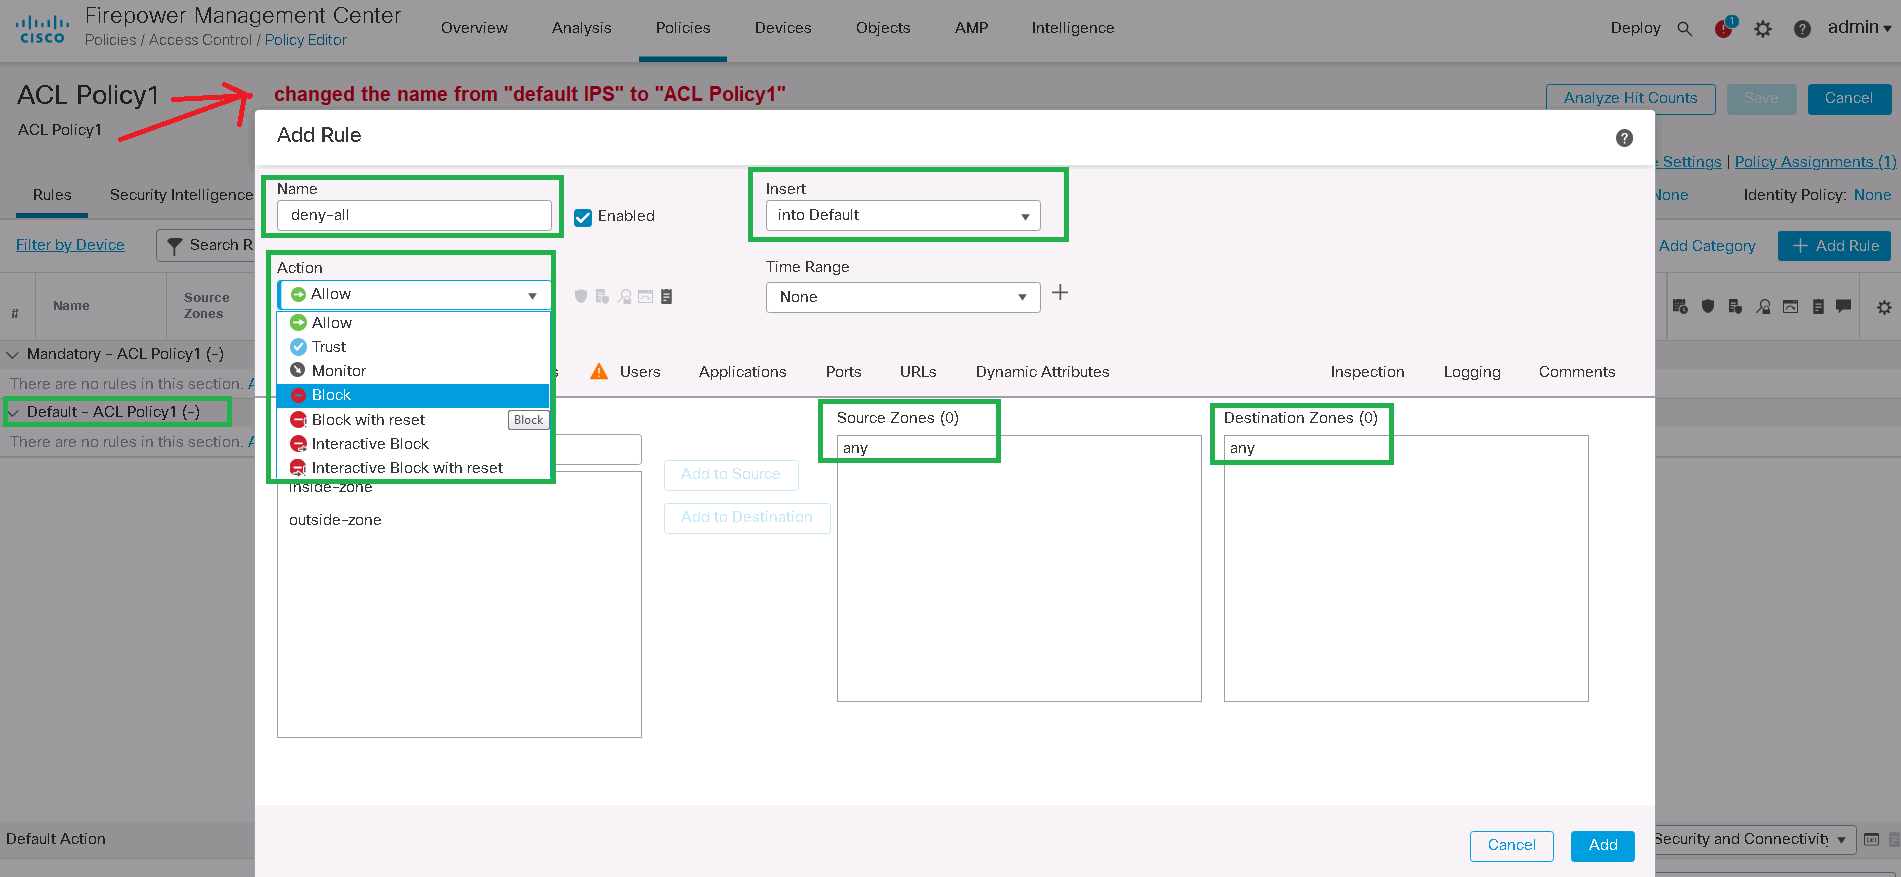
At best, we should deny all traffic and only allow the traffic required by Enterprise. So I’m adding a default rule to deny all traffic in the default category.
Policies -> Access Control -> default IPS -> Edit -> change the name from "default IPS" to "ACL Policy1"
Category: Default -> Add Rule
Name: deny-all
Enabled: set
Action: Block
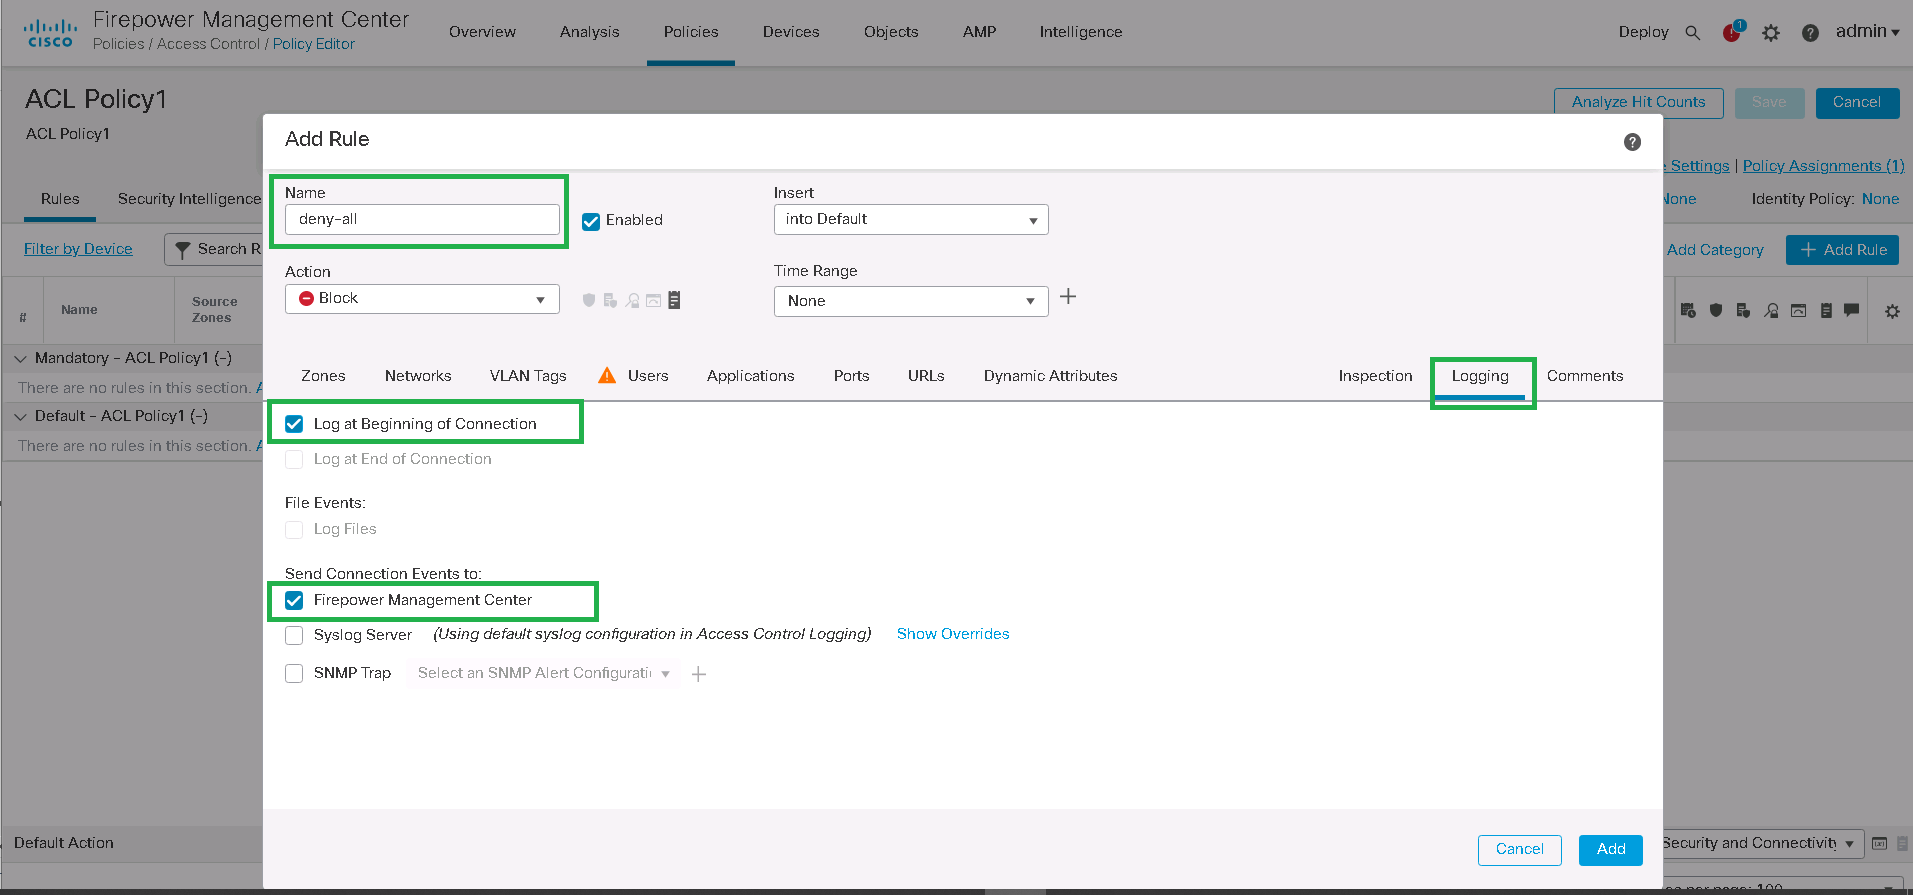
Tab: Logging
Log at Beginning of Connection: Set
Send Connection Events to: Firepower Management Center: SetWith this rule we block all traffic between any zones, between all networks, all ports and every application. We also enable logging so we can check what traffic is being dropped, which is critical to troubleshooting.
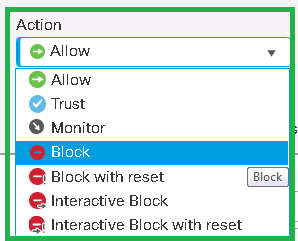
In addition to the block action, there are a few other actions that we need to know the differences between them.
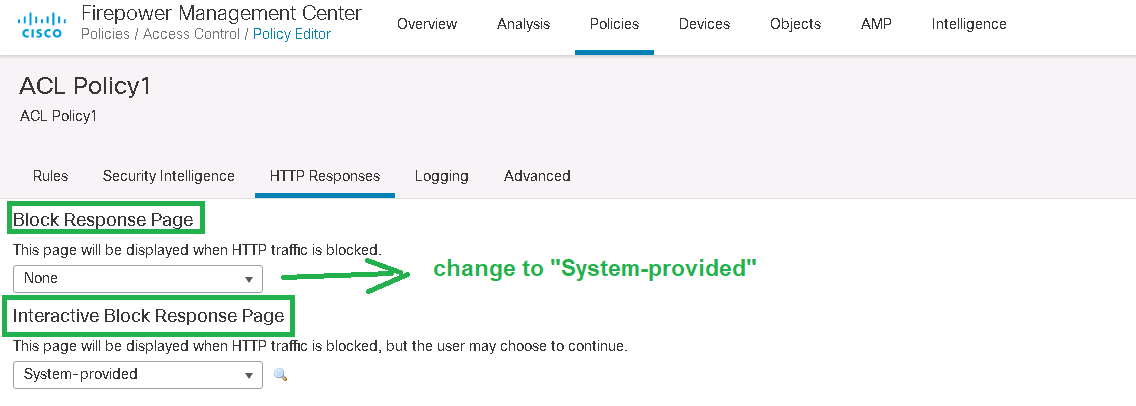
I noticed that the interactive message works mostly for http traffic, but not https. https sometimes works on some browsers, but may not work on all browsers.
Then we will add only WEB and DNS traffic. http, https and DNS traffic is permitted only from inside zone to outside zone and from LAN network with IP subnet 192.168.10.0/24. We also enable logging for theses traffics at the beginning and at the end of each connection. It is clear that blocked traffic can only be logged at the beginning of the connection.
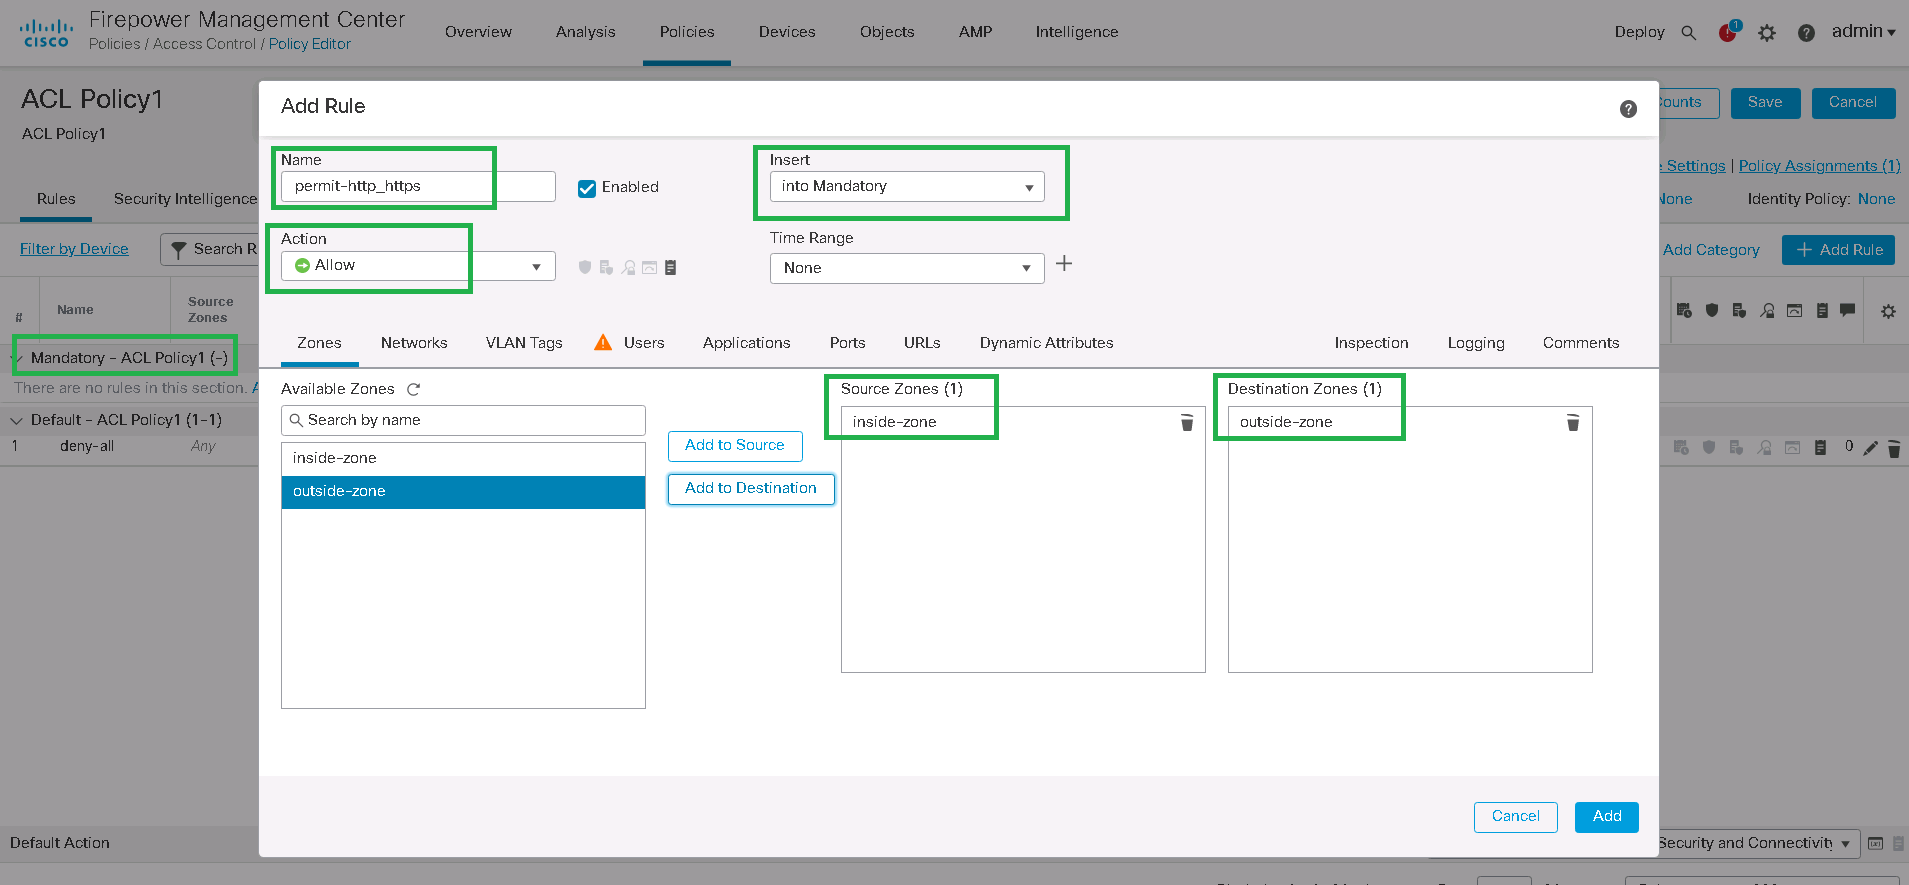
!!! add an ACL rule in Mandatory category to permit HTTP and HTTPS
Policies -> Access Control -> ACL Policy1 -> Edit -> Category: Mandatory -> Add Rule
Name: permit-http_https
Enabled: set
Action: Allow
Tab: Zones
Source Zones: inside-zone
destination Zones: outside-zone
Tab: Networks
Source Networks: NET_192_168_10 (192.168.10.0/24)
Source Networks: any
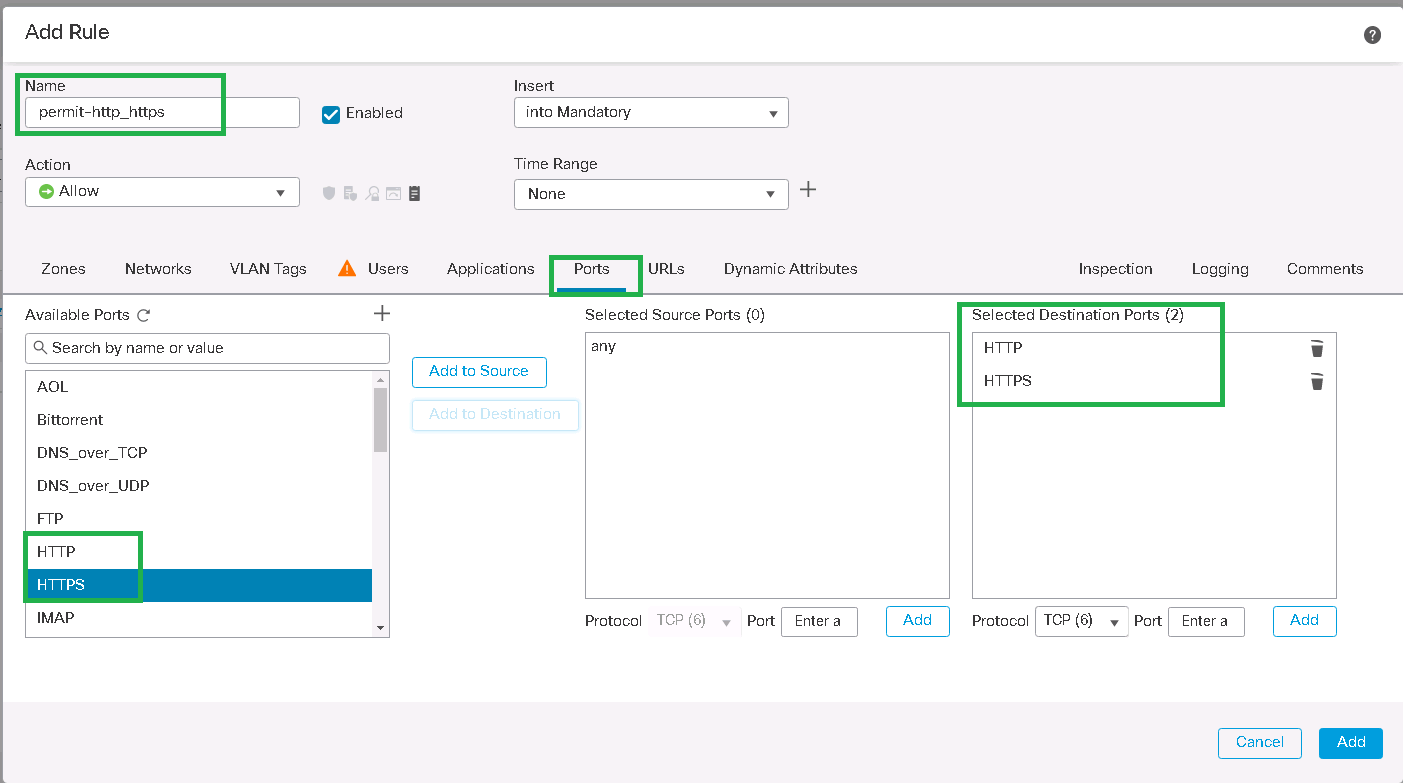
Tab: Ports
Selected Destination Ports: HTTP, HTTPS
Tab: Logging
Log at Beginning of Connection: Set
Log at End of Connection: Set
Send Connection Events to: Firepower Management Center: Set
!!! add an ACL rule in Mandatory category to permit DNS
Policies -> Access Control -> ACL Policy1 -> Edit -> Category: Mandatory -> Add Rule
Name: permit-dns
Enabled: set
Action: Allow
Tab: Zones
Source Zones: inside-zone
destination Zones: outside-zone
Tab: Networks
Source Networks: NET_192_168_10 (192.168.10.0/24)
Source Networks: any
Tab: Ports
Selected Destination Ports: DNS_over_UDP
Tab: Logging
Log at Beginning of Connection: Set
Log at End of Connection: Set
Send Connection Events to: Firepower Management Center: SetDo not forget to save and deploy your configuration whenever you make a change in your configuration.
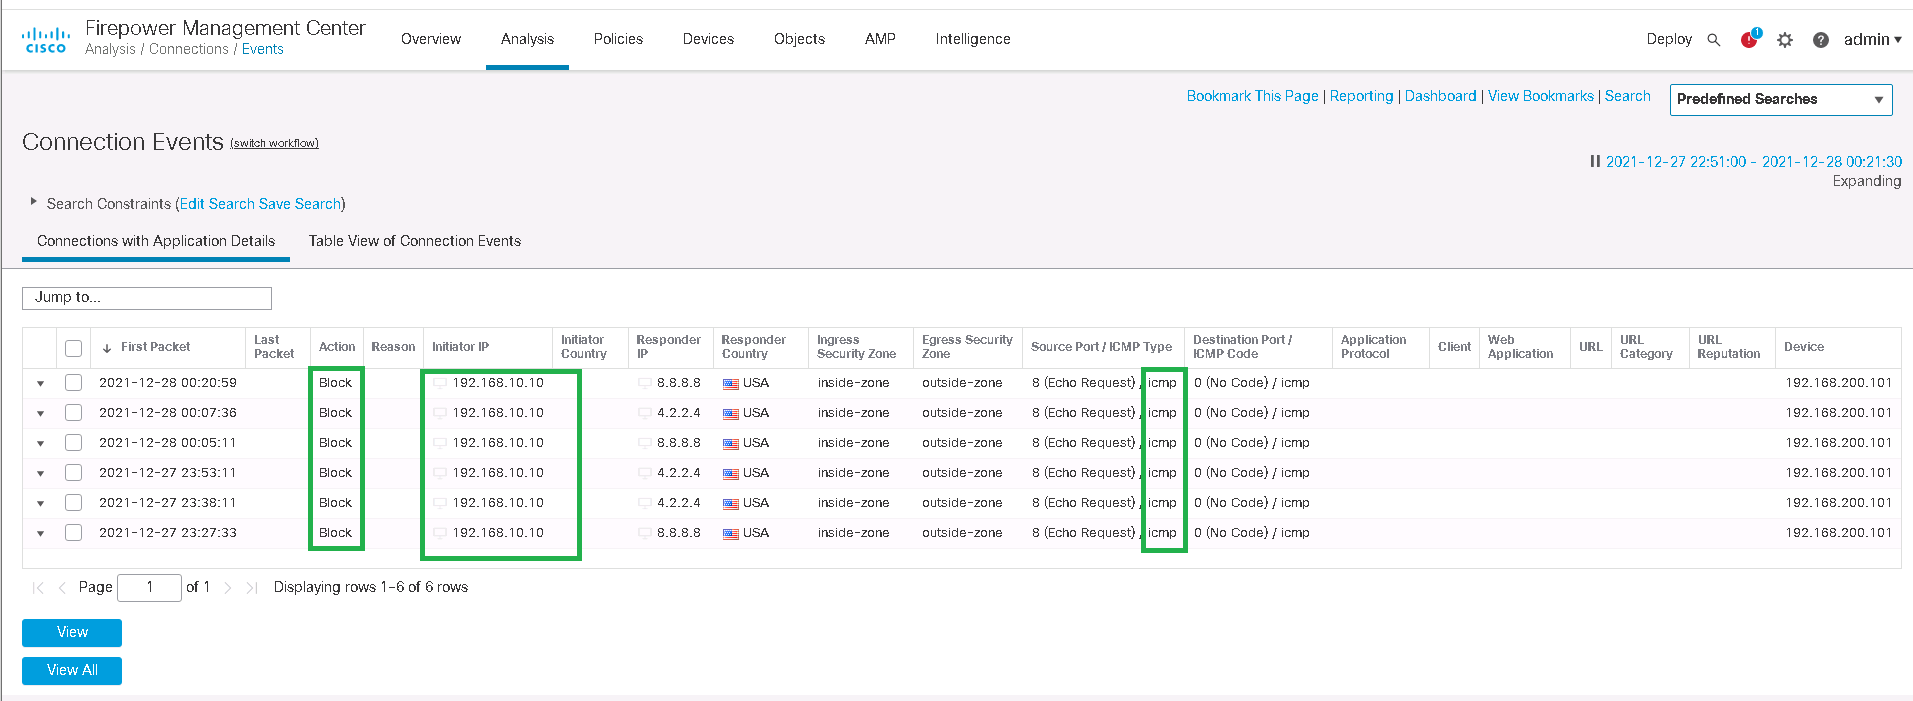
Now we can check from an endpoint on the LAN network to make sure that web traffic is permitted and ping traffic is dropped.
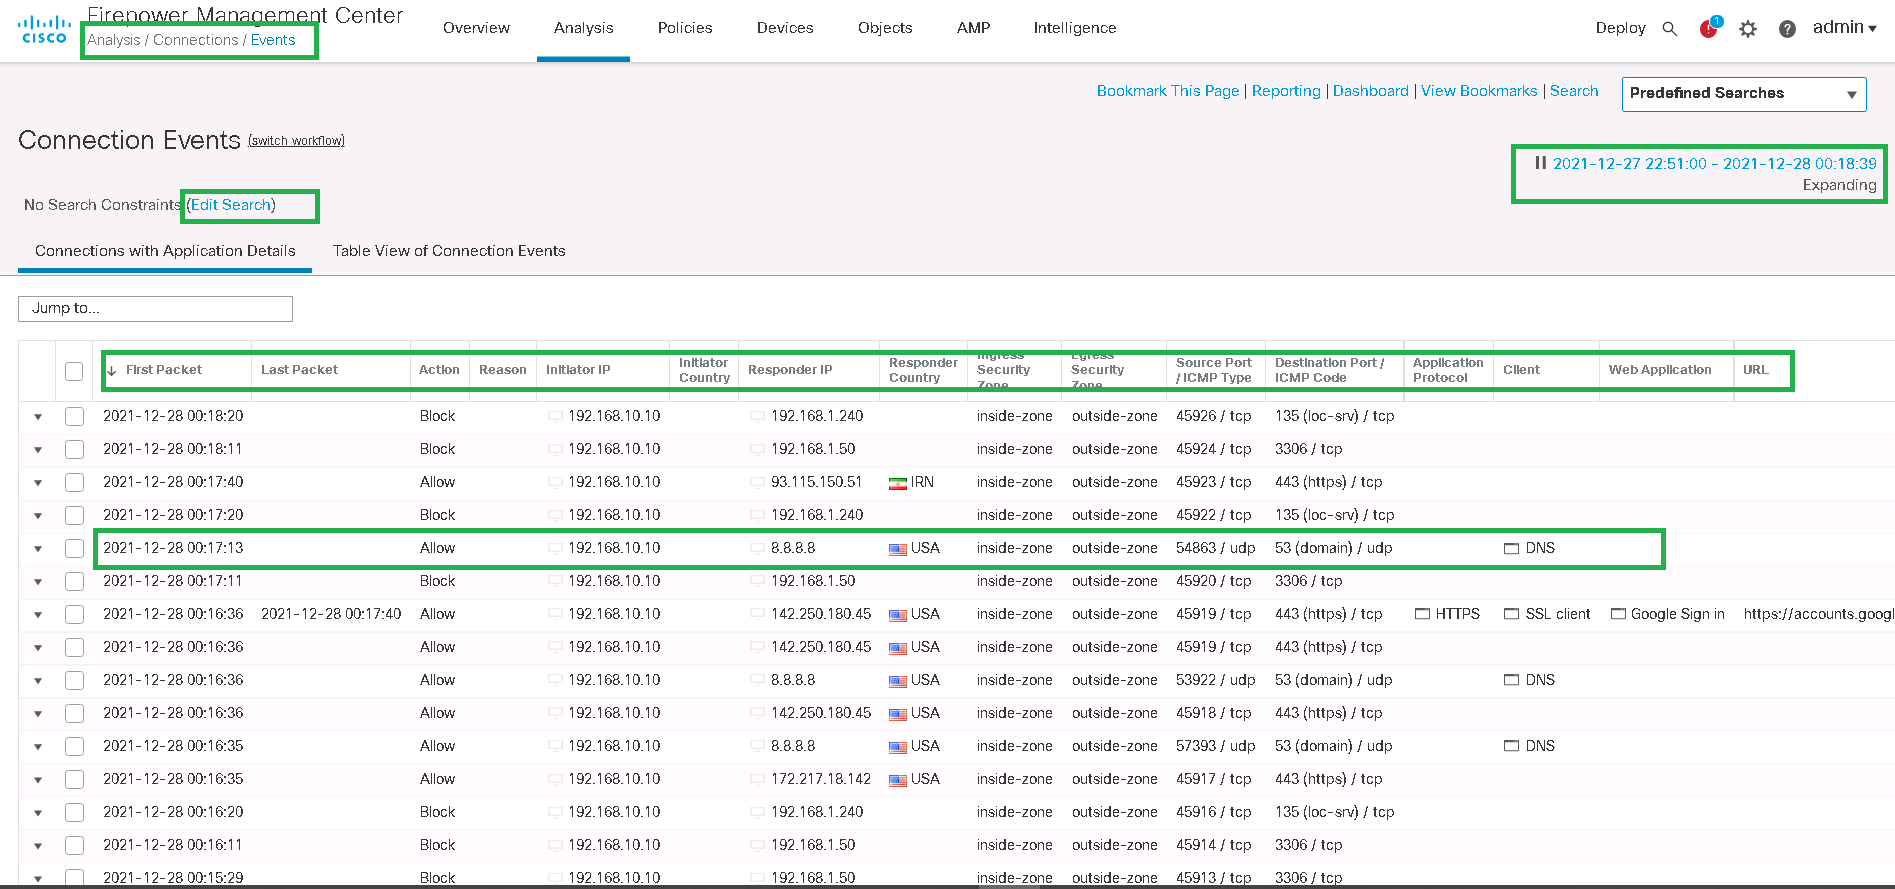
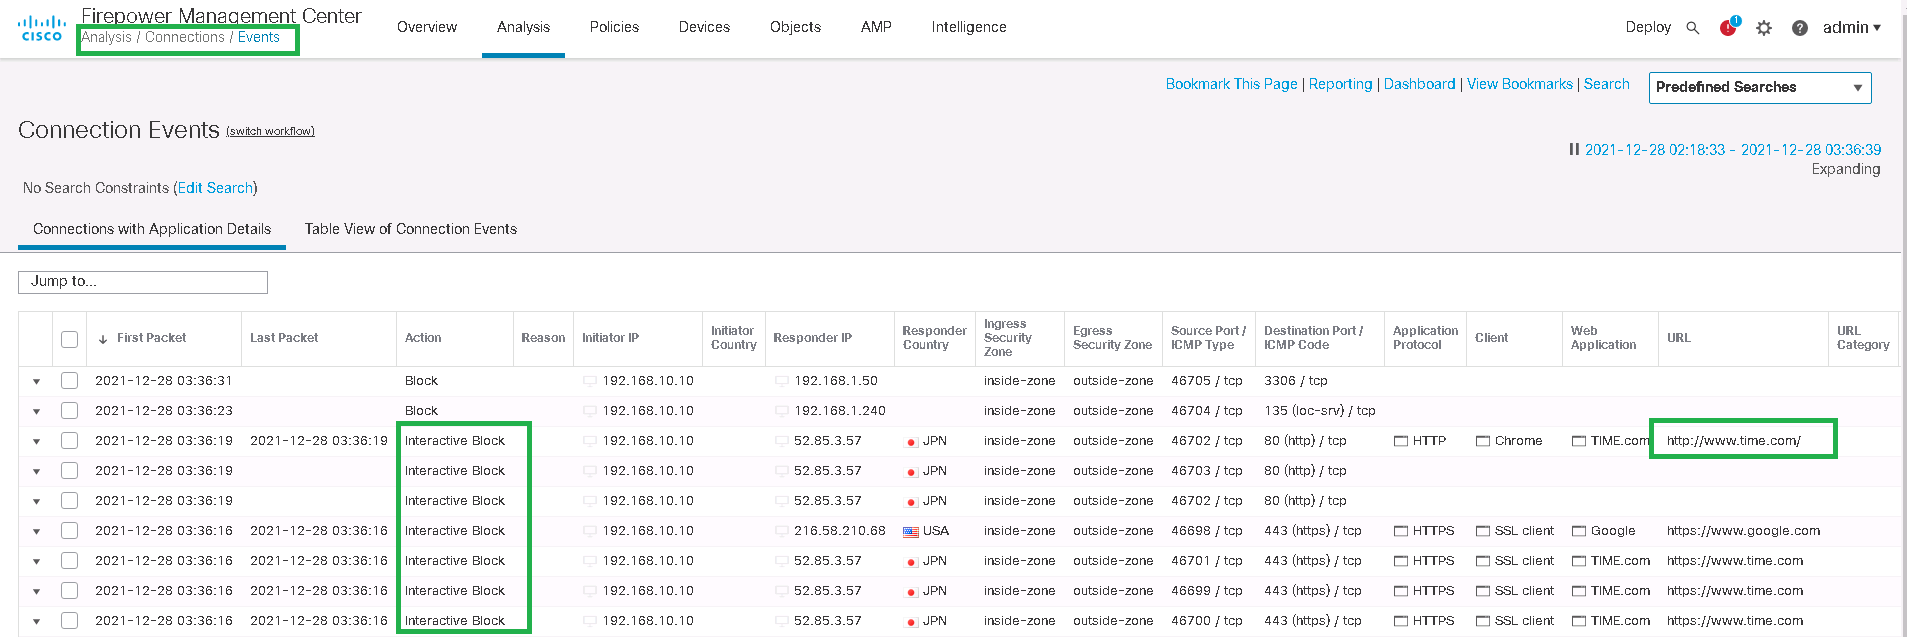
Now we can monitor allowed and dropped traffic via the analysis menu.
Analysis -> Connection -> EventsYou can monitor real-time, which action is applied to which traffic (like IP and Port) and also in which direction.
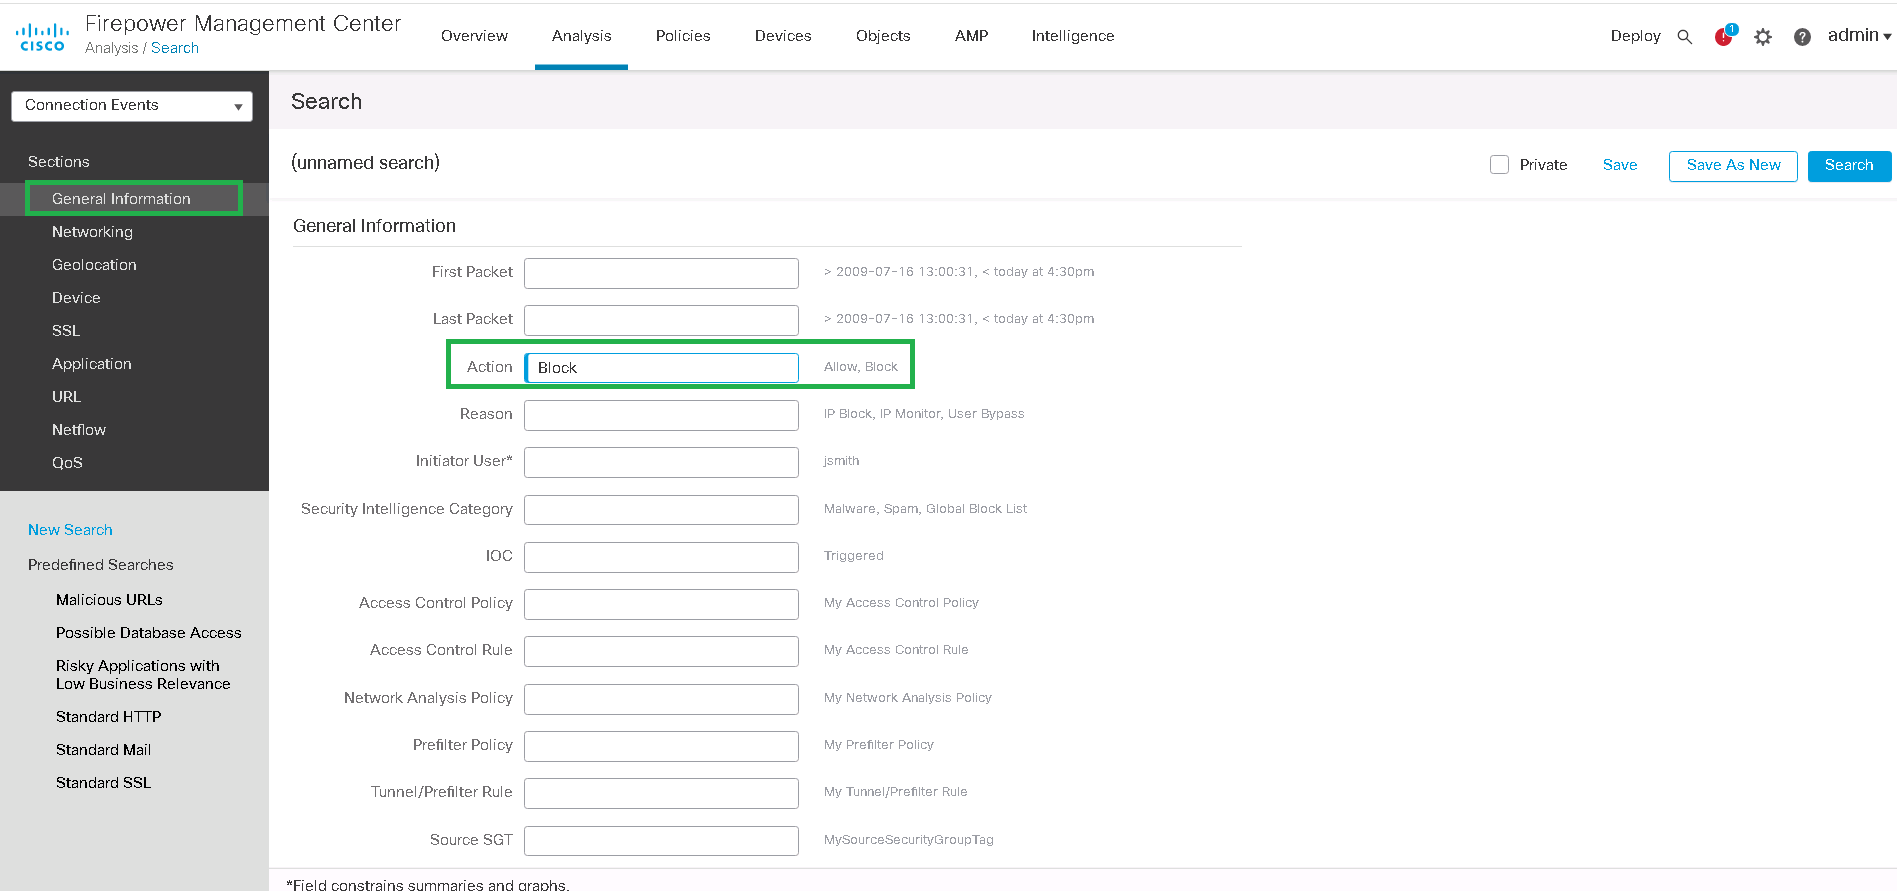
You can filter logs for a specific traffic pattern with any preferred fields. For example, we want to monitor the logs related to blocked ICMP traffic from endpoint 192168.10.10. Then only your favorite logs are displayed.
You can also limit the time range in which logs must be displayed. You can also configure the log output to be refreshed automatically.
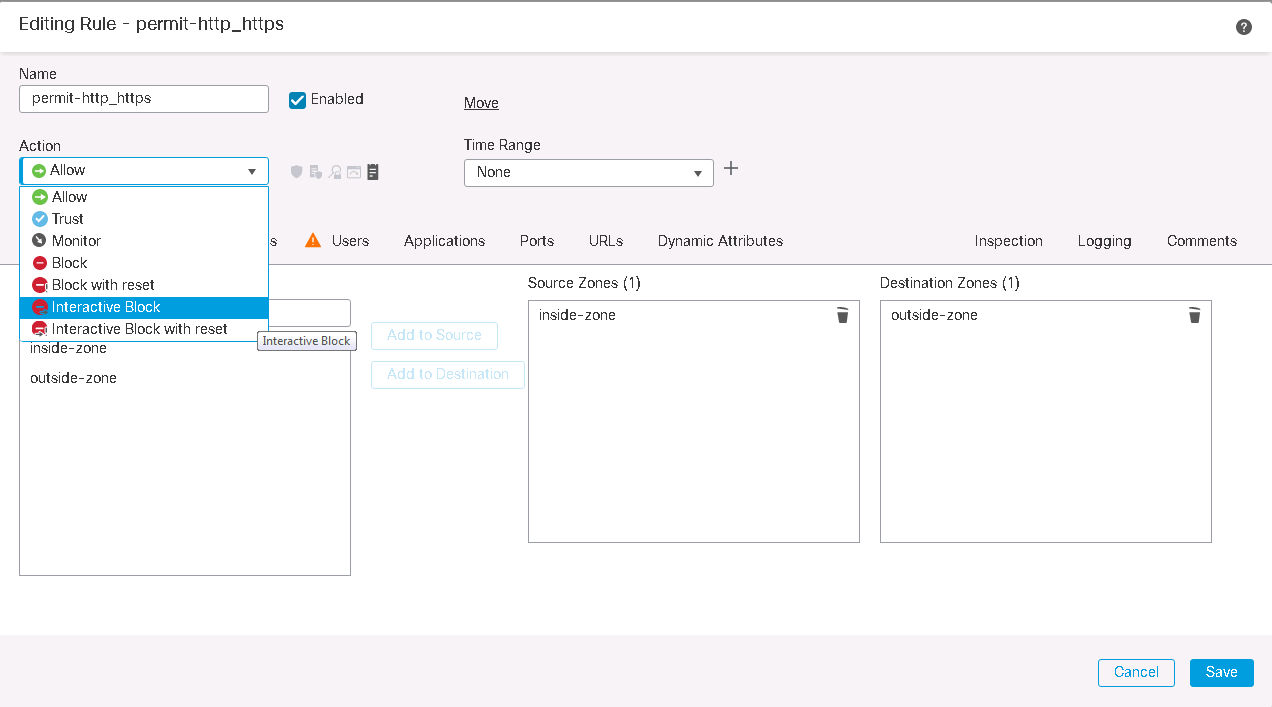
For the final test I want to change the action for http traffic from “Allow” to “Interactive Block”. Just to monitor how interactive block works.
With “Interactive Block”, the web page will be blocked but user can decide to view the page.
In “HTTP Responses” Tab, we can change or disable “Block” or “Interactive Block” message.