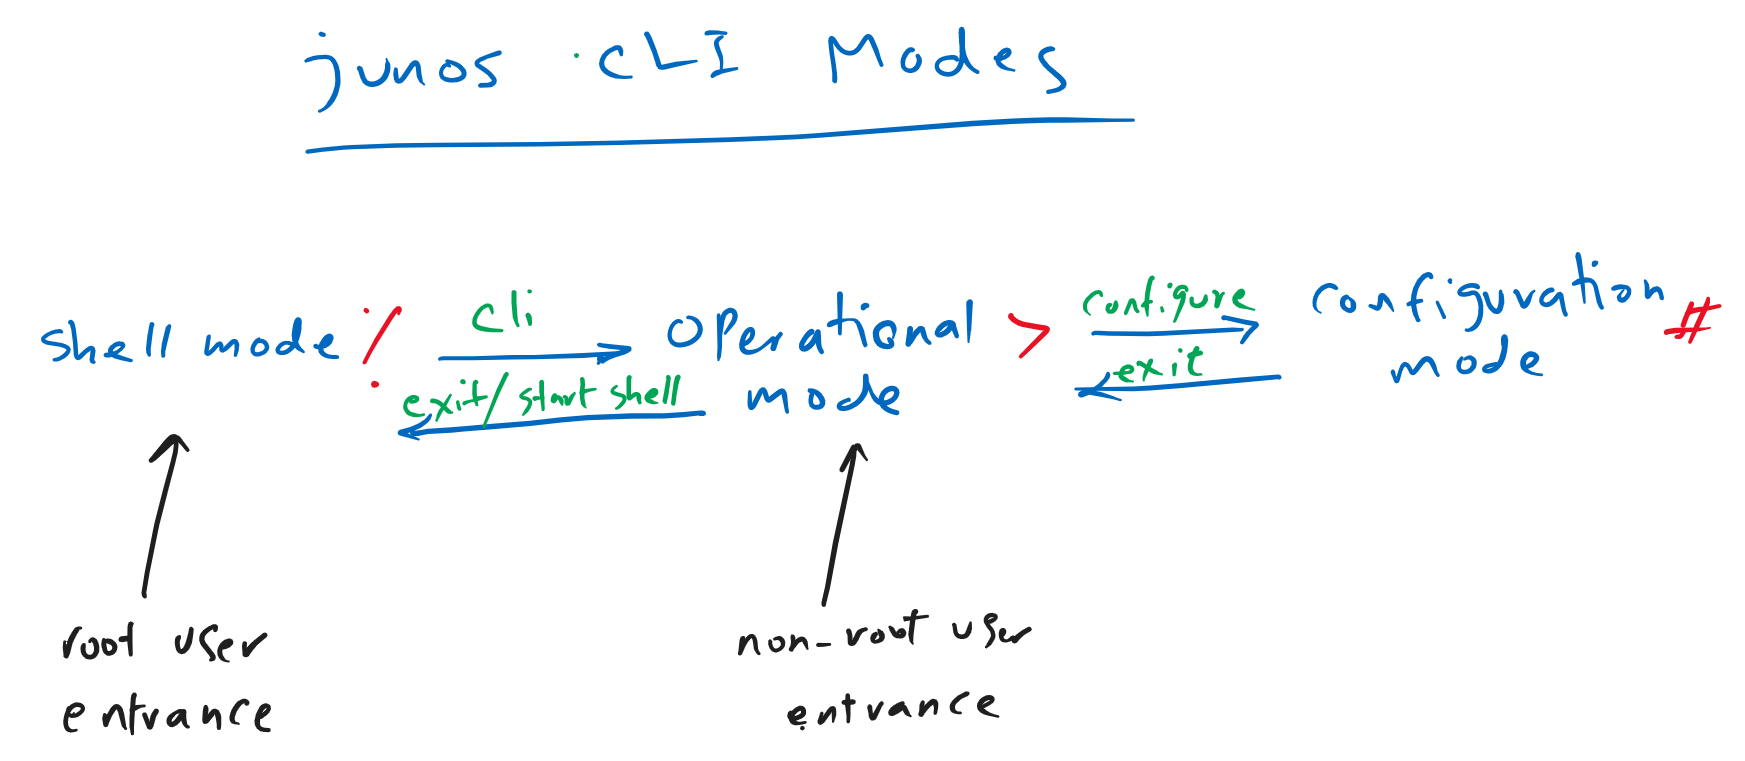
Junos CLI modes is the start of the topic where we learn how to work with Junos CLI user interface. This section introduces Junos CLI modes including shell mode, operational mode, and configuration mode where you can configure, monitor, and troubleshoot your configurations.
Depending on whether you log in as root or non-root user, you will be put into Free-BSD shell mode or Junos operational mode.
If you log in as the root user, you will enter the Free BSD shell mode. There isn’t much to do in shell mode other than file system commands. List the files, copy the files to other computers, mount external USB storage and etc. Sometimes when you ask Juniper for low-level troubleshooting, it ask you to run some commands in the shell mode environment.
In shell mode, you can use the “cli” command to switch to Junos operational mode. With “exit” command you will come back again to shell mode.
But if you login with non-root user, you will see directly Junos operational mode, in which you can do monitoring, troubleshooting and also filesystem commands.
As a non-root user, you can also start shell environment by entering the command “start shell”.
In operational mode, we can enter configuration mode by entering “configure” command. as the name suggest, in this mode, we will configure the device or change the current configuration. we come back again to the operational mode with “exit” command.
To get a better feeling of different Junos modes, let’s touch the real Junos CLI interface.
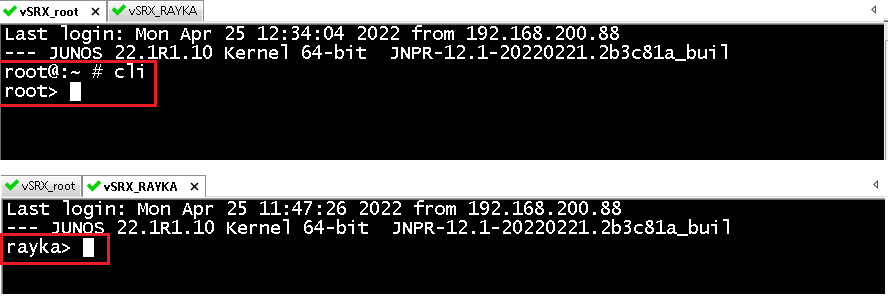
First of all, let’s login to vSRX, once as a root user and once as a non-root user.
As you can see, when we login with the root user, we are put in shell mode and we enter the operational mode with “cli” command, but when we login with “rayka” user, we see directly the operational mode.
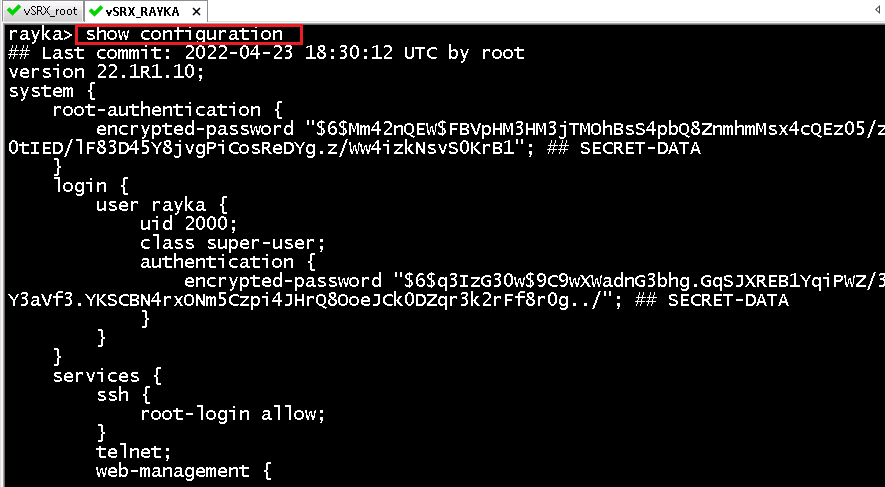
The most important command in the operational mode is “show configuration“, in which the current active configuration is displayed.
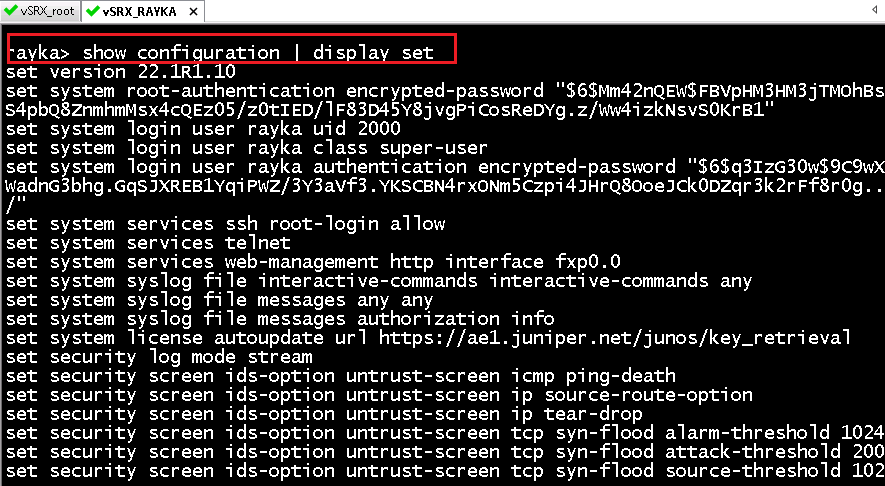
usually, it is easier to display the set version of the configuration, which can simply be copied. the command is “show Configuration | display set“.
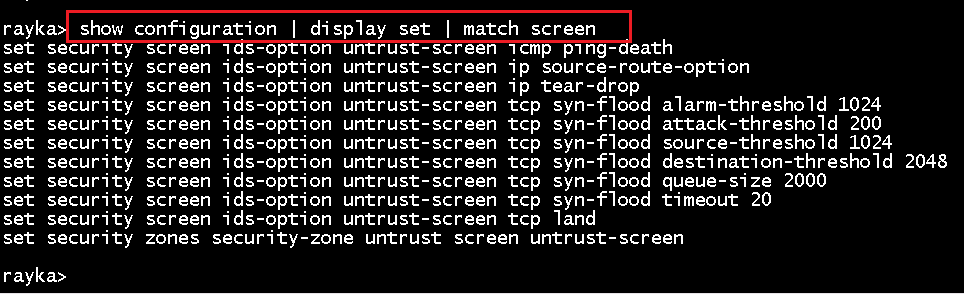
Or you can show only part of the configuration with matching a specific keyword. for example “show Configuration | display set | match screen”, in which show only a part of configuration lines including “screen” keyword.
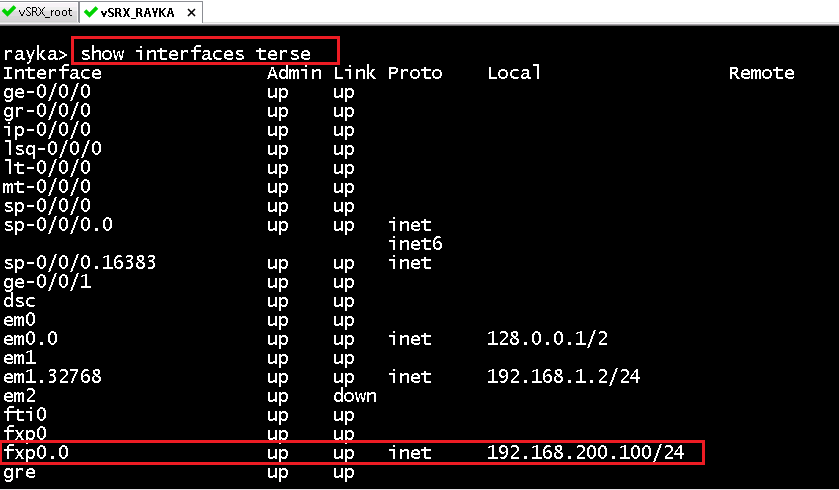
Another important command in operation mode is to check the status and IP address of all interfaces briefly is to use with “show interface terse” command. for example, it shows the status and IP address of management interface, fxp0, which we have configured in the previous section.
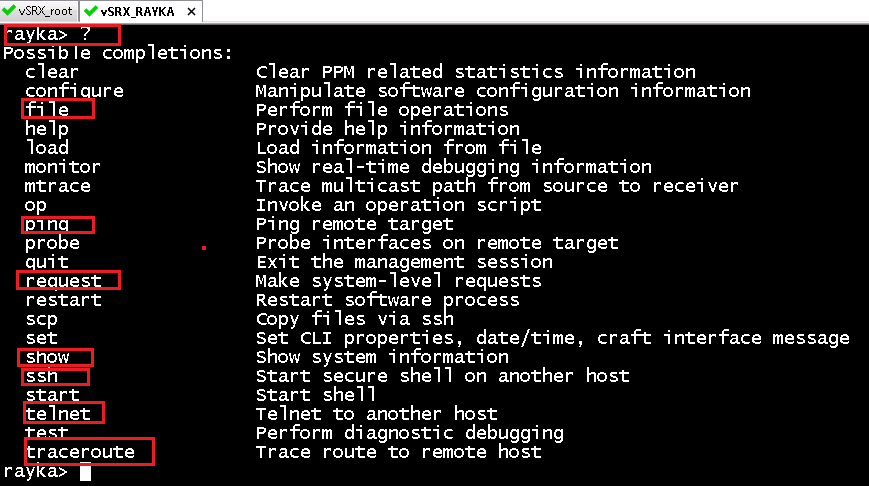
But there are some other monitoring, troubleshooting, and file system commands in operational modes that are also commonly used. It is enough to enter question mark (?) in operational mode to see the list of commands.
monitoring commands are started with the “show” keyword. File system commands are started with the keyword “file” and also some troubleshooting commands like “ping“, “traceroute“, “telnet” and “ssh“. It is also possible to restart the device with the command starting with “request” keyword.
Using “configure” command in CLI operational mode, we enter the configuration mode, where new changes are configured.
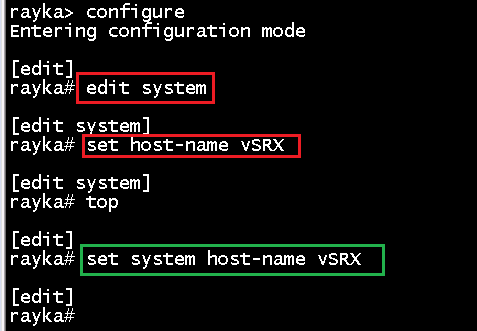
Probably the easiest configuration is to change the hostname. It is two ways to change the hostname.
In the first method, we go the the system context with “edit system” command. then we change the hostname with “set hostname vSRX” command.
rayka> configure
Entering configuration mode

[edit]
rayka# edit system

[edit system]
rayka# set host-name vSRX

[edit system]
rayka#
In the second method, we change the configuration without entering any context and directly with set command. for changing the hostname we use “set system hostname vSRX”
rayka# set system host-name vSRX

[edit]
rayka# If you want to see what changes you have made to the configuration that has not yet been applied, you can do this with “show | compare” command.
rayka# show | compare
[edit system]
+  host-name vSRX;

[edit]
rayka#
The plus sign (+) indicates that the configuration is added to the current configuration. the output shows that the hostname will be changed.
The configuration is not yet applied to the device. you can discard the configuration changes with the “rollback 0” command or apply the configuration changes with the “commit” command.
If we use “rollback 0”, the changes are discarded. To make sure we use, “show | “Compare” command which shows there is no changes to be applied to the device and changes are discarded.
rayka# rollback 0
load complete

[edit]
rayka# show | compare

[edit]
rayka#
If we commit the configuration changes, the hostname of the device will be changed and we can see it immediately.
rayka# set system host-name vSRX

[edit]
rayka# commit

commit complete

[edit]
rayka@vSRX#
We can delete a command after applying, by adding “delete” keyword instead of “set” at the beginning of the command, like “no” in Cisco devices.
rayka@vSRX# delete system host-name

[edit]
rayka@vSRX# show | compare
[edit system]
-  host-name vSRX;

[edit]
rayka@vSRX# commit
commit complete
I want to admit that I like working with the Junos CLI interface, although most of my experiencescome back to Cisco devices, but in my opinion, the Junos CLI interface is better than Cisco devices. Of course, Cisco IOS XR devices are exceptions, which are similar in configuration to Junos devices.