
Downloading F5 BIG-IP virtual edition, activating trial license and F5 BIG-IP initial setup are the topics we will discuss in this section.
In the first step, we download the latest version of “F5 BIG-IP Virtual Edition (VE)” and request trial license.
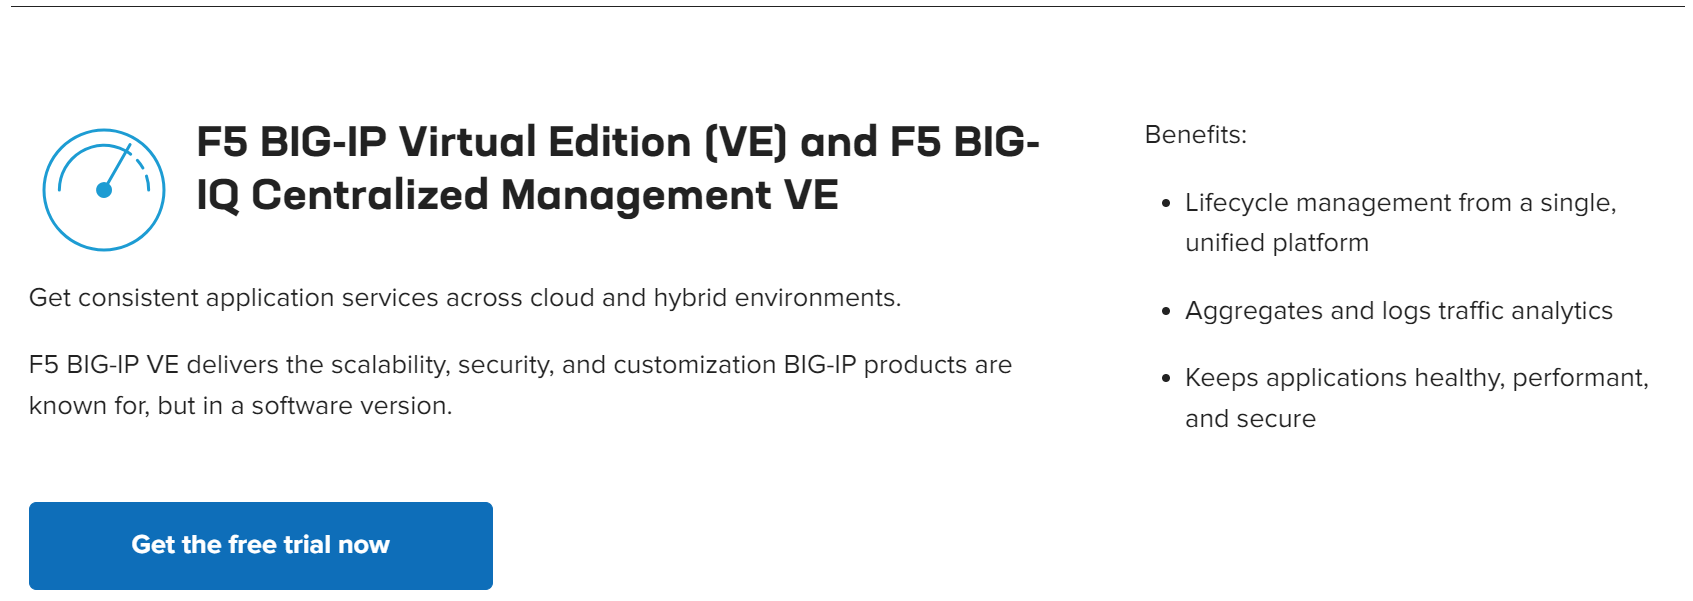
We go to “f5.com/trials“ website and to the section “F5 BIG-IP Virtual Edition (VE) and F5 BIG-IQ Centralized Management VE” and click on the “Get the free trial now” button.
In order to get the 30-day free trial license, we need to follow these four steps.
Login/Register for MyF5. It is recommended that you use a corporate email.
Once you’re logged in, select “Trials” under the “My Products & Plans” tab. Then, find the free trial tile for “BIG-IP Virtual Edition & BIG-IQ Virtual Edition.” Click “Start your trial”
Trial licenses are expected to be emailed to your registered email address.
In the third step we download the F5 BIG-IP Virtual Edition
We download the OVA file to import it into the Vmware ESXi environment.
Product Line: BIG-IP v17.x / Virtual Edition with Traffic Management Operating System® (TMOS®)
Product Version: 17.1.0
17.1.0.2_Virtual-Edition Release Jul 05, 2023 17.1.0.2_Virtual-Edition
BIGIP-17.1.0.2-0.0.2.ALL-vmware.ova Image file set for VMware ESX/i Server 2 GB
and in the last step, we use the trial keys to begin setting up BIG-IP VE in Vmware ESXi environment.
In the next step we import the OVA into the WMware ESX environment.
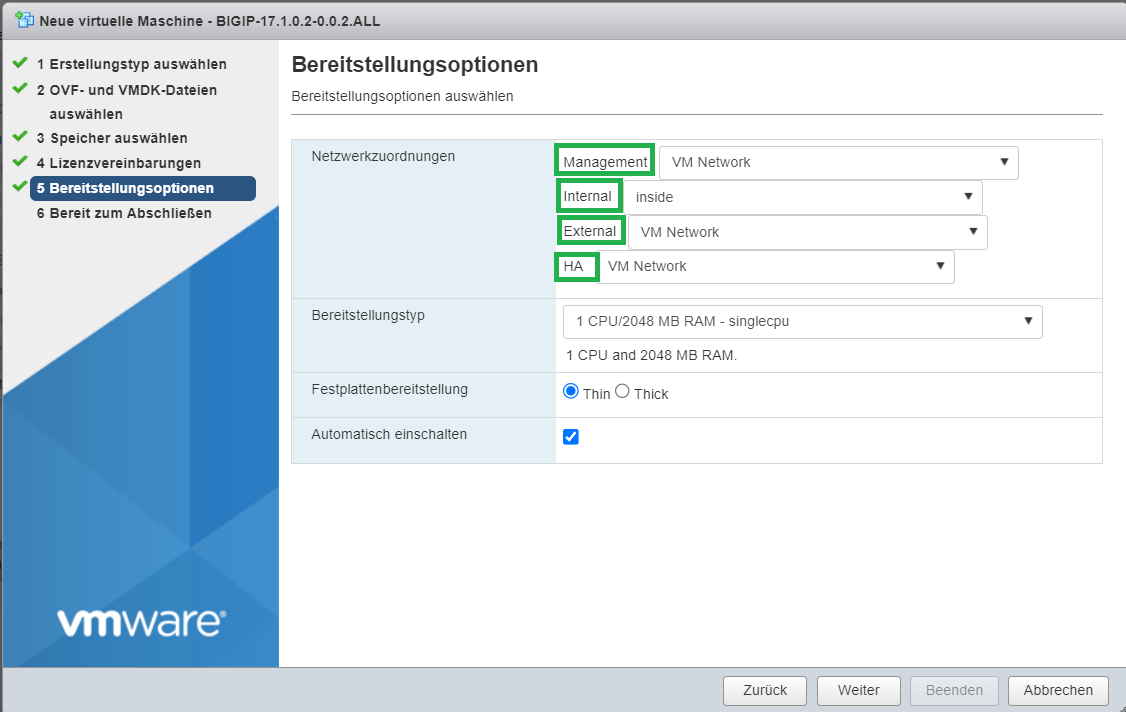
The only point to note is the order of the network interfaces to ensure they are correctly mapped to the port group in the WMware ESX environment
The first interface is the management interface. The second interface is internal interface. The third interface is used for external connectivity and finally the last interface is for redundancy purposes that will be discussed during the course.
I add management, external, and HA in the same port group, default “VM network”, but it is recommended that each interface has its own port group.
We wait for the F5 BIG-IP virtual edition to be imported and loaded.
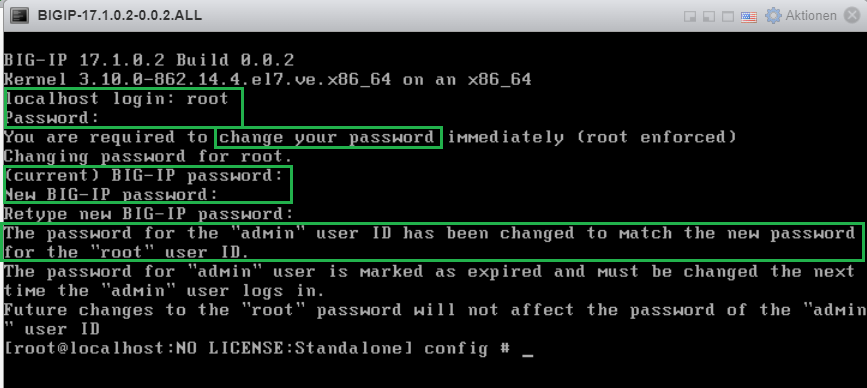
Then we use console default username/password “root/default” to login to the device.
Then we will be asked to change the default root user console password.
Changing the default console password also changes the default web admin user password to the same password. However, the first time you log in to the web, you will be prompted to change the web password as well.
You are now logged into the F5 BIG-IP shell environment, which is actually the bash shell of CentOS Linux distributions and all Linux bash commands are valid here.
The “tmsh” command takes you into the BIG-IP TMOS shell environment, which will be the topic of the next section.
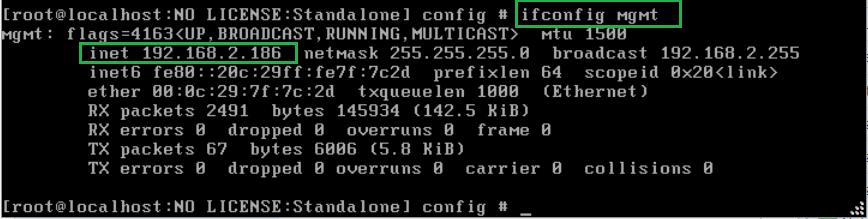
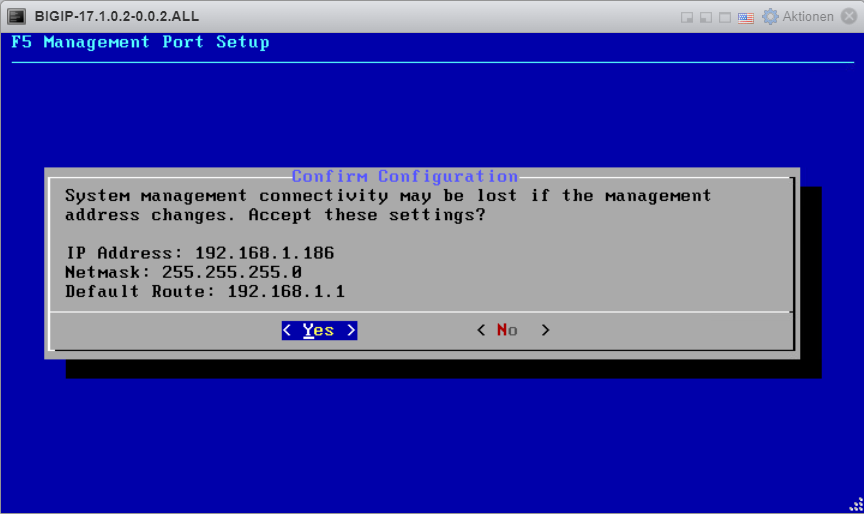
With the command “ifconfig mgmt” you can check the current IP address of F5 interface.
and with the command “config mgmt”, we can change manually the IP address of management interface.
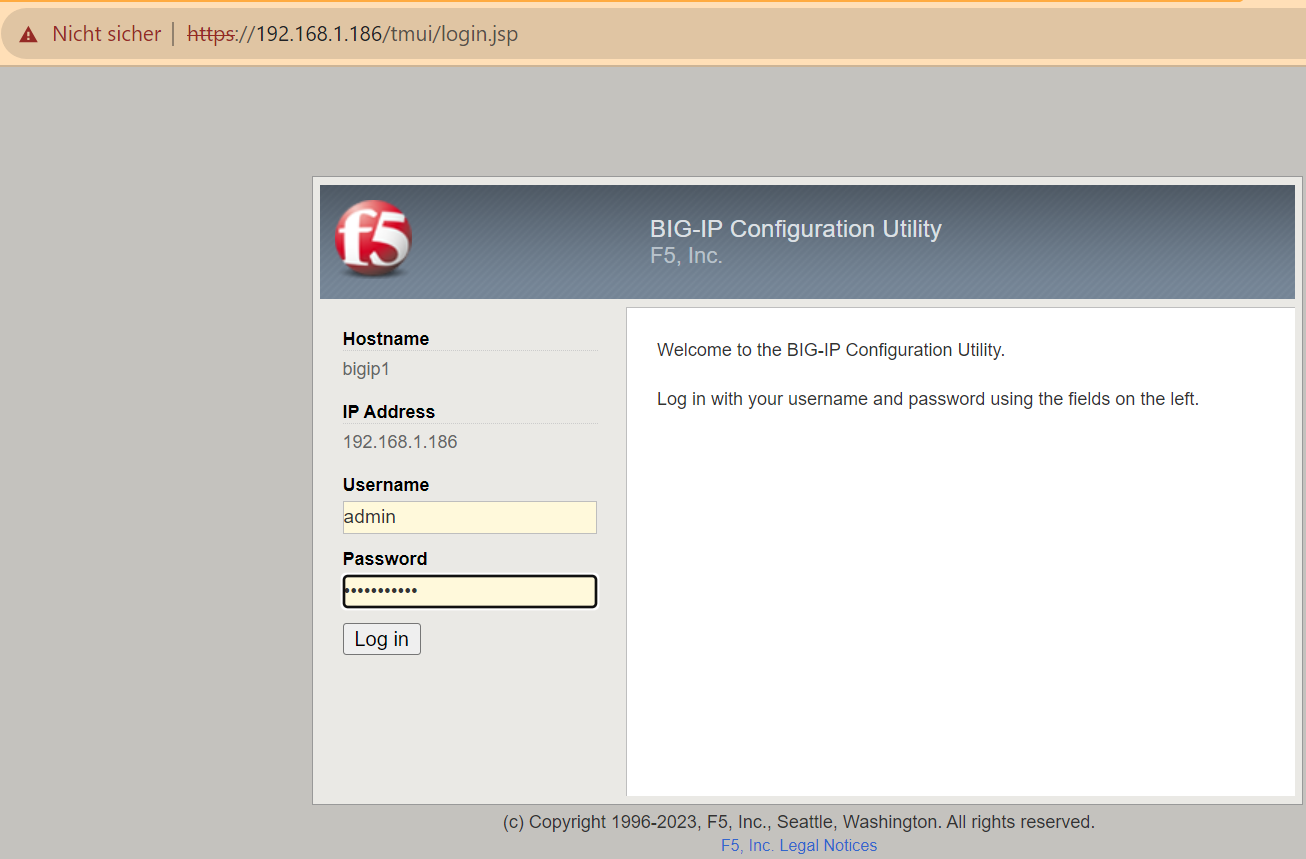
now we are ready to connect and login to the device through web interface.
We login with username “admin” and the same password as the root user that we have changed in the console.
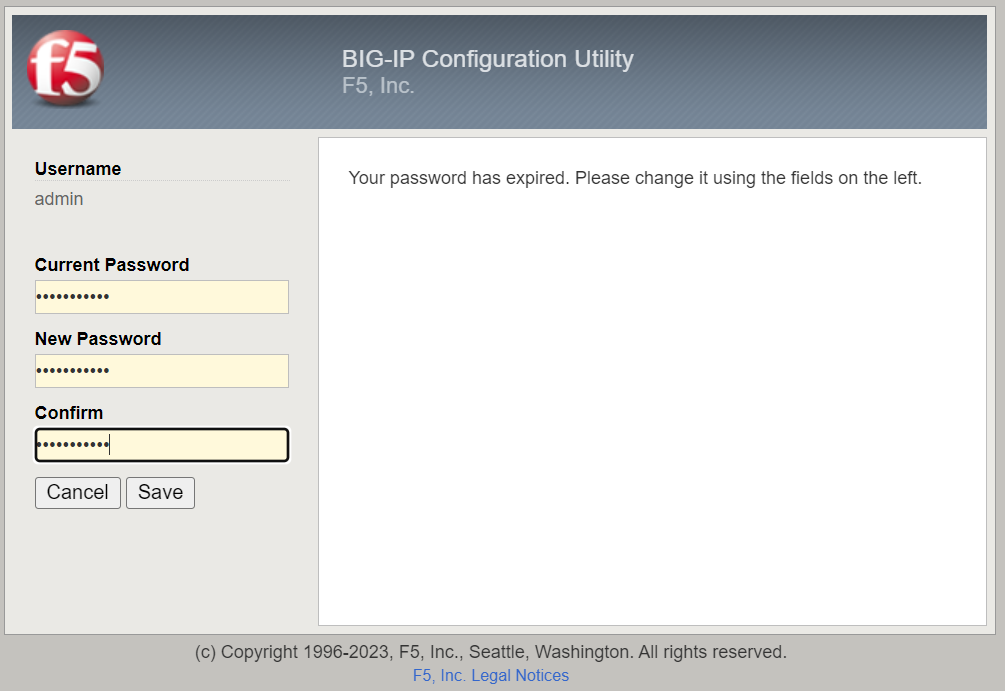
Then we are asked to change the web password.
In my case, the webpage took a long time to open and I kept getting the message “Configuration Utility (GUI) is restarting – Please wait while the Configuration Utility starts.”
According to article number K27856450 on the F5 website, the most common cause is the memory heap limit.
To determine if tomcat is running out of memory, look for the message “OutOfMemoryError” in “/var/log/tomcat/catalina.out” file.
[root@localhost:NO LICENSE:Standalone] config # cat /var/log/tomcat/catalina.out | grep Memory
# java.lang.OutOfMemoryError: Java heap space
# -XX:OnOutOfMemoryError="/usr/bin/restart_tomcat"
# java.lang.OutOfMemoryError: Java heap space
# -XX:OnOutOfMemoryError="/usr/bin/restart_tomcat"
Allocating additional memory to Tomcat according to this article solves the problem.
[root@localhost:NO LICENSE:Standalone] config # tmsh modify /sys db provision.tomcat.extramb value 250
[root@localhost:NO LICENSE:Standalone] config # tmsh restart /sys service tomcat
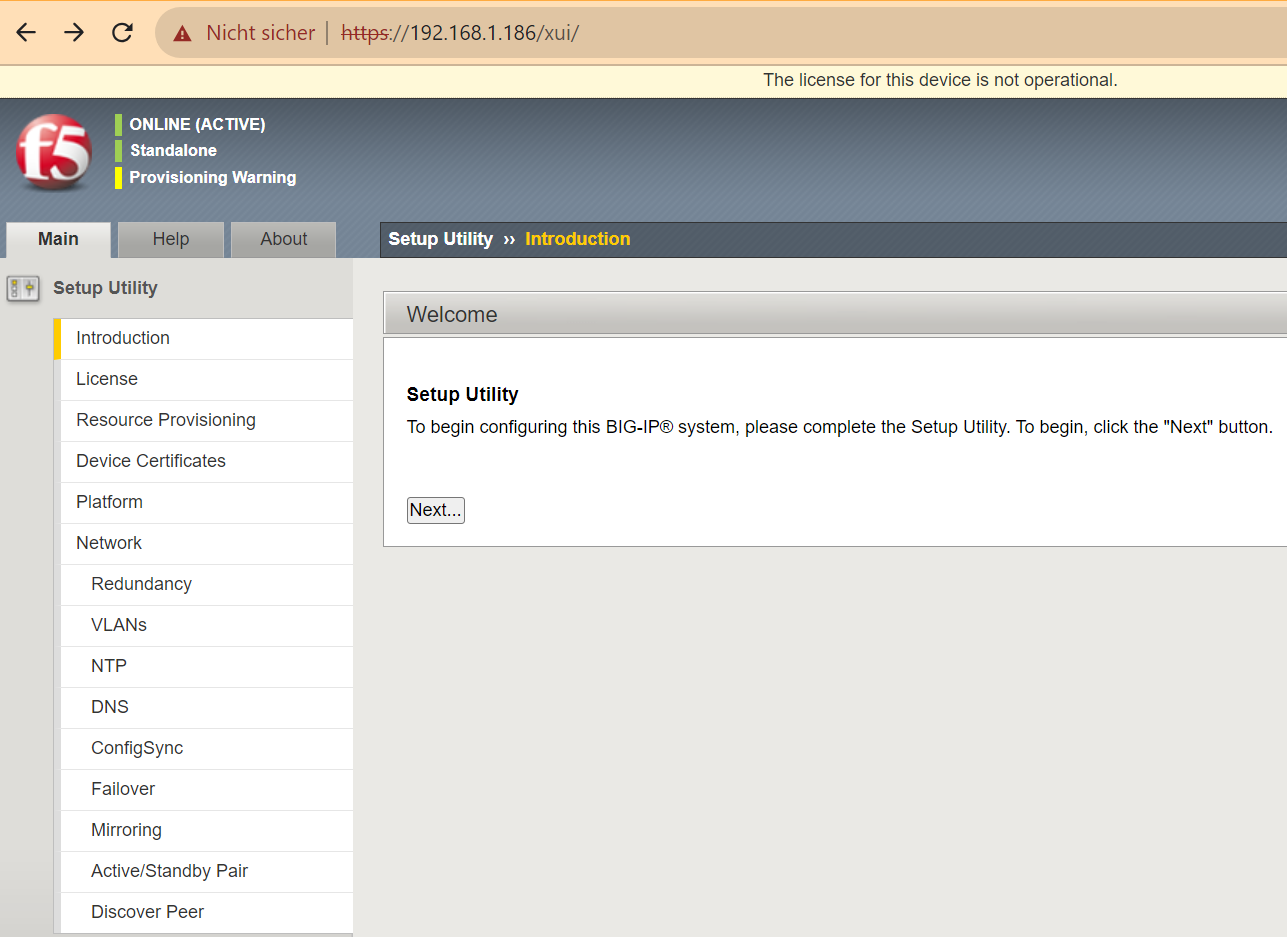
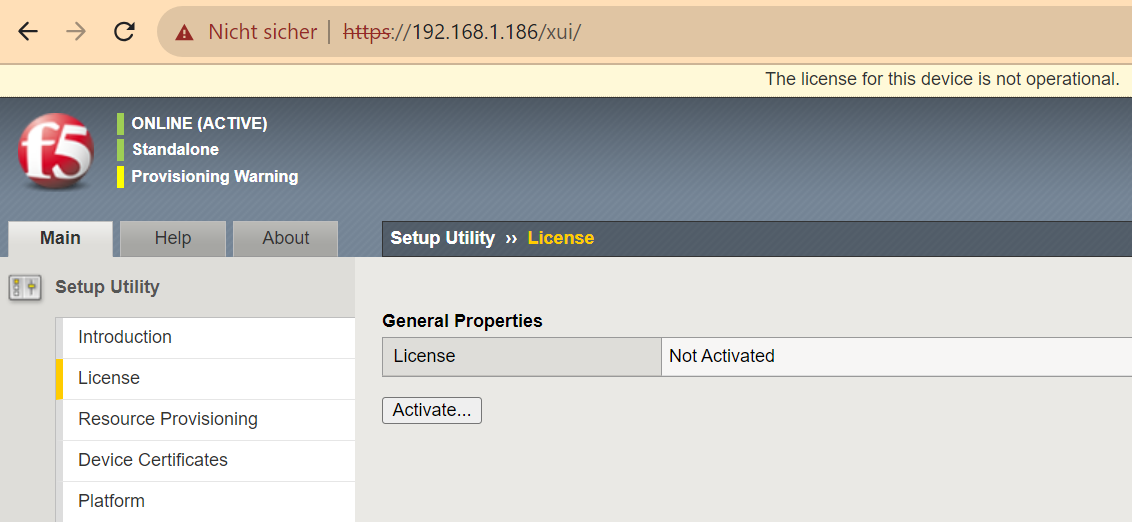
When you connect to the F5 BIG-IP web interface for the first time, you will be automatically directed to the setup utility.
Clicking the Next button takes you to the license page. Here you select the “Activate” key.
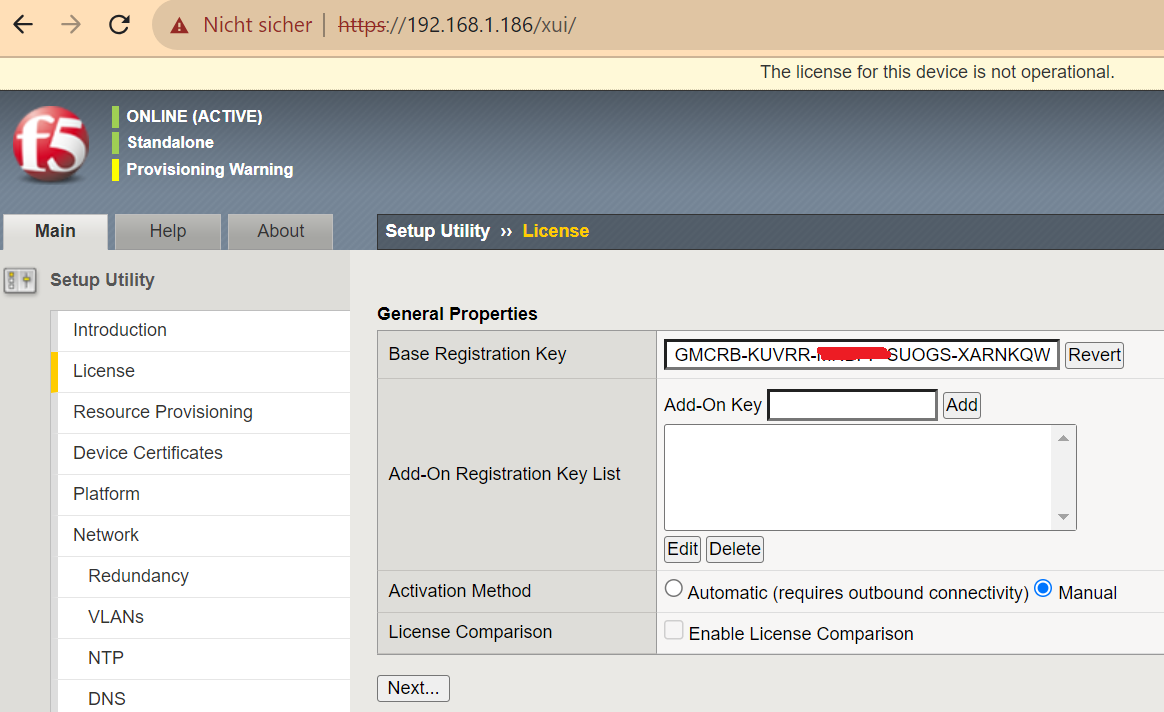
In the section “Base Reintegration Key”, enter the trial license key that you received via F5.
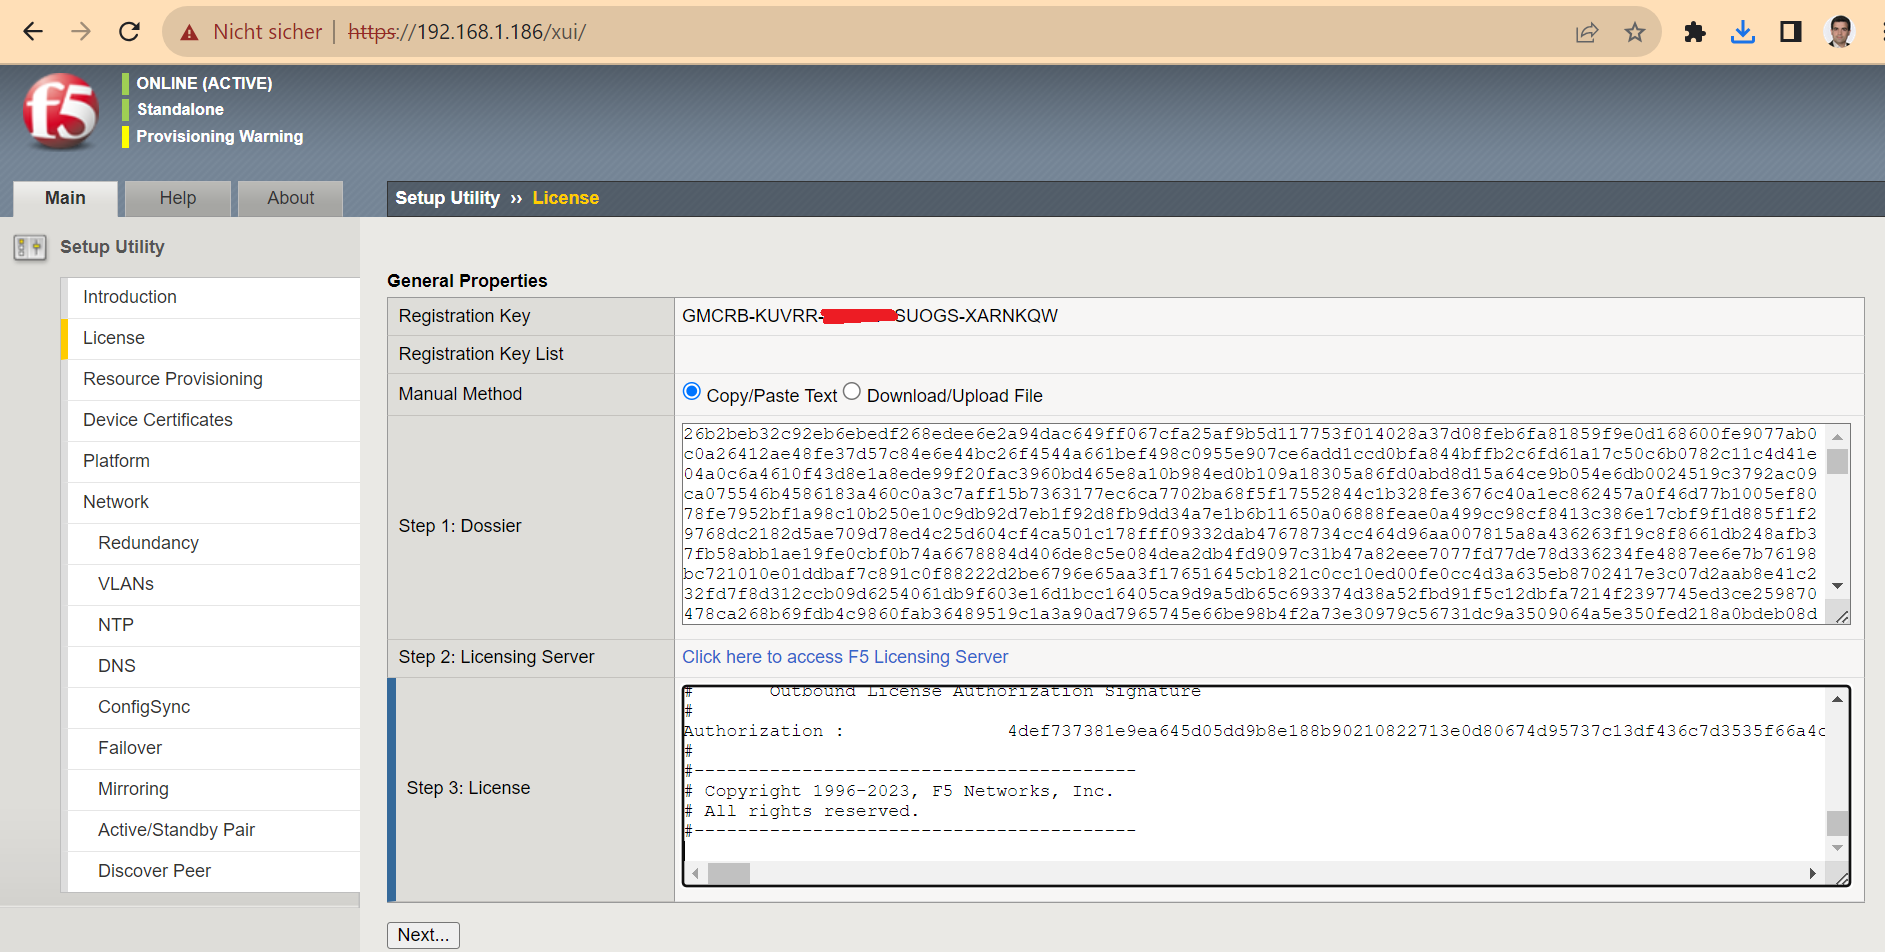
In the “Activation Method”, choose the “Manual” method. Then next.
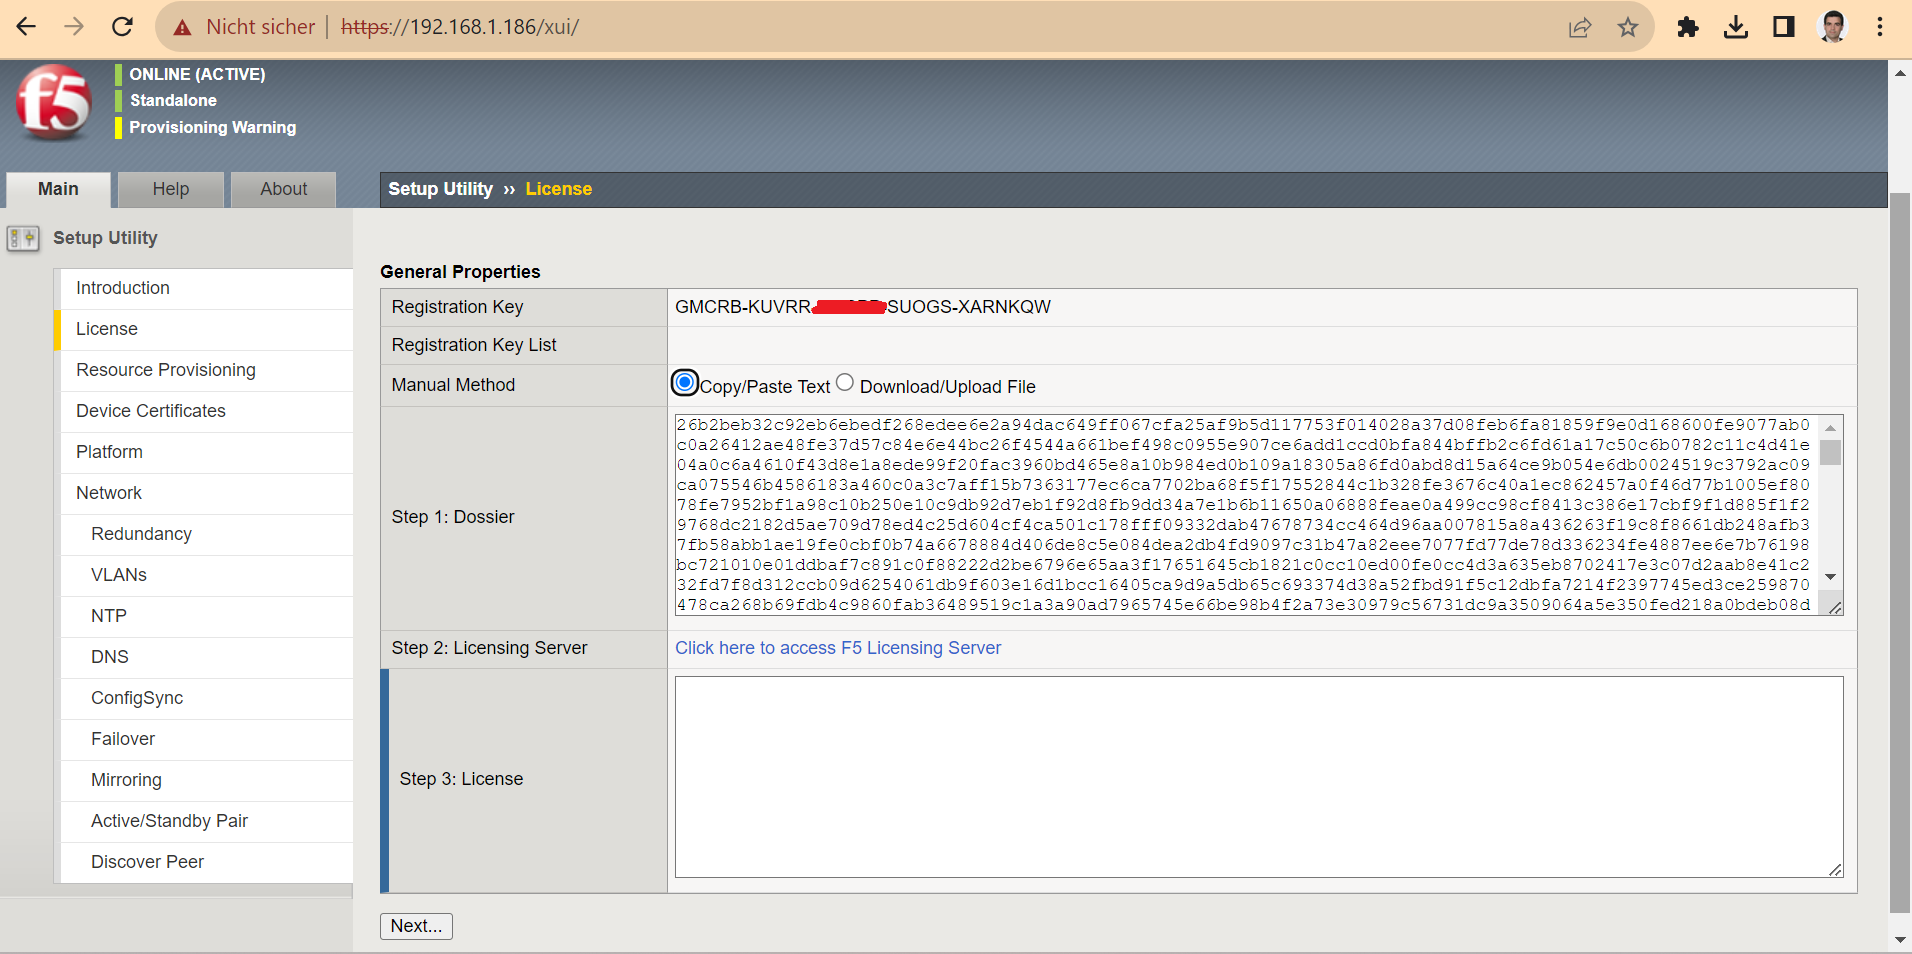
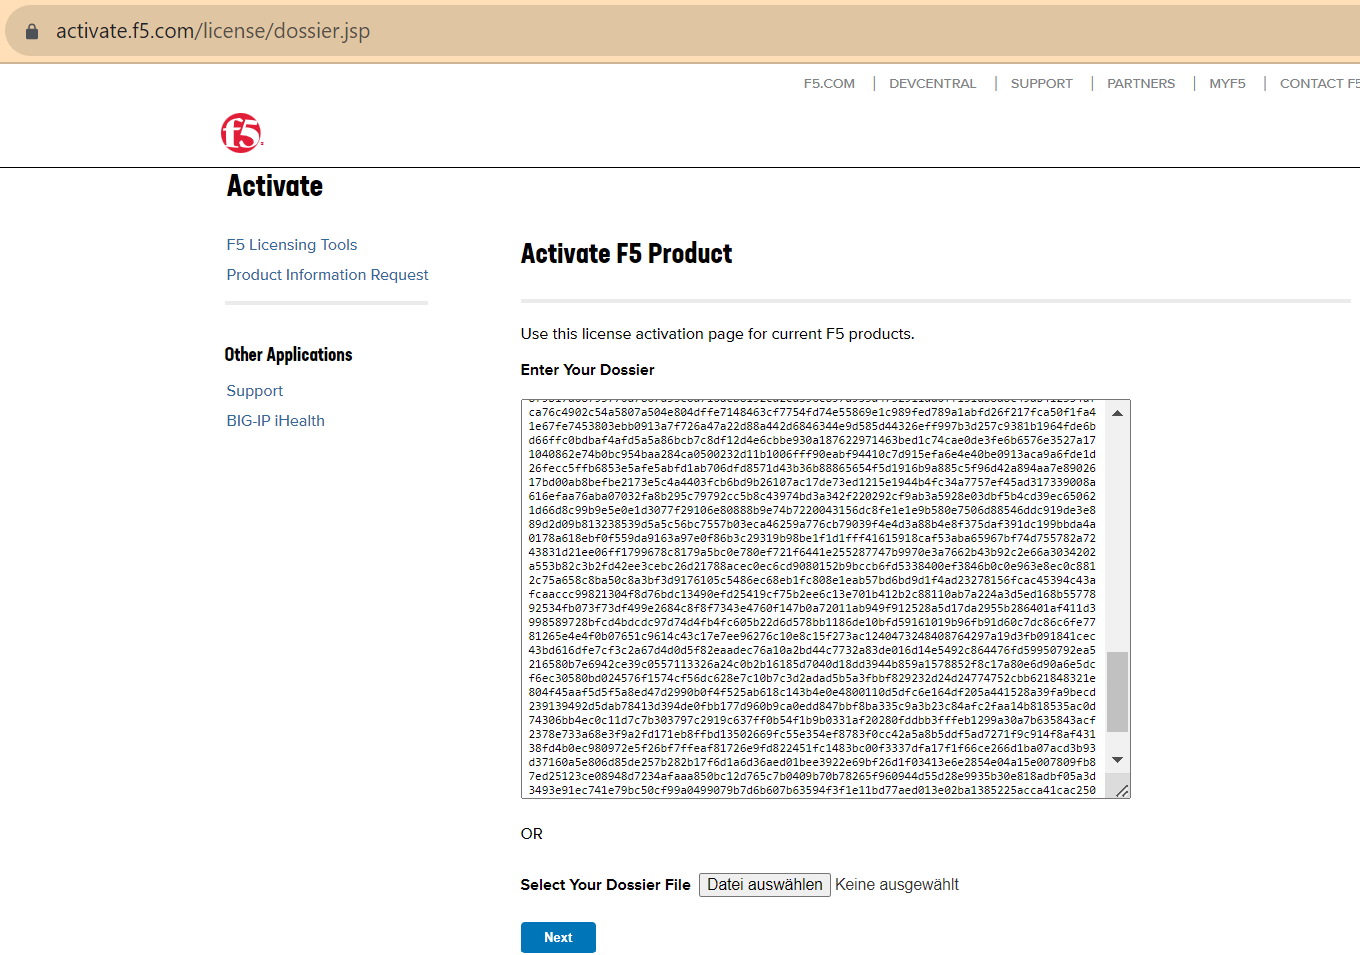
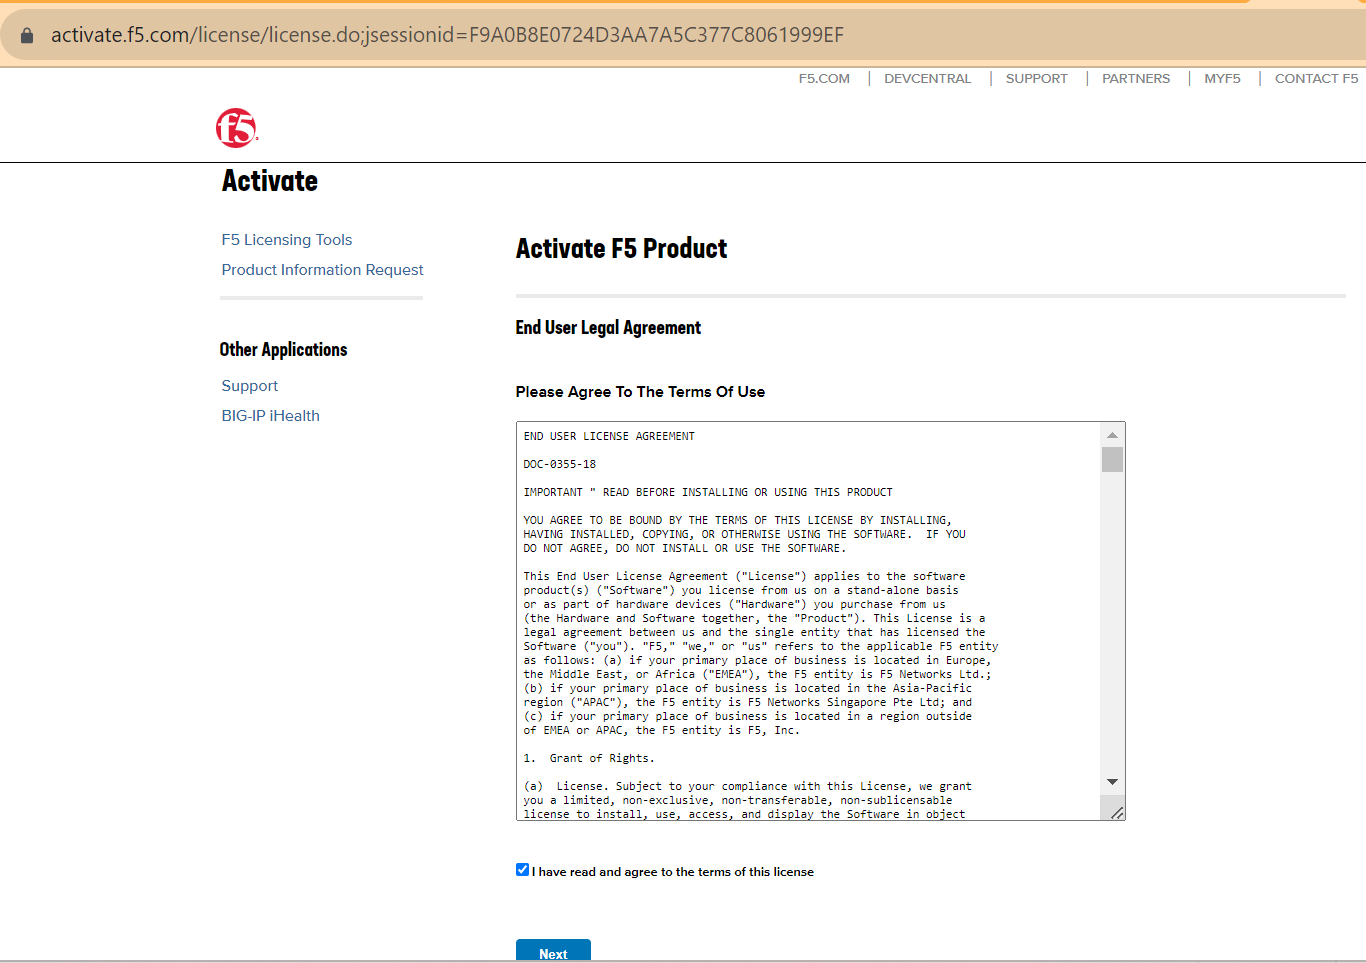
In the next page, you will be given a text and a link.
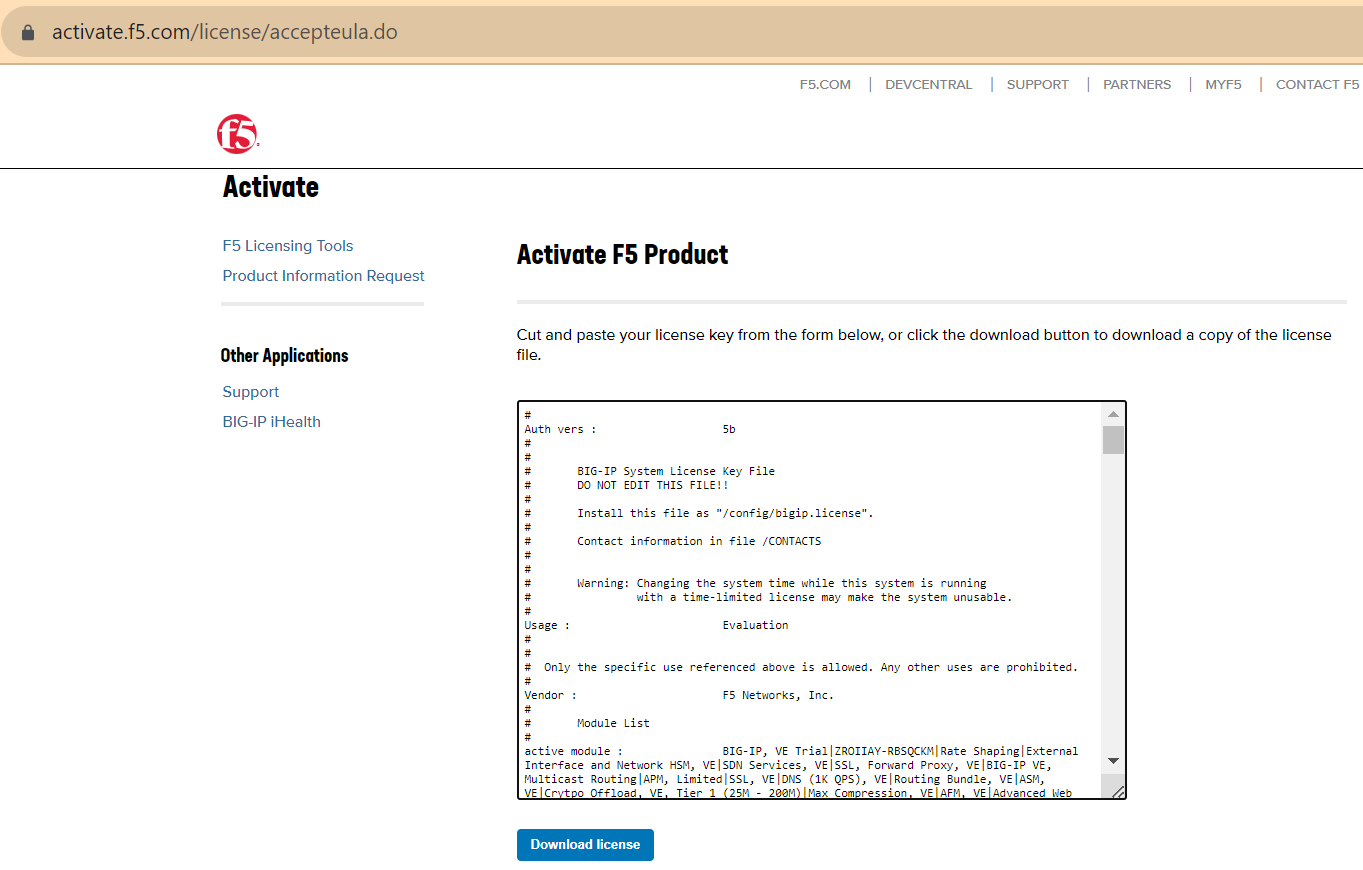
Copy the text in the link and receive your license which is along text or text file.
Then copy the obtained license text in the “License” section of “License” page and then press the next key.
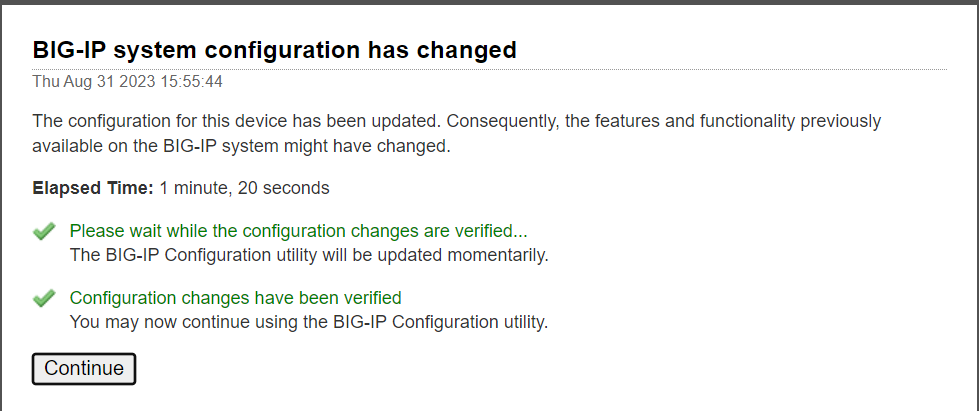
Now license is activated.
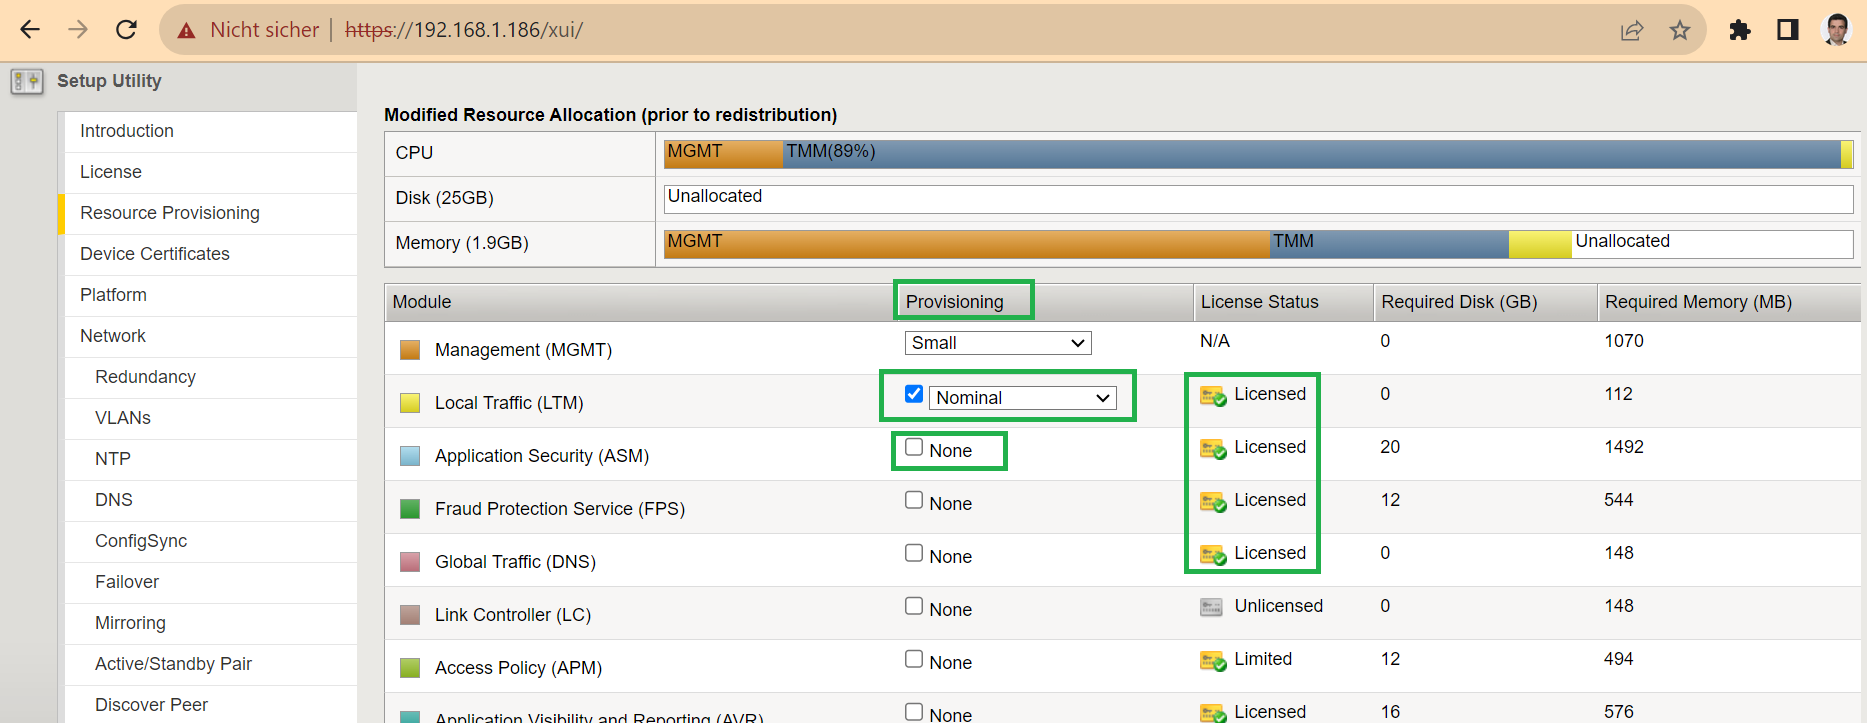
After license activation, you will be redirected to the “Resource Provisioning” page, which shows all BIG-IP supported modules and the modules licensed by the trial key.
Many modules are licensed, but only the LTM module license is provisioned by default.
By simply selecting the “provisioning” section of any of the licensed modules, you can activate them and use them free of charge for 30 days.
In this course we only need the LTM module, so we will not choose any other module.
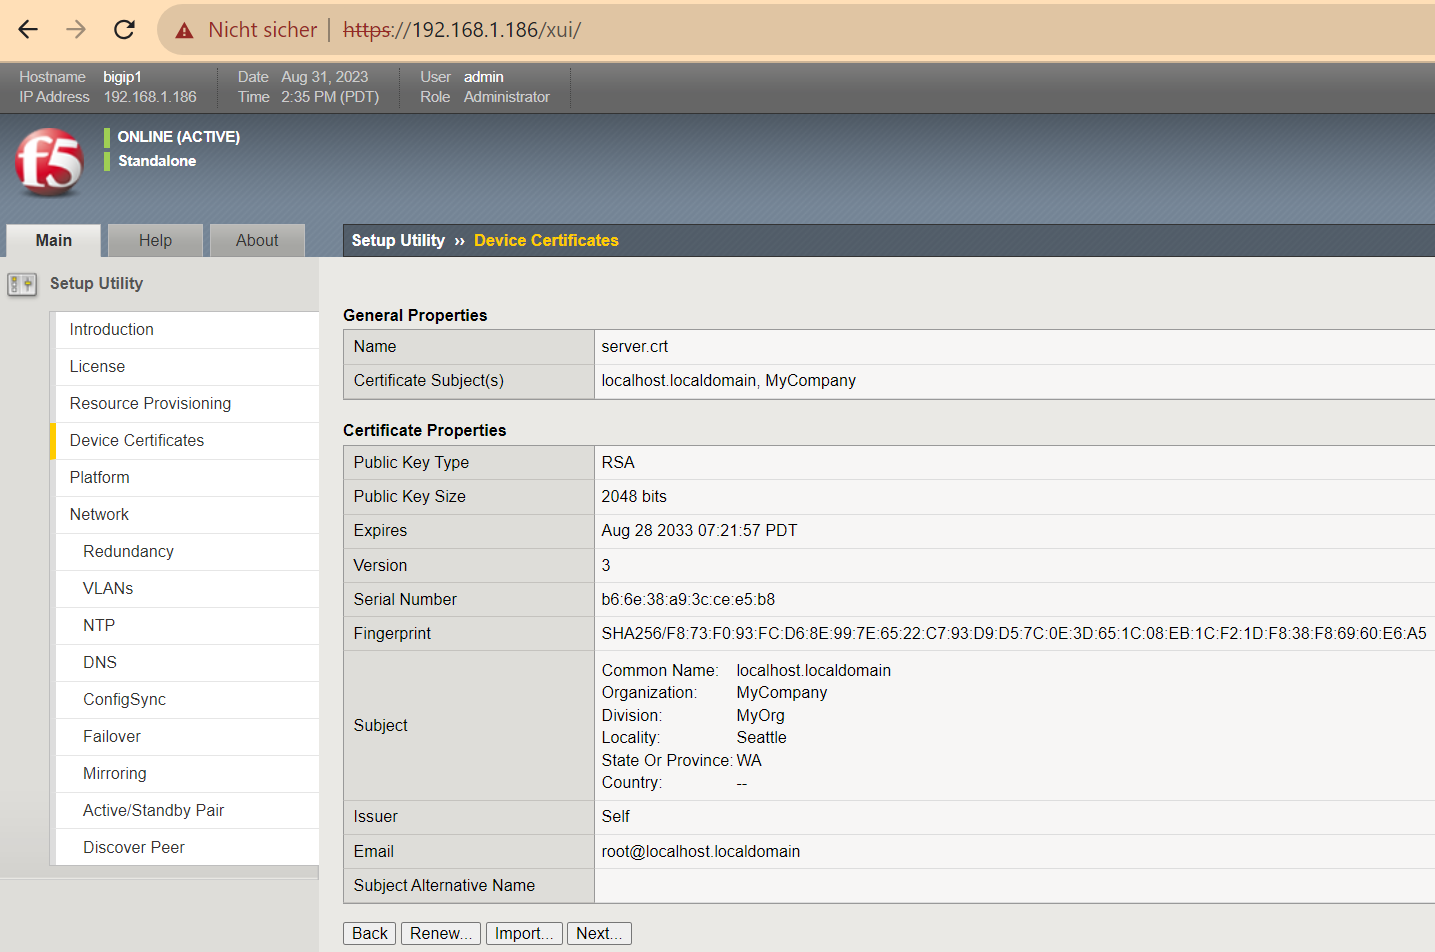
On the next page you can change the device certificate, which we ignore.
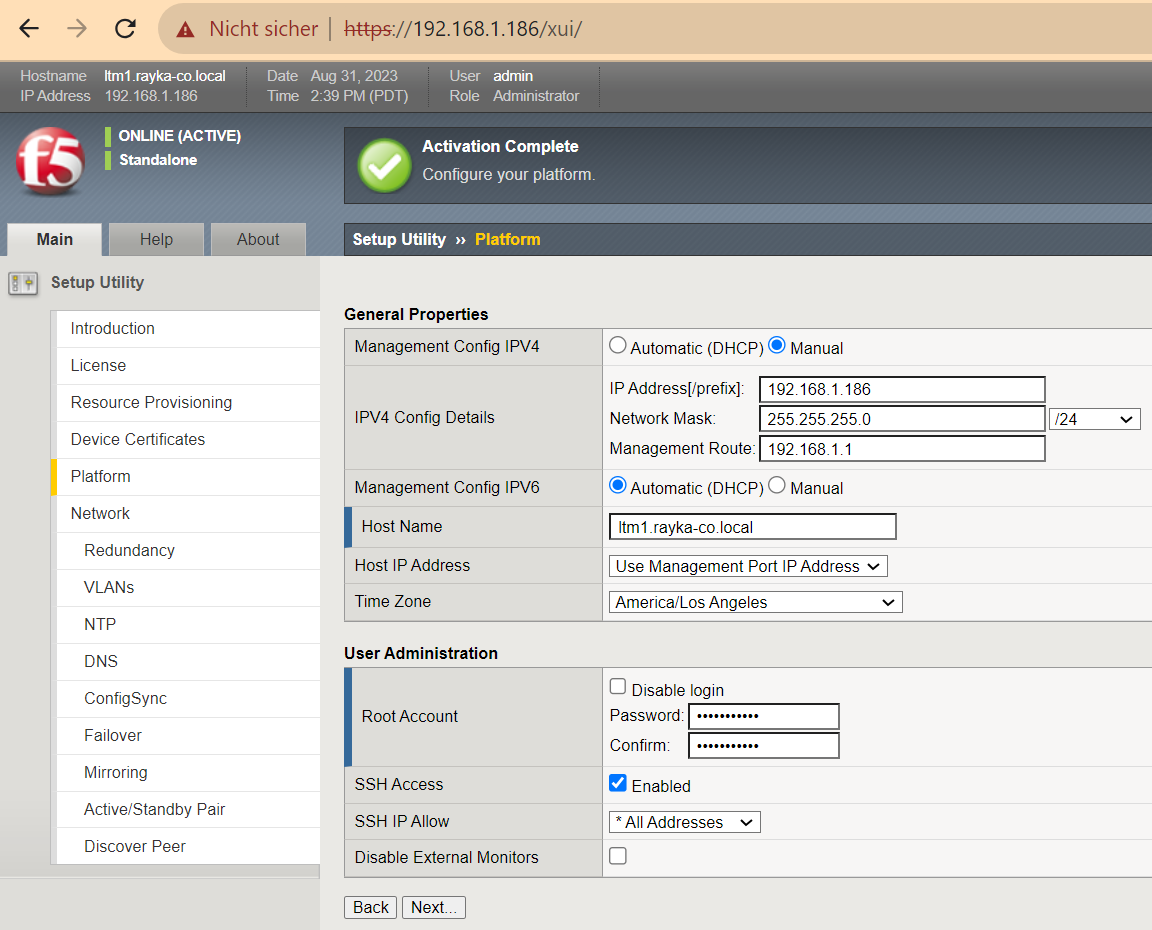
!!! mgmt interface
IP address: 192.168.1.86/24
management route: 192.168.1.1
hostname: ltm1.rayka-co.local
SSH access: enable
On the next “Platform” page, we can change the management IP address, the device’s host name, the time zone, and enable or disable the device’s SSH access.
We must also enter the root password twice to continue.
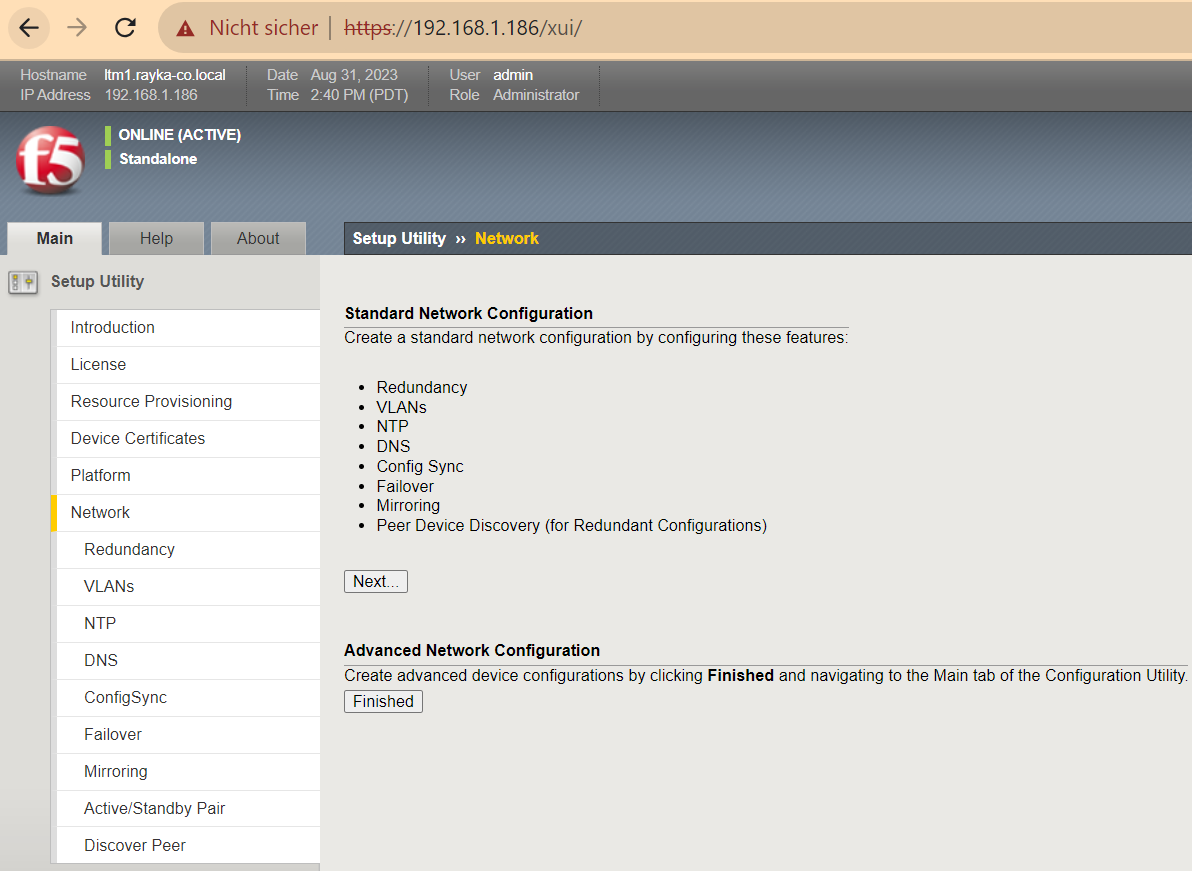
In the network page, you are allowed to configure redundancy, VLANs and interfaces, NTP, DNS and some other network related options.
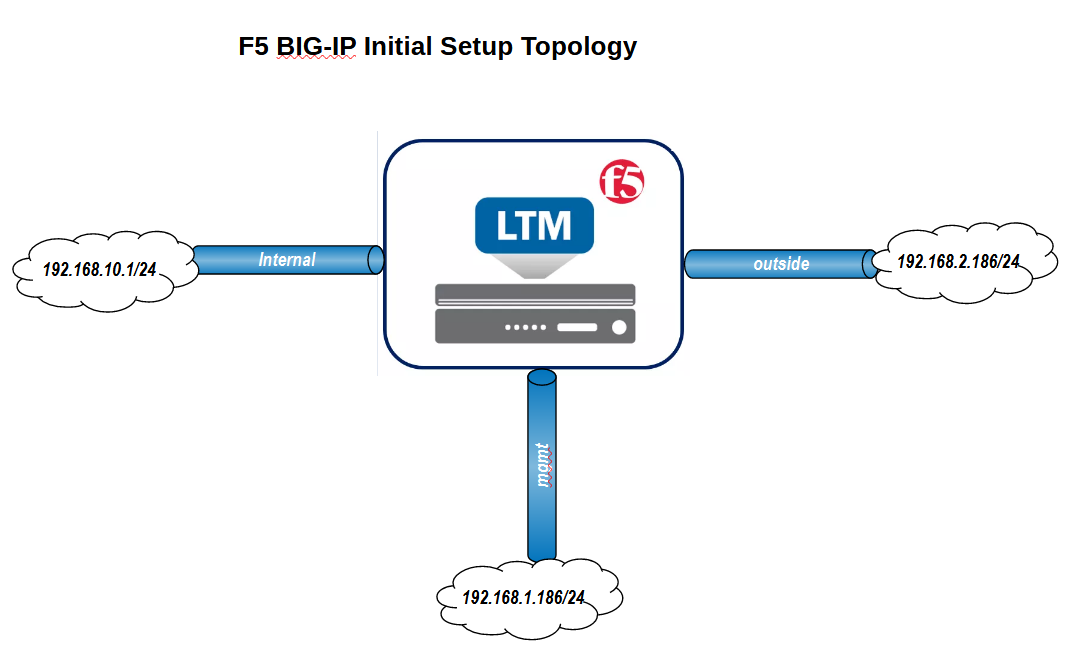
This is the topology that we want to implement in the initial setup.
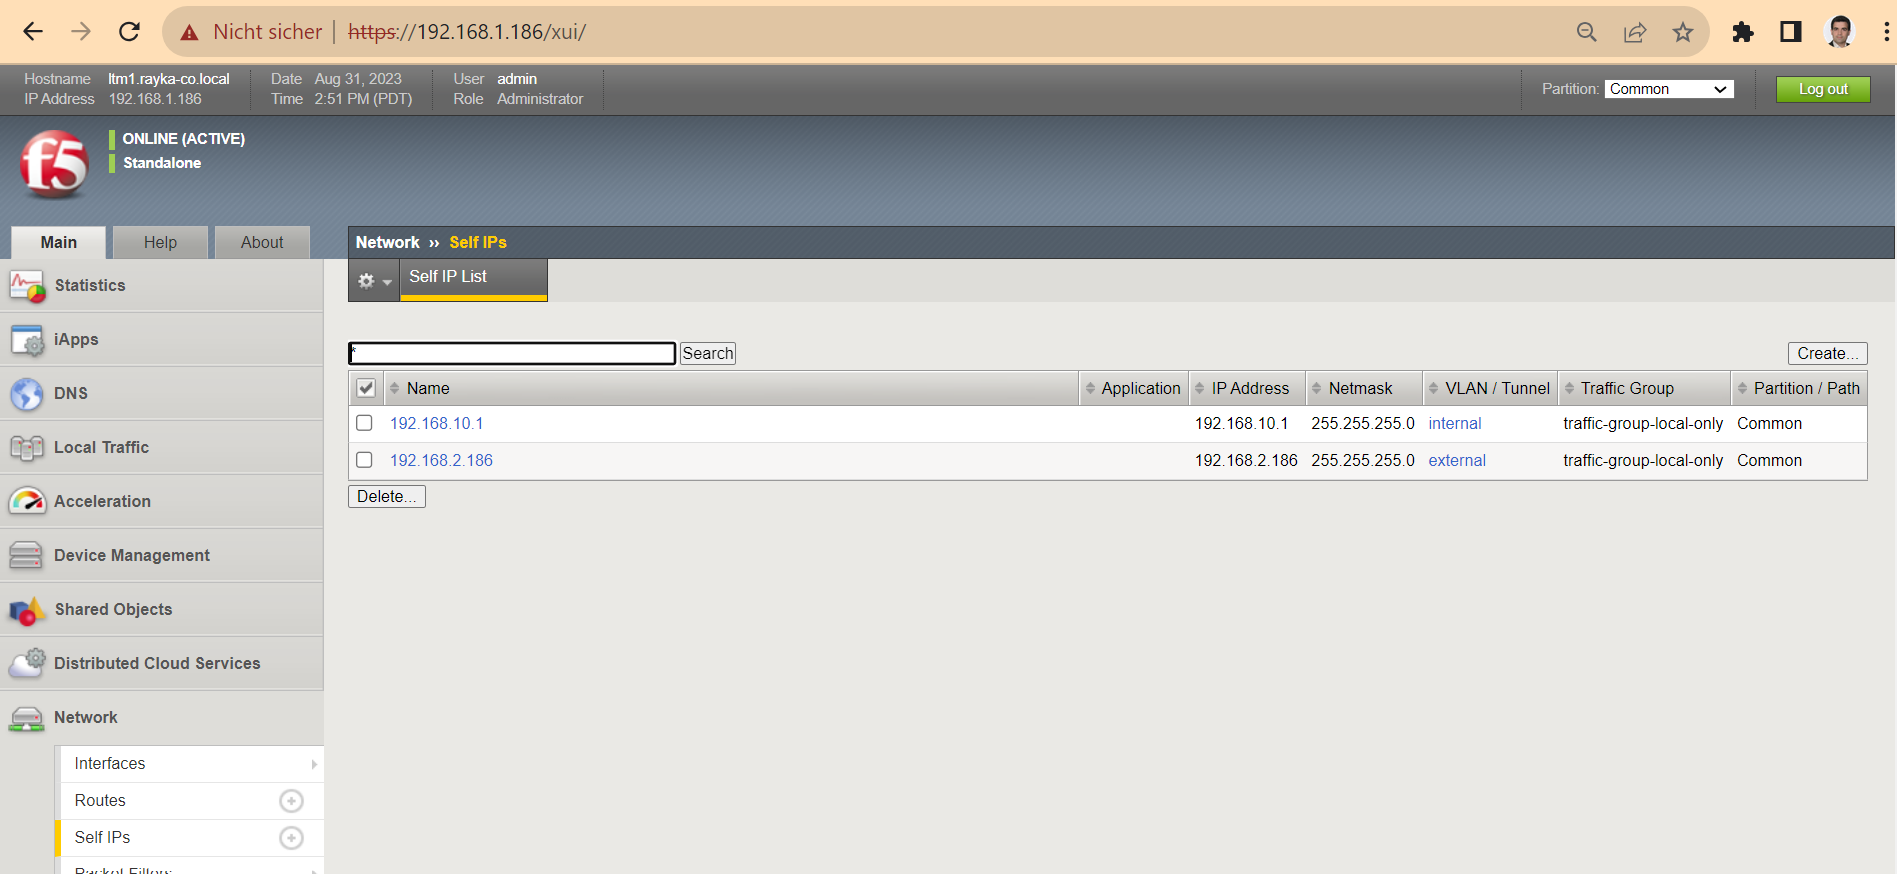
Management interface through which I connect to F5 BIG-IP. Internal interface with IP address 192.168.10.1/24 to connect to internal servers and external interface with IP address 192.168.2.186/24 to connect to the Internet.
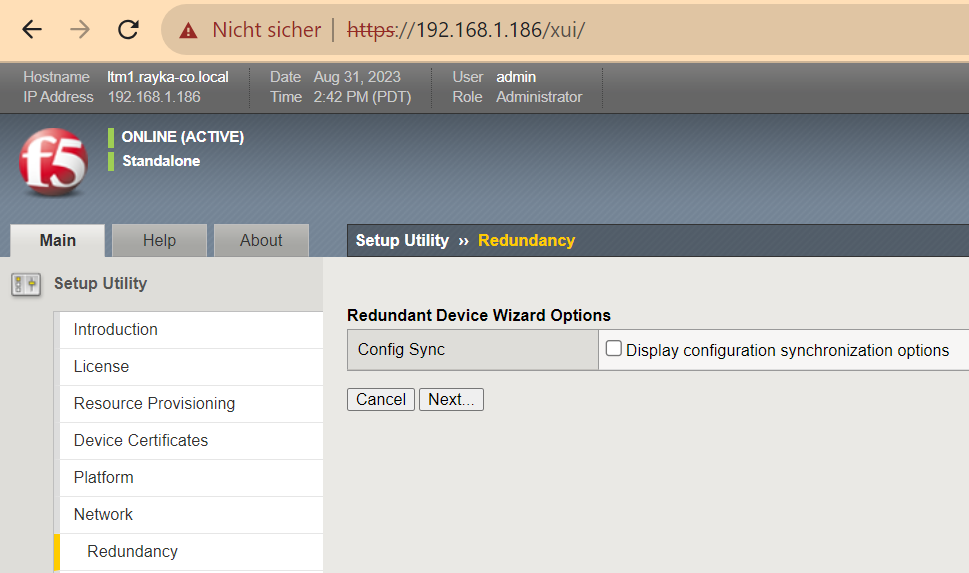
On the “Redundancy” page, we disable the “Config Sync” option because we will not configure any redundancy during the initial setup.
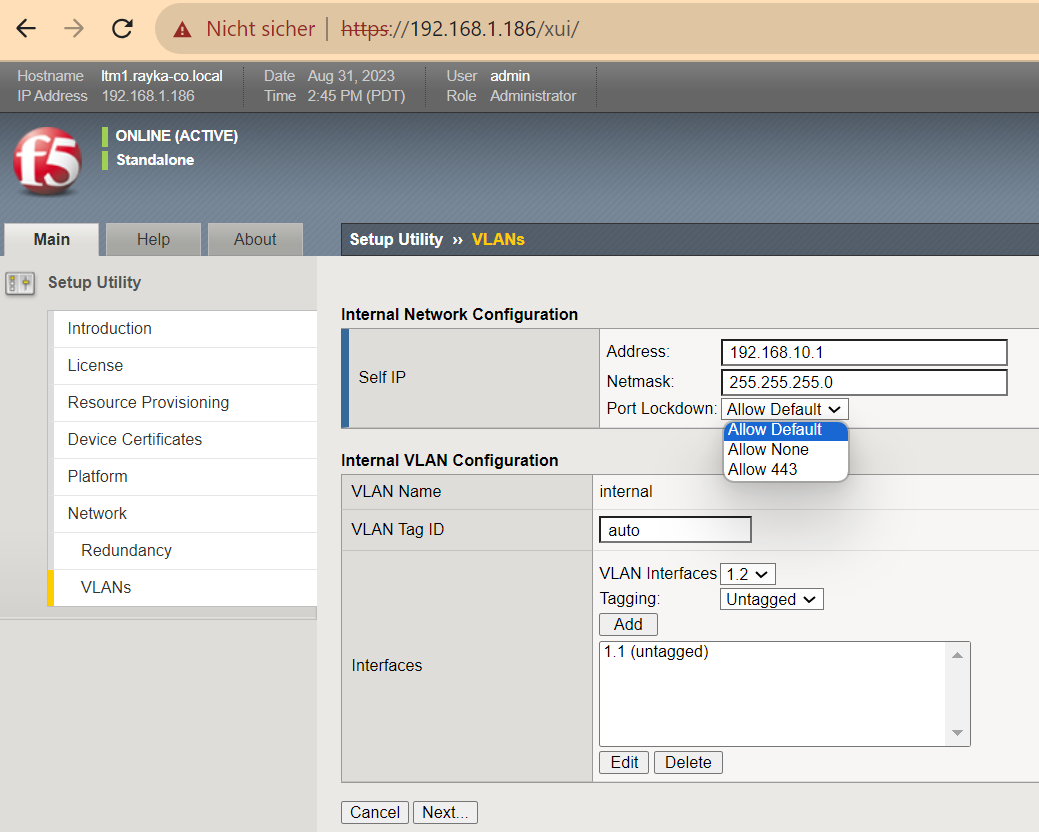
On the “VLANs” pages we first configure the “internal” and then the “external” interface.
We give the IP address, subnet mask and open ports on the interface.
With the “Allow Default” option, we open well-known management and control ports such as HTTPS, SSH, DNS, as well as unicast and multicast routing protocols, RIP, OSPF, IGMP and PIM.
With the “Allow 443” option we only open an HTTPS connection to the interface and with “Allow None“, every connection to the interface itself is not allowed.
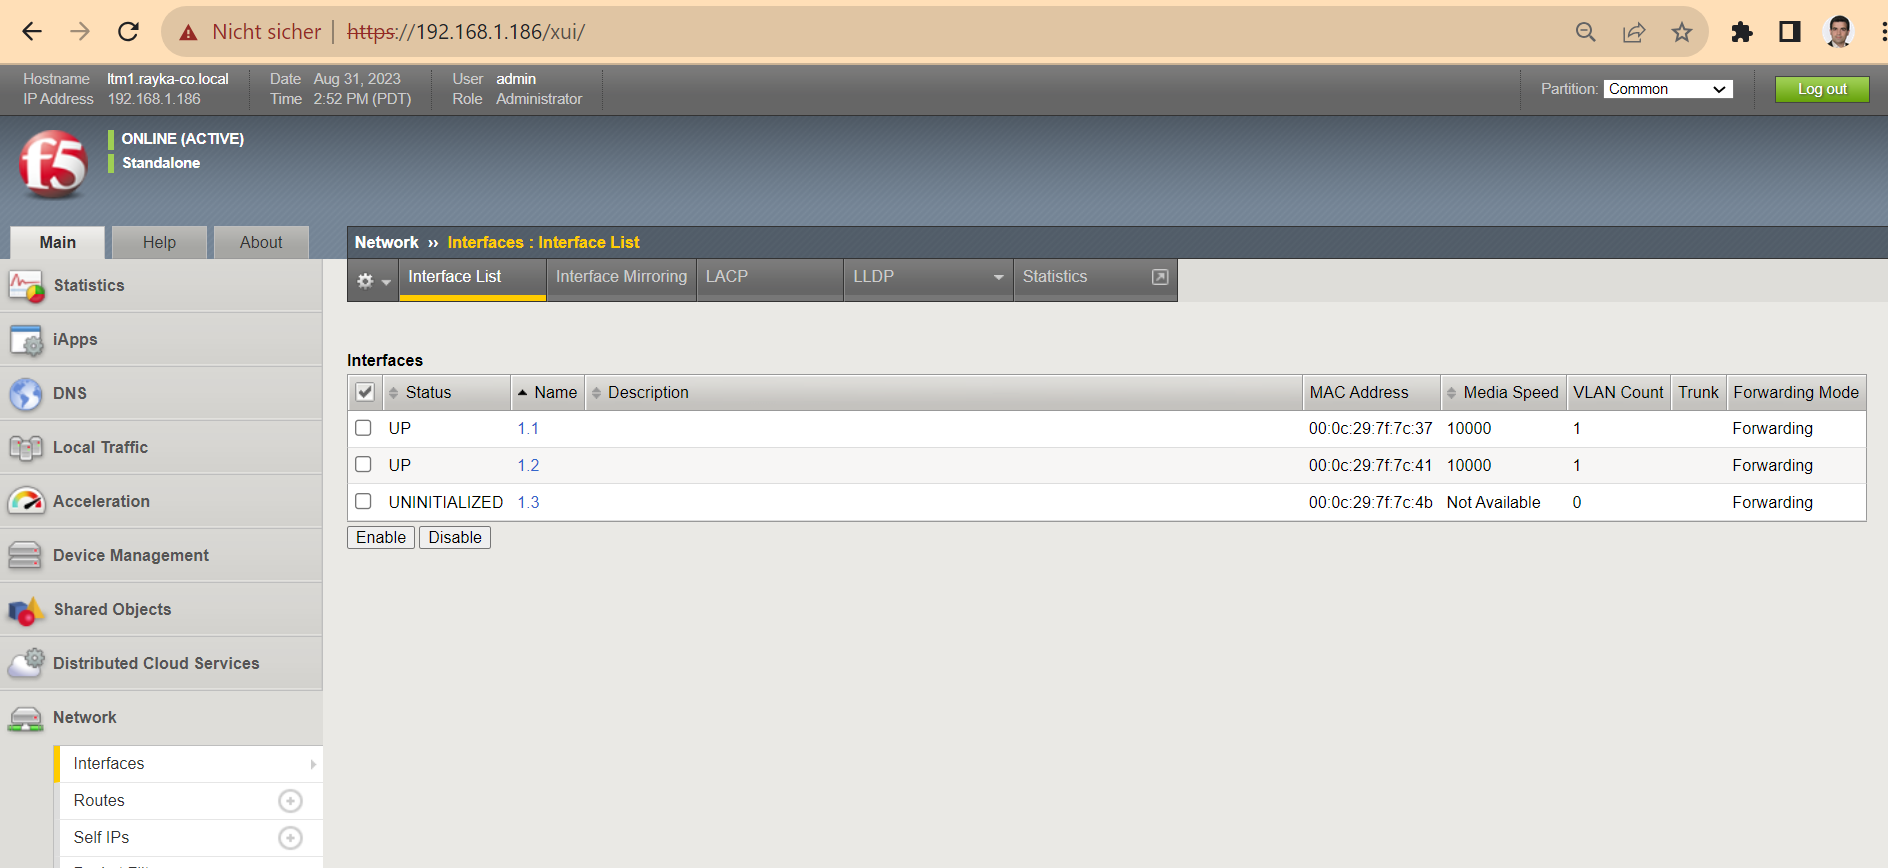
The VLAN interface “1.1” is selected for the internal interface, because, if you remember, it was the first interface after the management interface in the OVA configuration. I also choose „untagged“ because I have not configured VLAN tagging in the port groups in the VMware environment.
!!! internal interface
IP address: 192.168.10.1/24
port lockdown: Allow Default
VLAN interfaces: 1.1 (untagged)
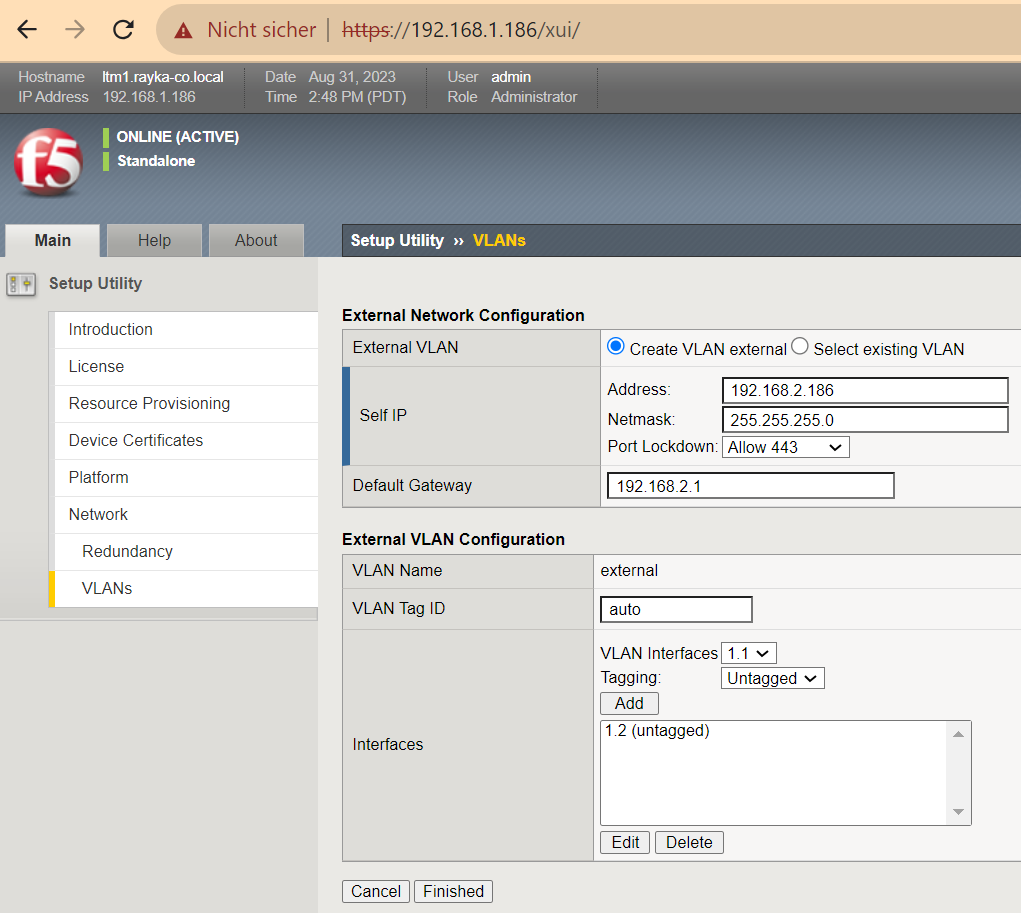
On the next and last page of the initial setup, we configure the IP address of the external interface, the allowed ports and the interface number.
!!! external interface
IP address: 192.168.2.186/24
port lockdown: Allow 443
VLAN interfaces: 1.2 (untagged)
Now we have configured F5 BIG-IP initially and are ready for the actual load balancer configuration which will be discussed in the next sections.
We can check the licensing information in the system section and network configuration in the network section.