To complete BIG-IP LTM Lab topology, we need some web servers to be used as example web servers behind the LTM load-balancer.
In this section we show how to prepare sample web servers with SliTaz, a lightweight Linux operating system.
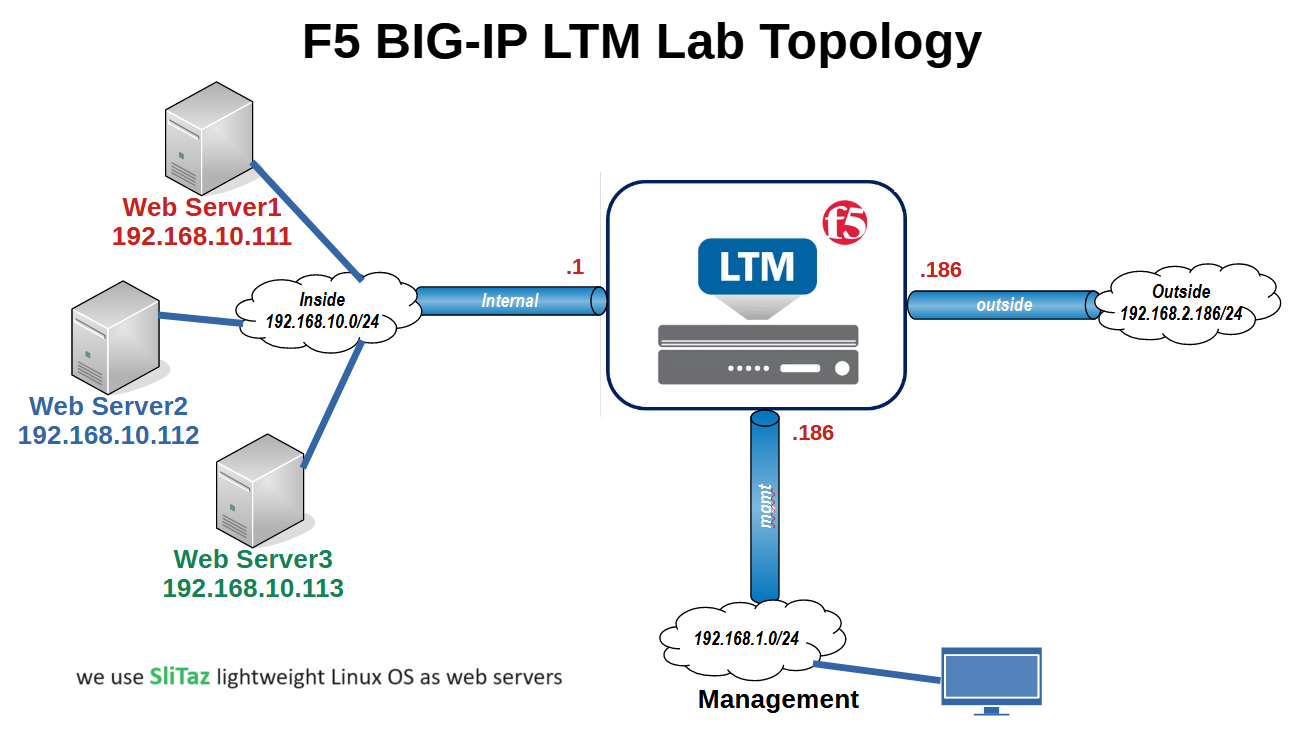
This is the lab topology that we initialized and configured in the previous section.
A management interface with an IP address of 192.168.1.186, an external interface on the subnet 192.168.2.0/24 and an IP address of .186, and an internal interface on the subnet 192.168.10.0/24 and an IP address of 192.168. 10.1”.
However, to configure and test different load balancing scenarios, we need some servers behind BIG-IP LTM to be used during the course.
We prepare three web servers with IP addresses “.111”, “.112” and “.113” that can be accessed via the BIG-IP load-balancer solution and a virtual IP address.
As recommended by the F5 community, we use the lightweight Linux operating system SliTaz for the web servers. In this section you will learn how to prepare these small web servers
To prepare lightweight web servers, we first need to download the Slitaz Linux operating system.
This website is the original source to download the SliTaz image file.
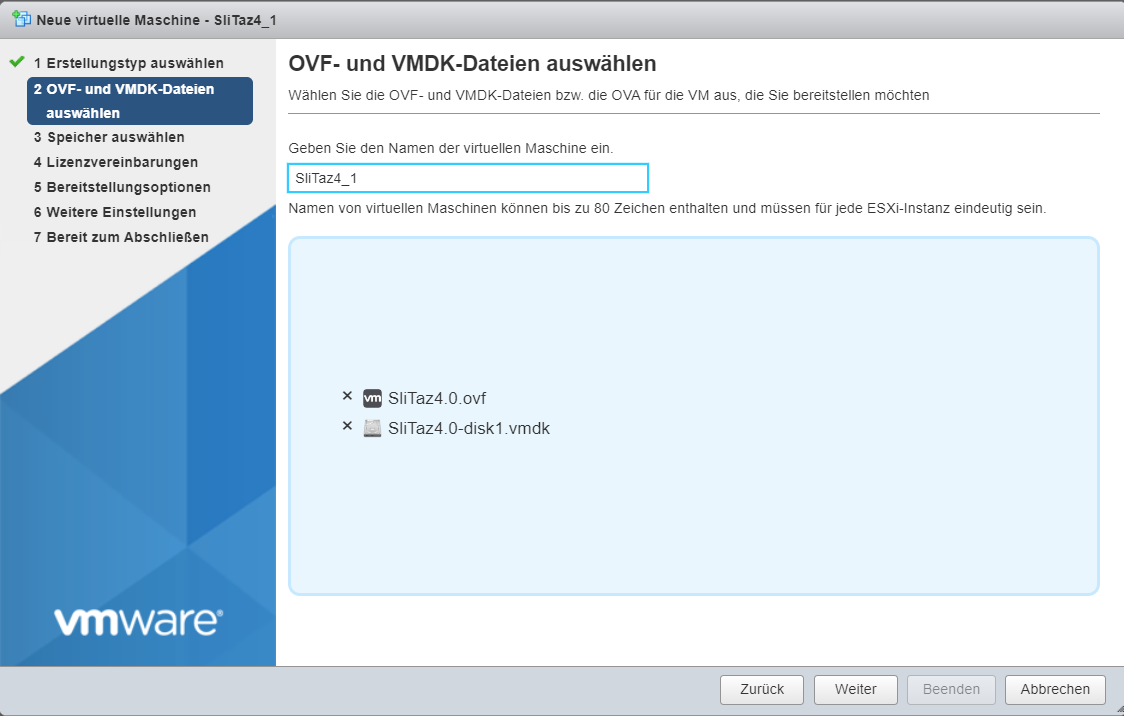
But the VMware OVF version of SliTaz can be downloaded from this link that I used for my topology.
The downloaded ZIP file contains three files, “ovf”, “vmdk”, and “mf” files that we use to load SliTaz into VMware ESX environment.
After OVF is imported into the VMware ESX environment, we need to change the IP address of the virtual machine and also configure a sample web page for the pre-configured web server.
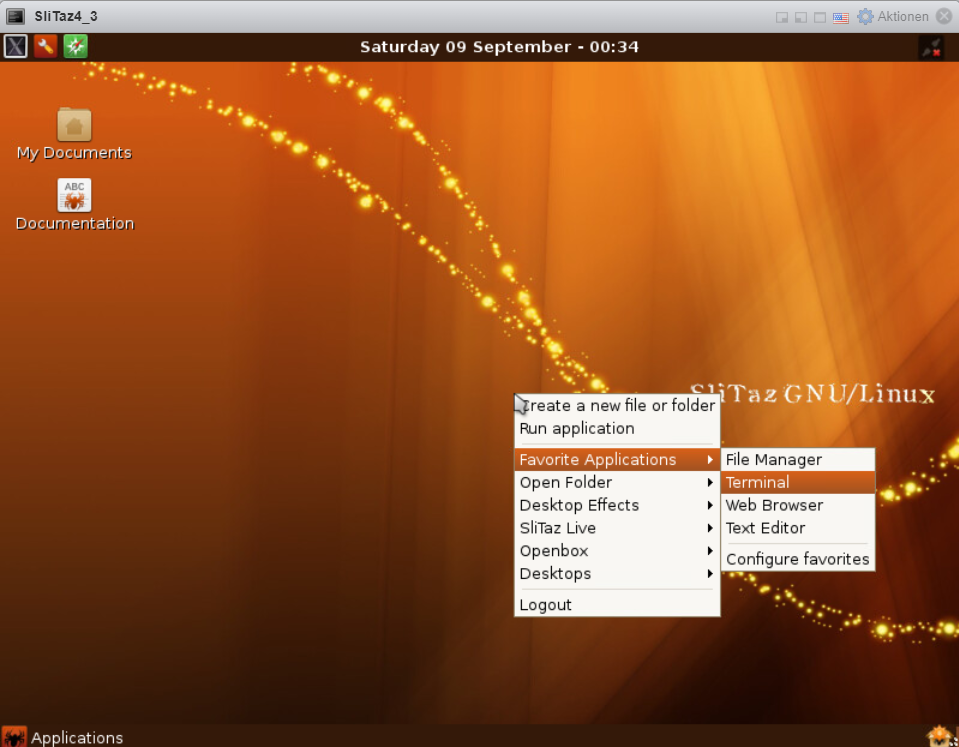
To login to the SliTaz virtual machine, the default password of “root” user is “root” and there is also the username “vmware“, with password “vmware” pre-configured for SSH access.
Right-click on the desktop, “favorite Applications” and then “Terminal” to access the shell command.
In the terminal, use “nano /etc/network.conf” to change the IP address and gateway of the eth0 interface according to your topology.
vmware@slitaz:~$ su -
Password: root

ifconfig in console to check ip address and connect through ssh
right click on desktop
favourite applications -> Terminal

root@slitaz:~# nano /etc/network.conf


root@slitaz:~# cat /etc/network.conf
# /etc/network.conf: SliTaz system wide networking configuration.
# Config file used by: /etc/init.d/network.sh
#

# Set default interface.
INTERFACE="eth0"

# Dynamic IP address.
# Enable/disable DHCP client at boot time.
DHCP="no"

# Static IP address.
# Enable/disable static IP at boot time.
STATIC="yes"

# Set IP address and netmask for a static IP.
IP="192.168.2.111"
NETMASK="255.255.255.0"

# Set route gateway for a static IP.
GATEWAY="192.168.2.1"

# Set DNS server for a static IP.
DNS_SERVER="192.168.2.1"
...
Then use “/etc/init.d/network.sh restart” to restart the network service.
root@slitaz:~# /etc/init.d/network.sh restart
Now you can access the virtual machine with the new IP address via both SSH and the web.
The last step is to change the content of the web page.
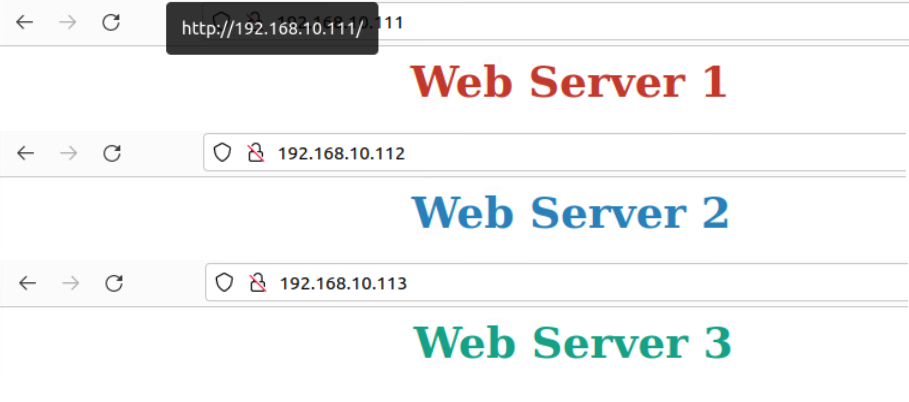
For three web servers, I use the following simple HTML code in “/var/www/index.html” to load three different web servers with different names and different colors so that I can easily distinguish which of the three servers we are accessing through LTM virtual IP, which is very important to test different load balancing algorithm.
nano /var/www/index.html
<p style="text-align:center"><span style="font-size:36px"><span style="color:#c0392b"><strong>Web Server 1</strong></span></span></p>
<p style="text-align:center"><span style="font-size:36px"><span style="color:#2980b9"><strong>Web Server 2</strong></span></span></p>
<p style="text-align:center"><span style="font-size:36px"><span style="color:#16a085"><strong>Web Server 3</strong></span></span></p>