
F5 LTM SNAT configuration is required in some F5 applications, such as SSL offloading or when we configure F5 in one-armed topology.
In this section we will configure SNAT in F5 LTM with automap and also manual SNAT pool.
The first question that may arise is why we need to configure SNAT in F5 BIG-IP.
There are some scenarios where SNAT needs to be implemented in F5 BIG-IP.
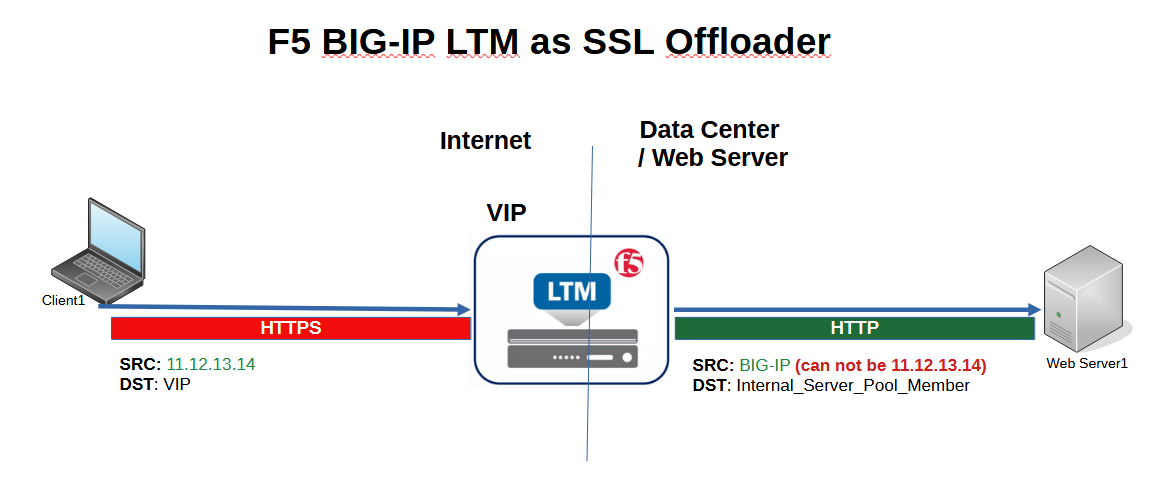
If you remeber, we implemented SSL offloading in the previous section and found that configuring SNAT in the virtual server is necessary because the traffic between client and F5 is HTTPS and the traffic between F5 and the internal server is HTTP. Traffic with the client’s real IP address cannot reach the internal server.
Therefore, the client IP address must be translated into a BIG-IP address before reaching the internal server.
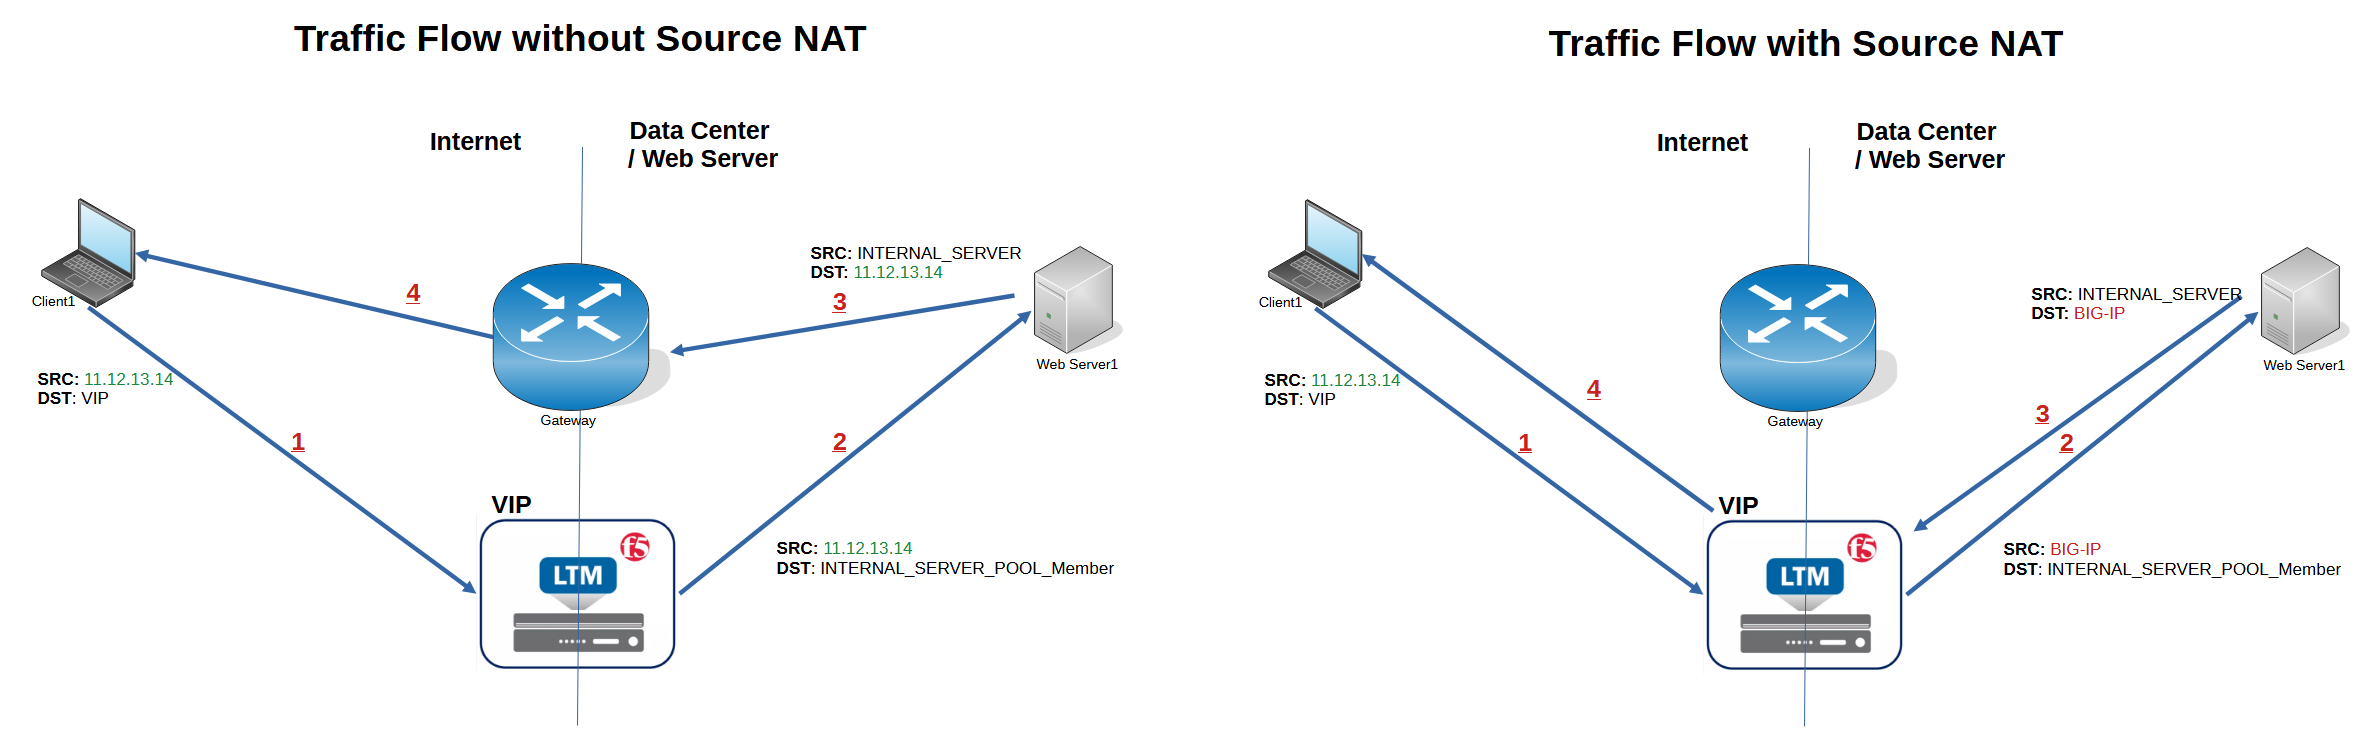
For the second example, let’s assume that BIG-IP is not the gateway of the clients in an enterprise and a router serves as the gateway.
If we do not implement SNAT in BIG-IP, traffic back and forth between client and server will not be routed over BIG-IP, as shown in the left figure.
The client over the internet reaches the BIG-IP virtual IP. According to the load balancing algorithm, the request is forwarded to one of the internal servers.
The source IP address of request traffic is not changed and the client’s IP address remains unchanged. Therefore, the destination IP address of the return traffic is the client itself.
The return traffic is not routed via BIG-IP because the server’s gateway points to the router and not BIG-IP.
In this topology, F5 does not behave as a full proxy and some of the F5 features such as SSL offloading cannot be implemented.
But in the right figure, the client’s IP address is changed to the BIG-IP before the request is forwarded to the BIG-IP. Therefore, the destination IP address of the return traffic points to the BIG-IP and is forwarded via BIG-IP. IP.
In this figure, BIG-IP is behaving as a full-proxy solution and we can take full advantage of F5 LTM features.
Before you start implementing SNAT on F5 BIG-IP, it may be interesting to connect to the virtual server and then capture the traffic on the F5 BIG-IP to ensure that BIG-IP does not change the source IP address of the client by default, when the request is forwarded to the internal server.
This is the command to capture traffic matching with client IP address, “192.168.2.175” and port 80 on F5 BIG-IP and store them in a file with the name of “before_source_nat.pcap”
[root@ltm1:Active:Standalone] config # tcpdump -s0 -nni 0.0:nnnp host 192.168.2.175 and port 80 -vw /var/tmp/before_source_nat.pcap
The “s” parameter specifies how many bytes of each packet to be captured. “-s0” means unlimited and therefore captures ful packets.
The parameter “-i 0.0” means to capture traffic from all interfaces except management interface.
The number of “n” indicates how deep you want to capture the traffic.
The “p” parameter allows you to capture a specific traffic flow from end to end, even when the configuration uses a SNAT or OneConnect.
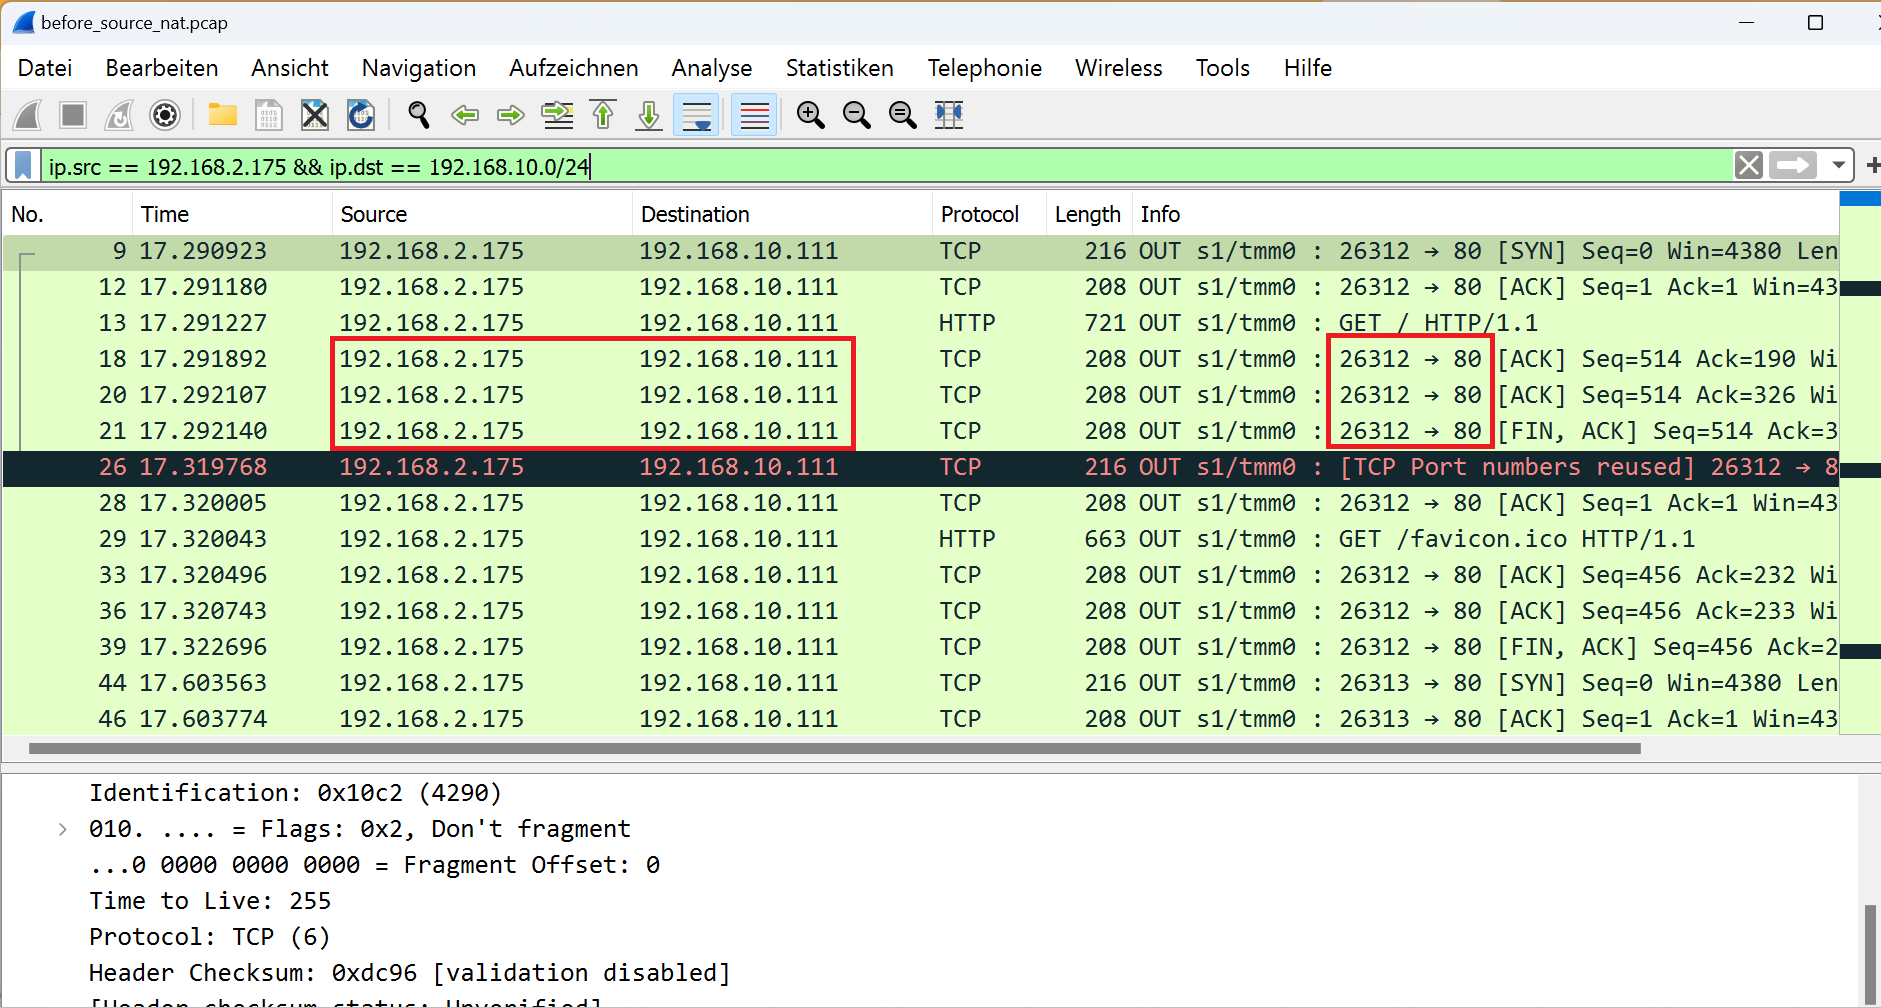
If we filter the captured traffic by the client’s address “192.168.2.175” as the source address and the destination in the server subnet, it shows that the traffic reaches the server with the client’s IP address and is not translated in BIG-IP by default.
In the next step, we enable SNAT on the virtual server.
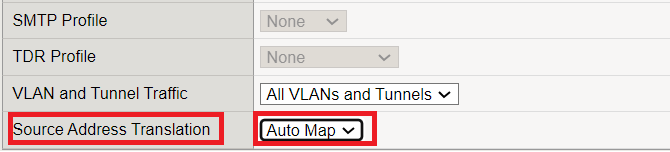
To enable SNAT, you can manually configure to which address the client address needs to be translated. We’ll see this in a few minutes, but for now let’s use the easier and preferred “automap” method.
Through automap, the BIG-IP self-IP of the outgoing interface is used as the translated address and we don’t need to configure a SNAT pool.
When floating self-IP is configured on BIG-IP, it is preferred over outgoing interface self-IP to support outgoing interface failover. It will be discussed in a few minutes.
After enabling SNAT, we connect to the virtual server, capture the traffic again and save it in a file named “after_source_nat.pcap”.
[root@ltm1:Active:Standalone] config # tcpdump -s0 -nni 0.0:nnnp host 192.168.2.175 and port 80 -vw /var/tmp/after_source_nat_with_floating_ip.pcap
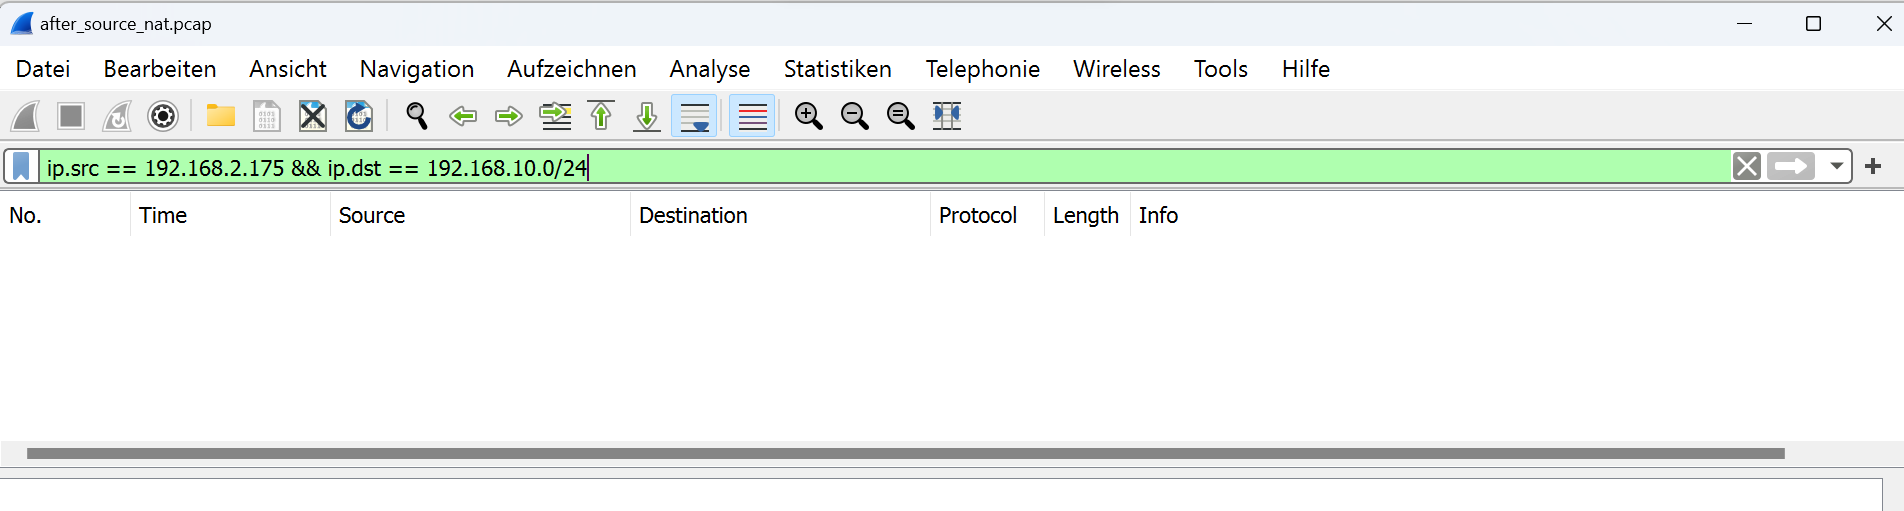
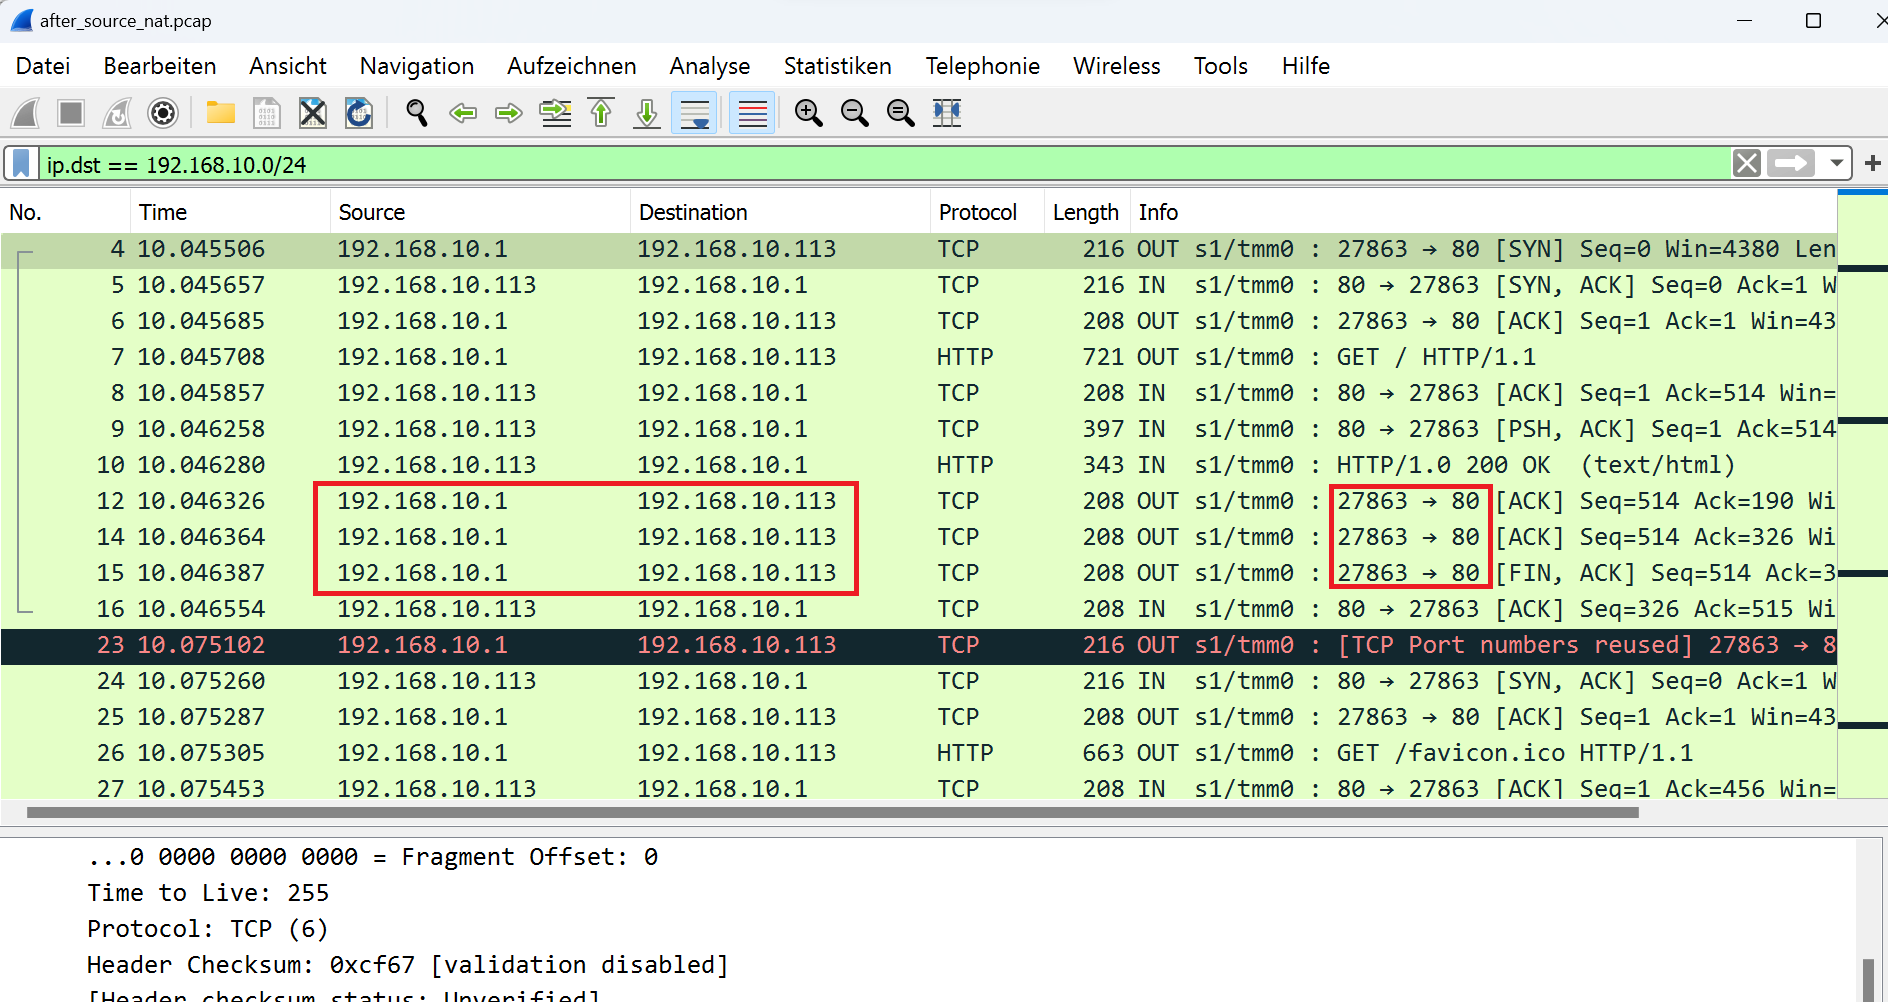
This time, when you open the file in Wireshark, you’ll see that no traffic is reaching the server with the client’s source IP address.
If you change the Wireshark filter to only show traffic to the destination in the server subnet, you will notice that the traffic reaches the server with the IP address of BIG-IP itself (IP address of BIG-IP internal interface).
As I have said, SNAT with automap prefers floating IP to support failover.
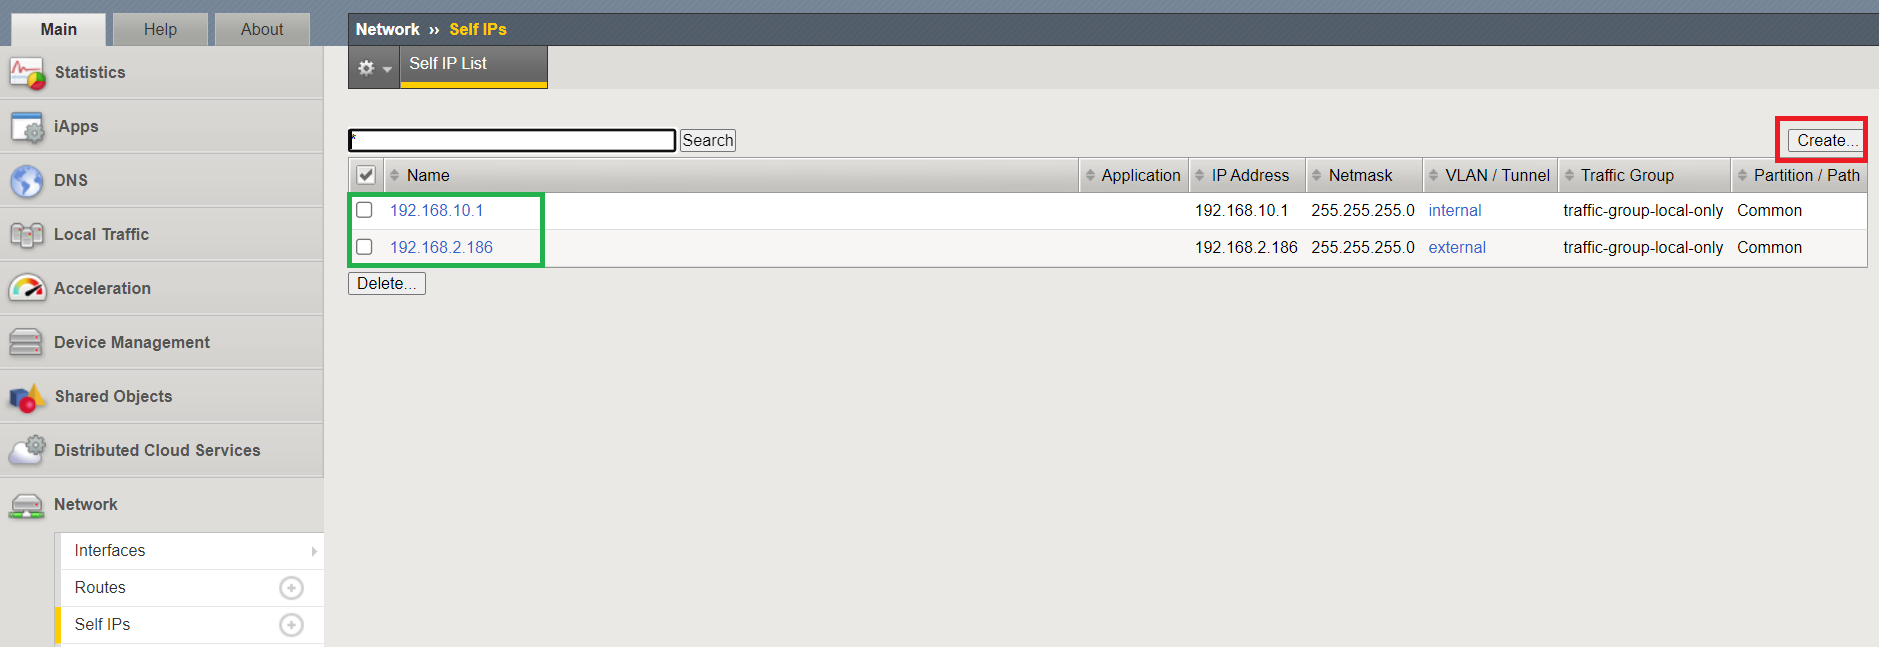
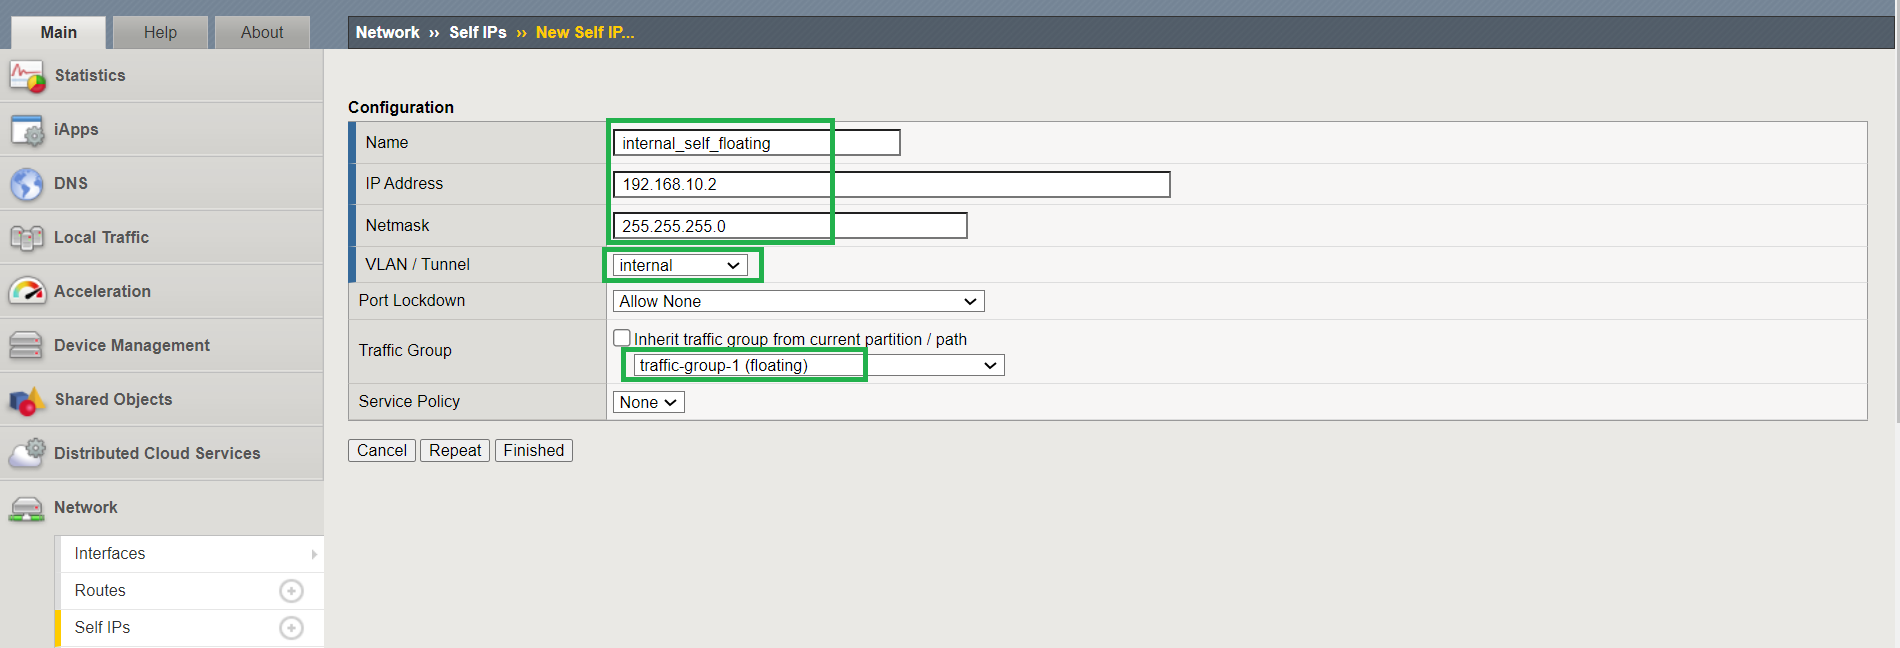
To check this, we create a new floating IP (192.168.10.2) on the internal network.
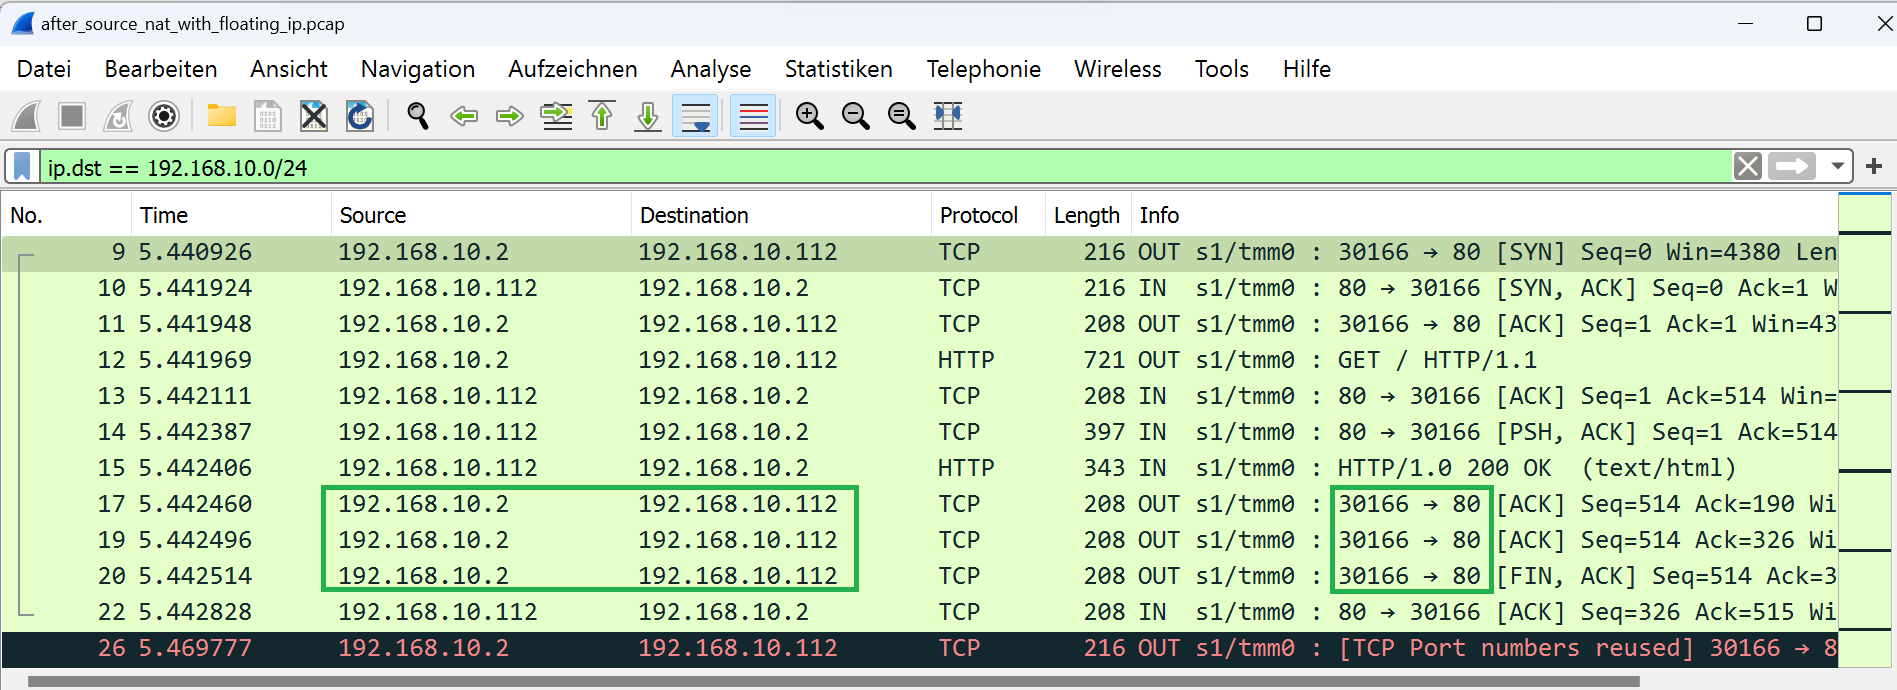
Now we connect to the virtual server and capture traffic again. We store the captured traffic in a file with the name of “after_source_nat_with_floating_ip.pcap”.
If we filter the captured traffic to only show traffic destined in the server subnet, you will see that this time the traffic reaches the server with the source of the floating IP.
And finally, we enable SNAT to translate the client address into an address configured in the SNAT pool.
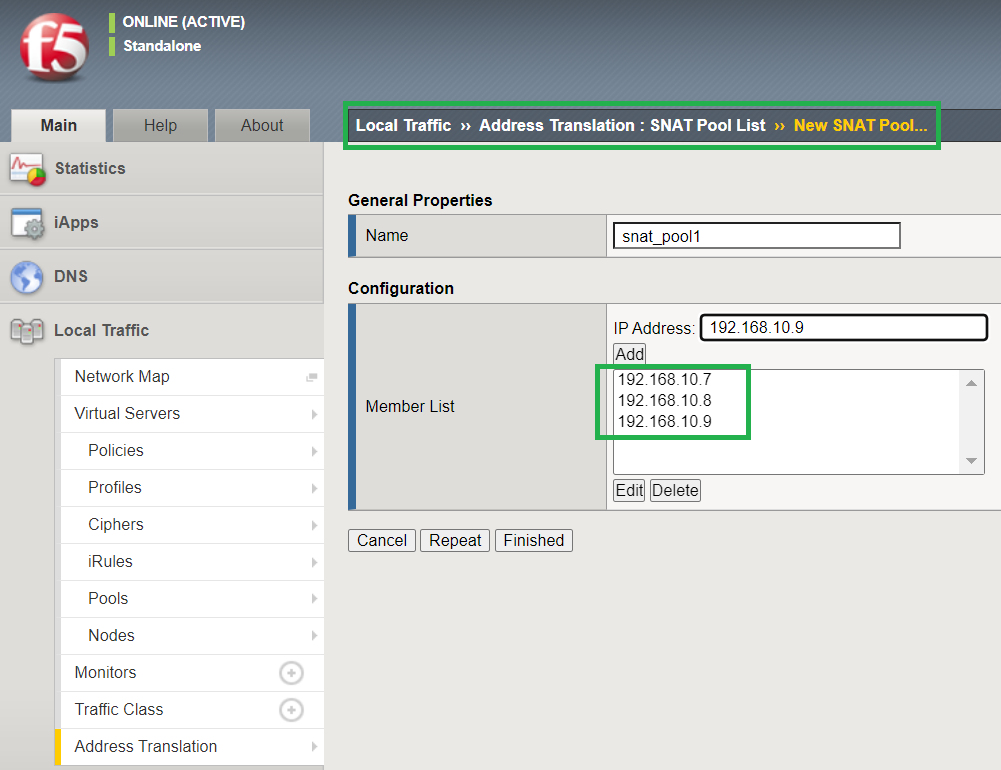
First we have to configure SNAT pool.
I add three addresses to the SNAT pool, 192.168.10.7-9.
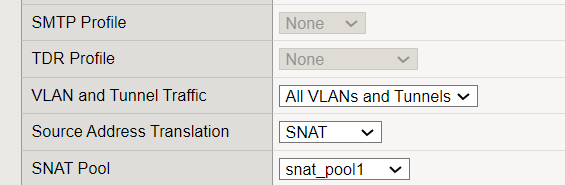
Then we change the virtual server configuration to translate client’s IP address to the configured SNAT pool. We no longer use automap, but instead select the pool we just configured.
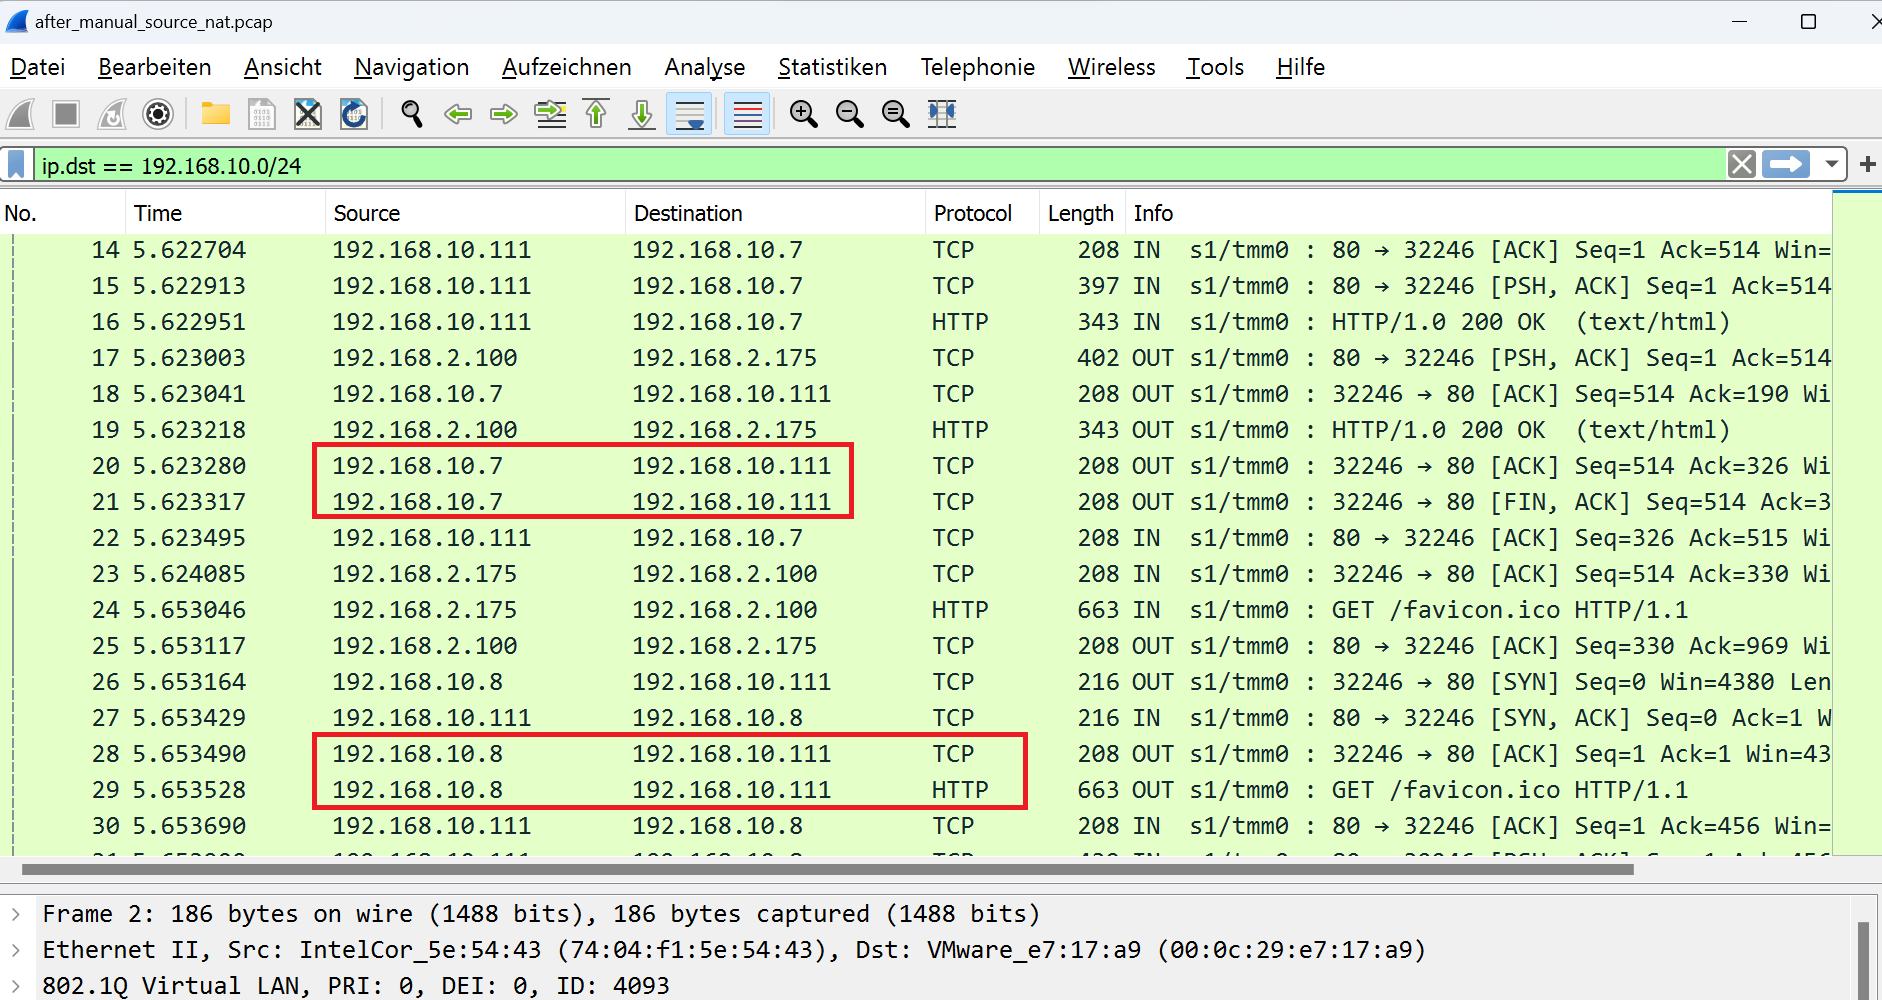
We test the connectivity again and capture the traffic to find out from which source the traffic is reaching the server.
as we expect traffic is reaching the server with the IP address configured in SNAT pool.