Table of Contents

F5 LTM profiles provide the capability to manage and affect the behavior of specific traffic as it passes through a virtual server.
 
In this section, we change TCP traffic by changing the TOS value in the IP header.

F5 LTM Profile simple Example

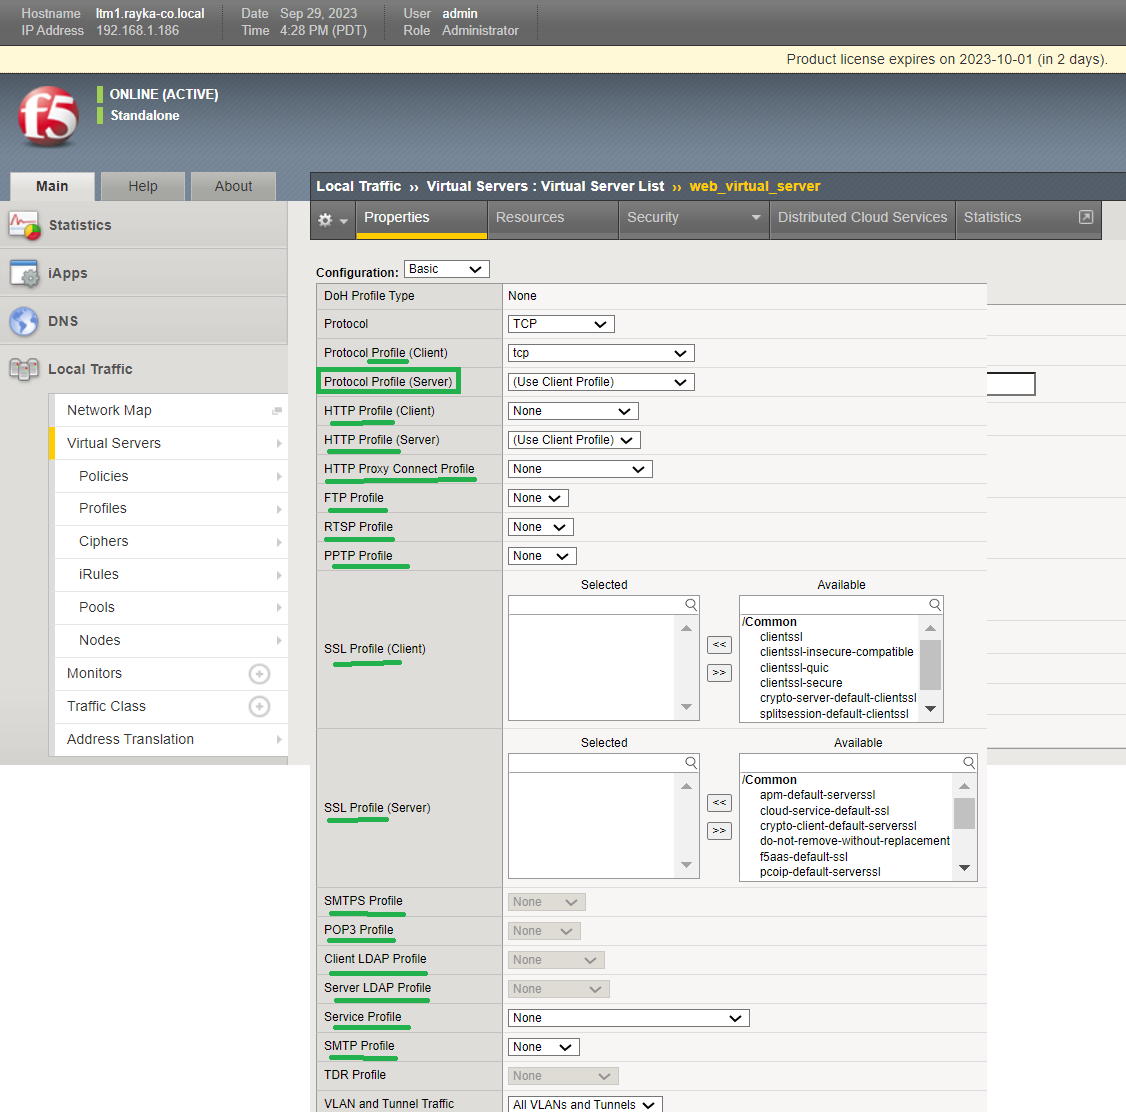
When you check the configuration of a virtual server in F5 LTM, you see many profiles that can be assigned to the virtual server.
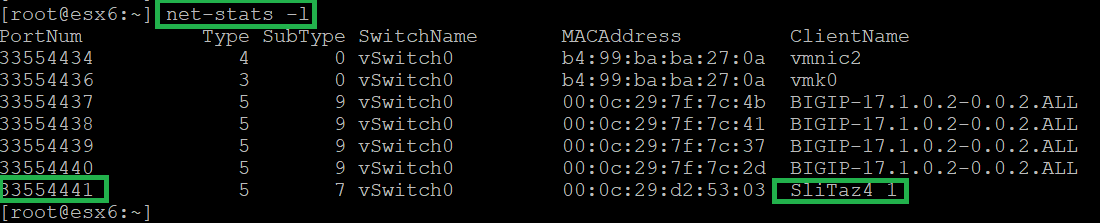
different type of profiles to assign to virtual server
During the course we will see some practical examples such as persistence, client authentication and SSL offloading where a profile is configured and assigned to a virtual server.
 
But in this section, as a start, we will change the behavior of TCP traffic by changing the DSCP header field (TOS field) in the IP header.
create a tcp protocol profile
Before we assign the new profile to the virtual server, we capture the traffic when we access web servers through the virtual server.
 
Therefore, we can compare the DSCP field before applying the profile and after applying the profile in the virtual server.
 
You can capture the traffic coming and going from the web server on the server itself, but I capture the traffic from the virtual port connected to the web server through the ESX server using the “pktcap-uw” command.
 
I have only started the first web server, so I can ensure that traffic is forwarded to the first virtual server.
 
I connect to the ESX server via SSH and first find out which virtual port is connected to the virtual server using the “net-stats -l” command.
 
The output shows which virtual port the first web server is connected to.
net-stats -l
packet capture in virtual port in VMware ESX

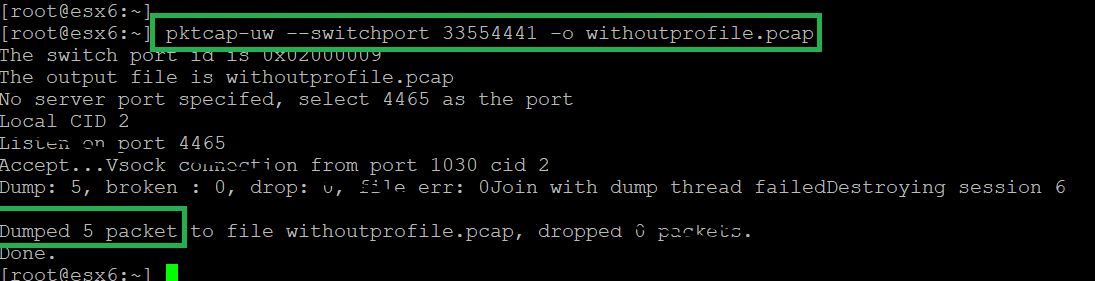
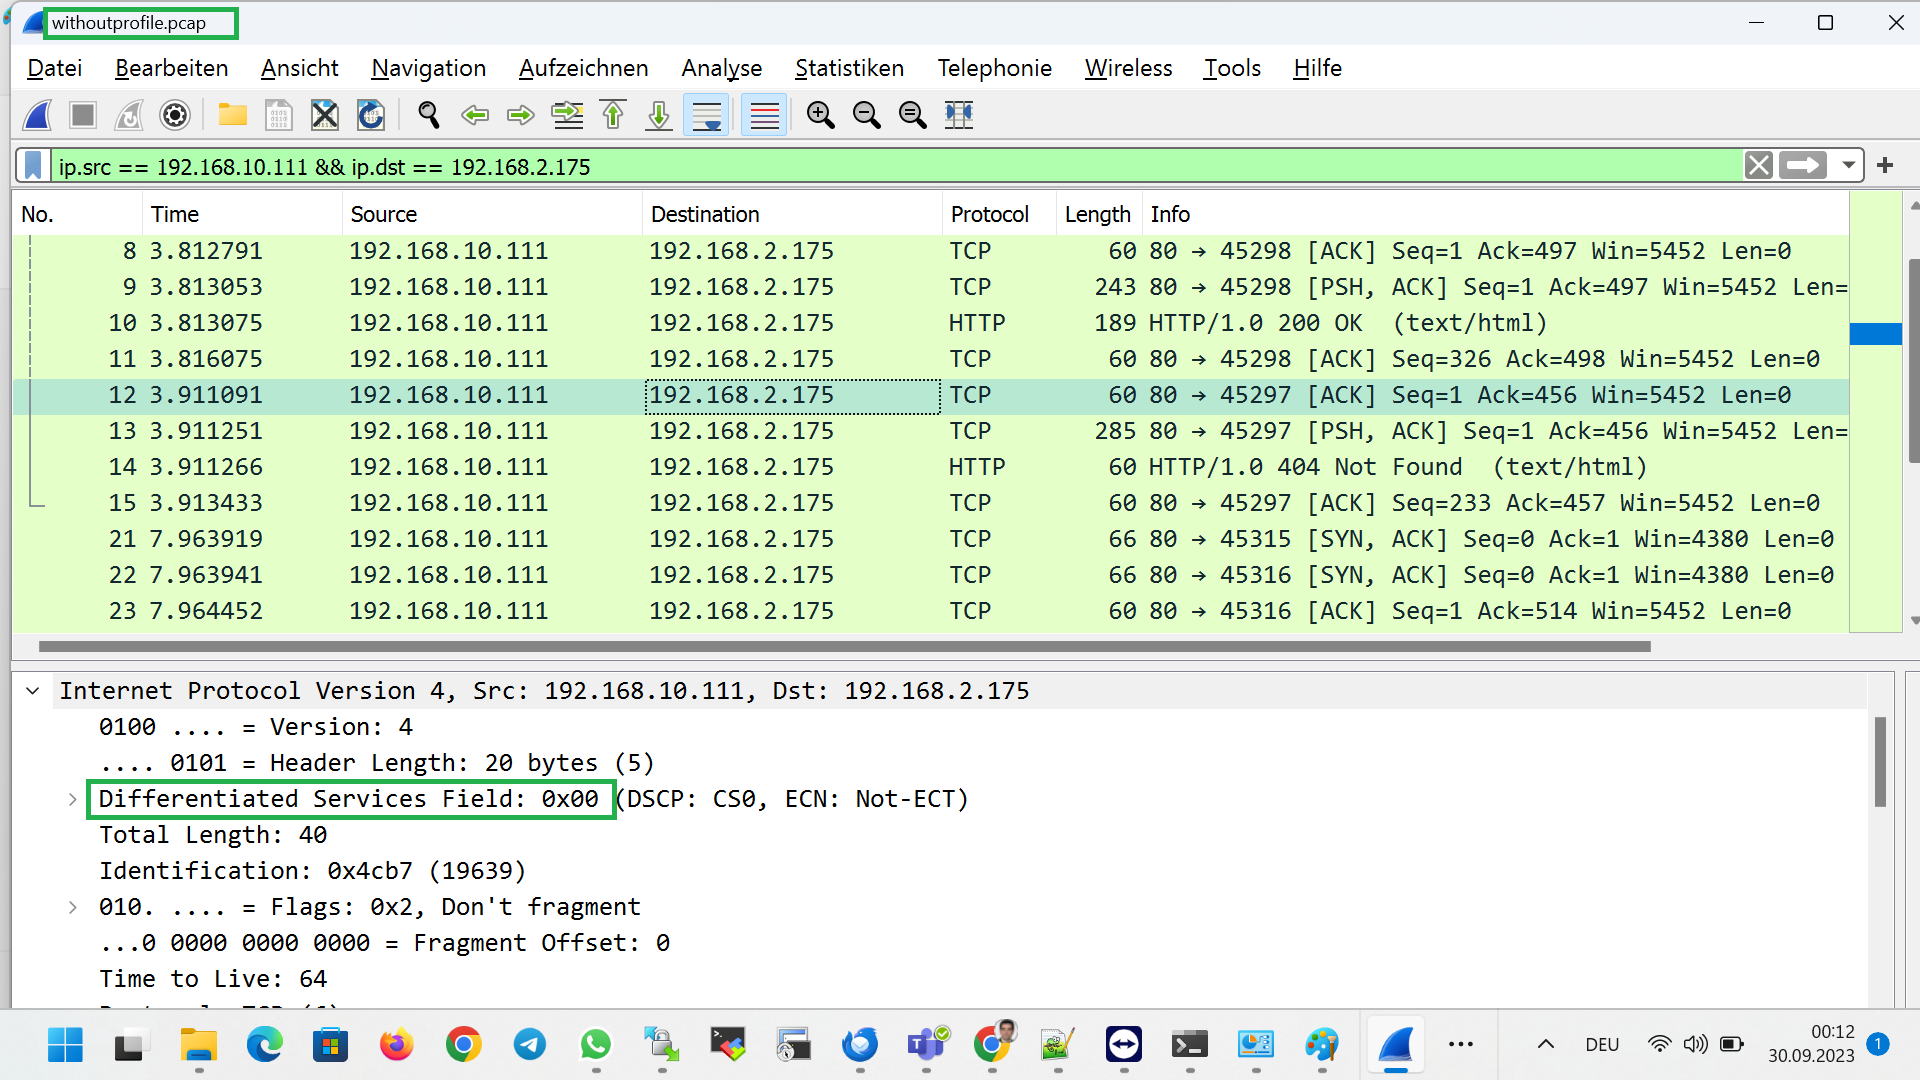
Now we request access to the web server through virtual IP address and then use the “pktcap-uw” command with the “–switchport” option to capture comings and goings from the first web server. We save the output of the capture in a file called “withoutprofile.pcap”.
Therefore, we can download the capture file and check the contents of the packets using wireshark software.

pktcap-uw --switchport 33554441 -o withoutprofile.pcap
packet capture in virtual port in VMware ESX

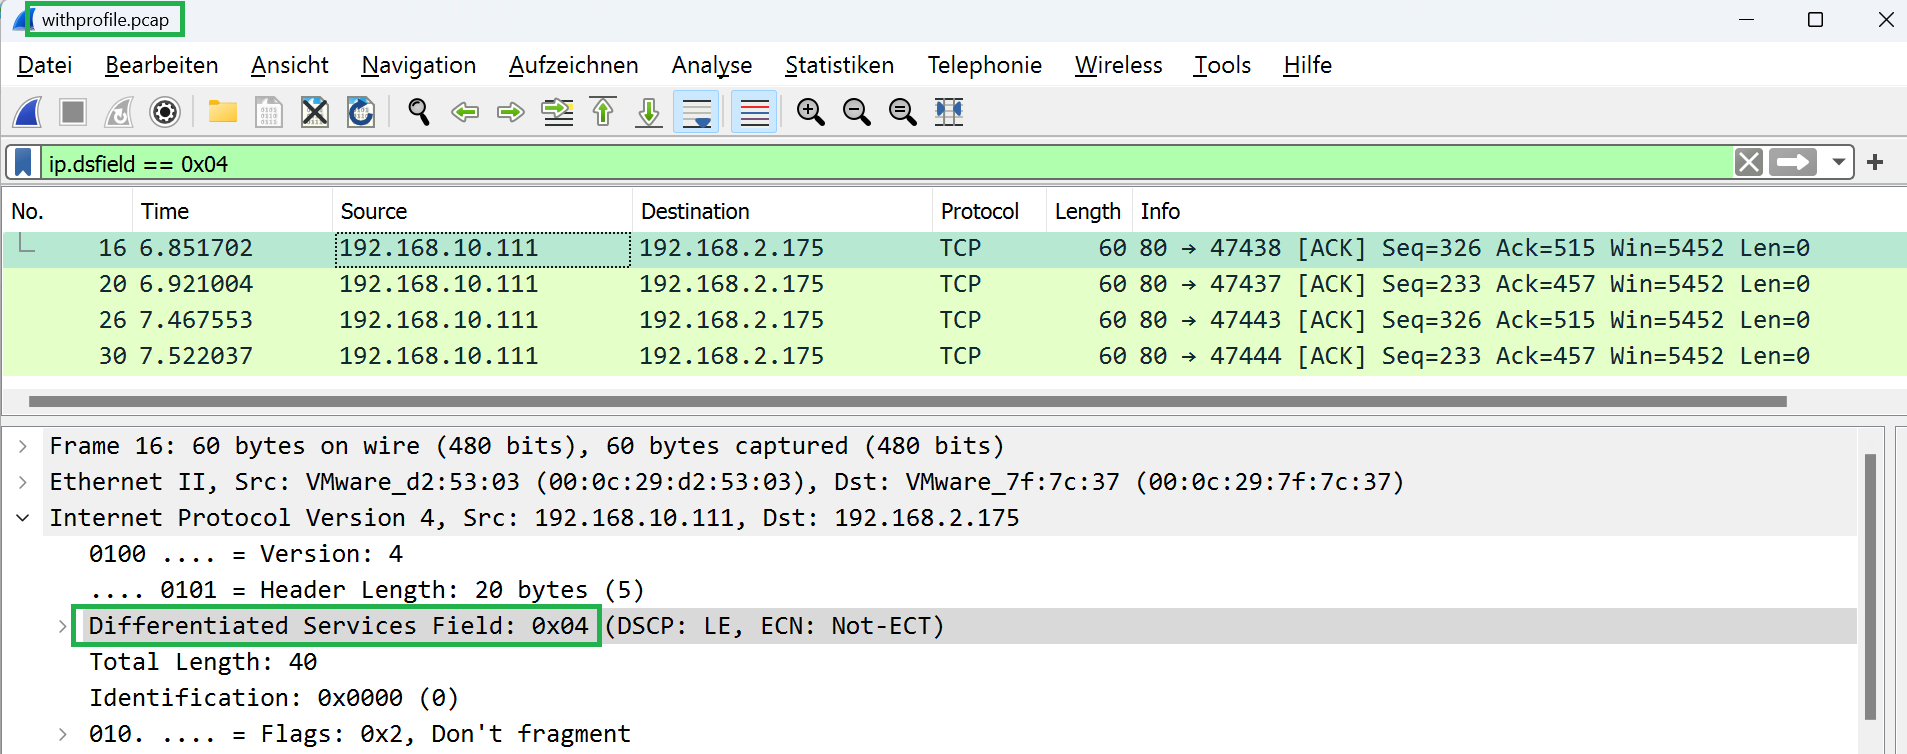
if we check DSCP field captured traffic, you can see that they are all “0x00”, which is the default value.

packet capture before assigning profile to virtual server
packet capture before assigning profile to virtual server with dscp filter

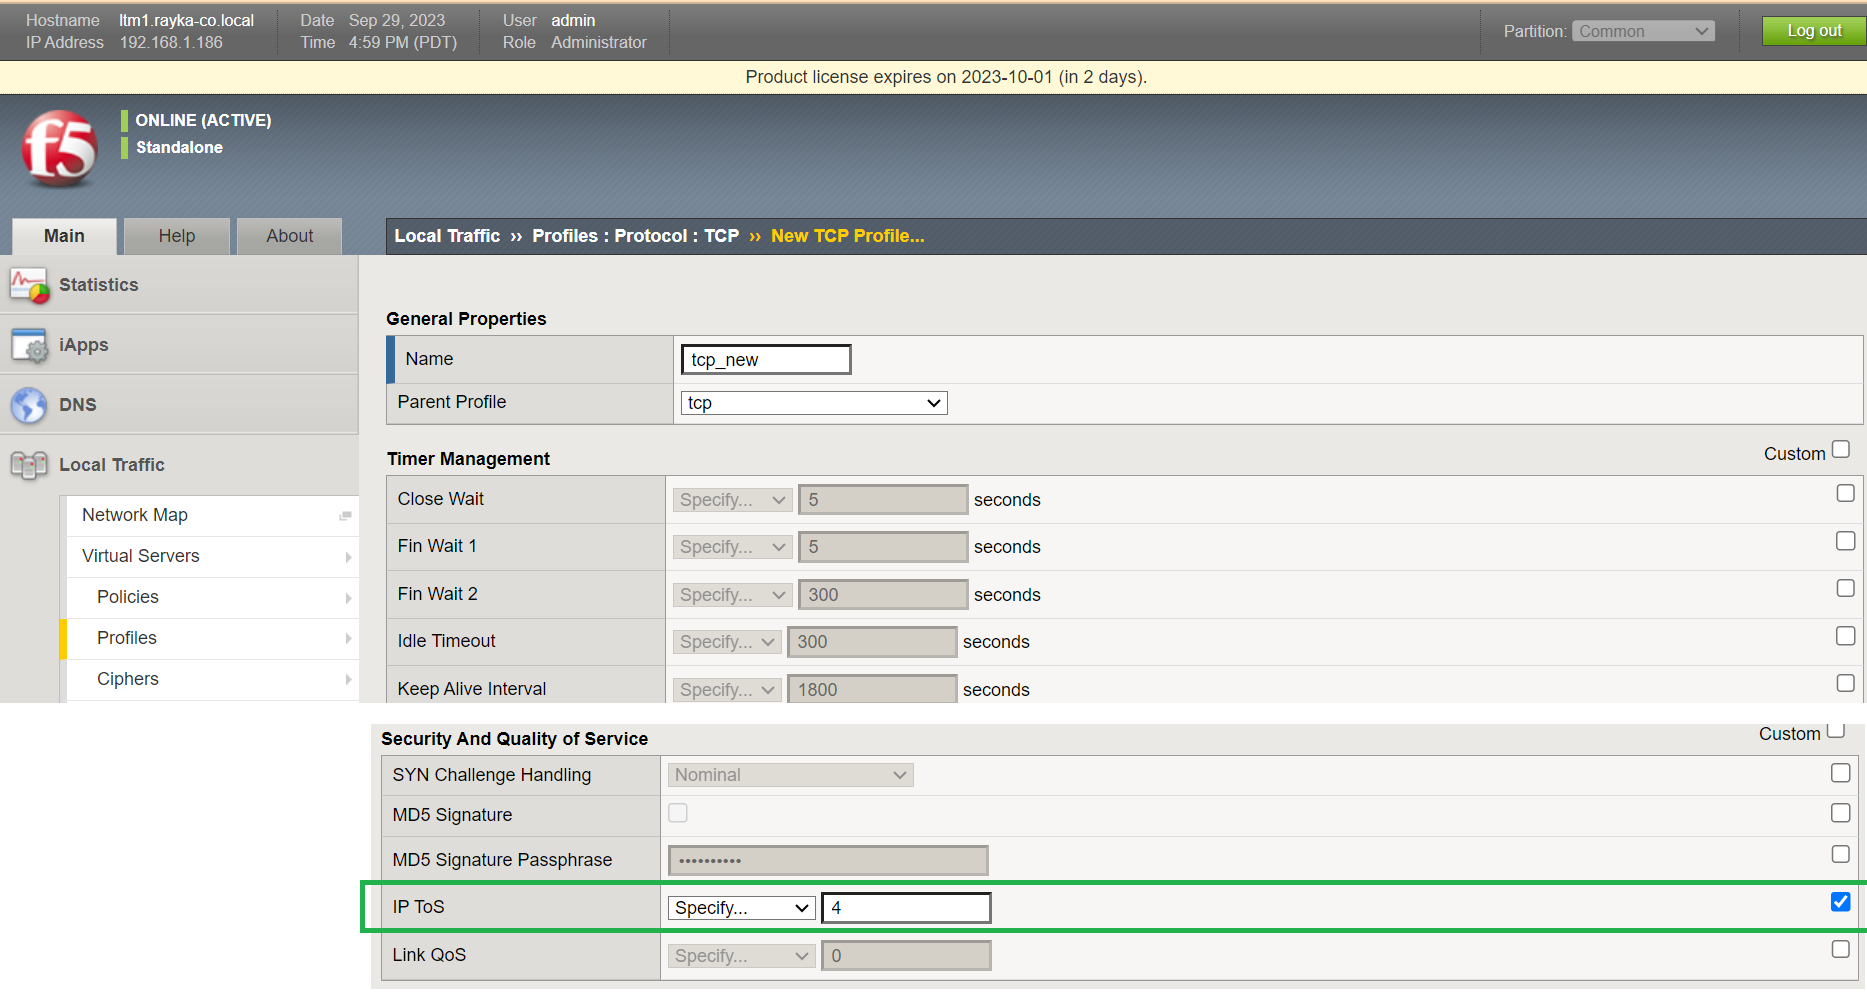
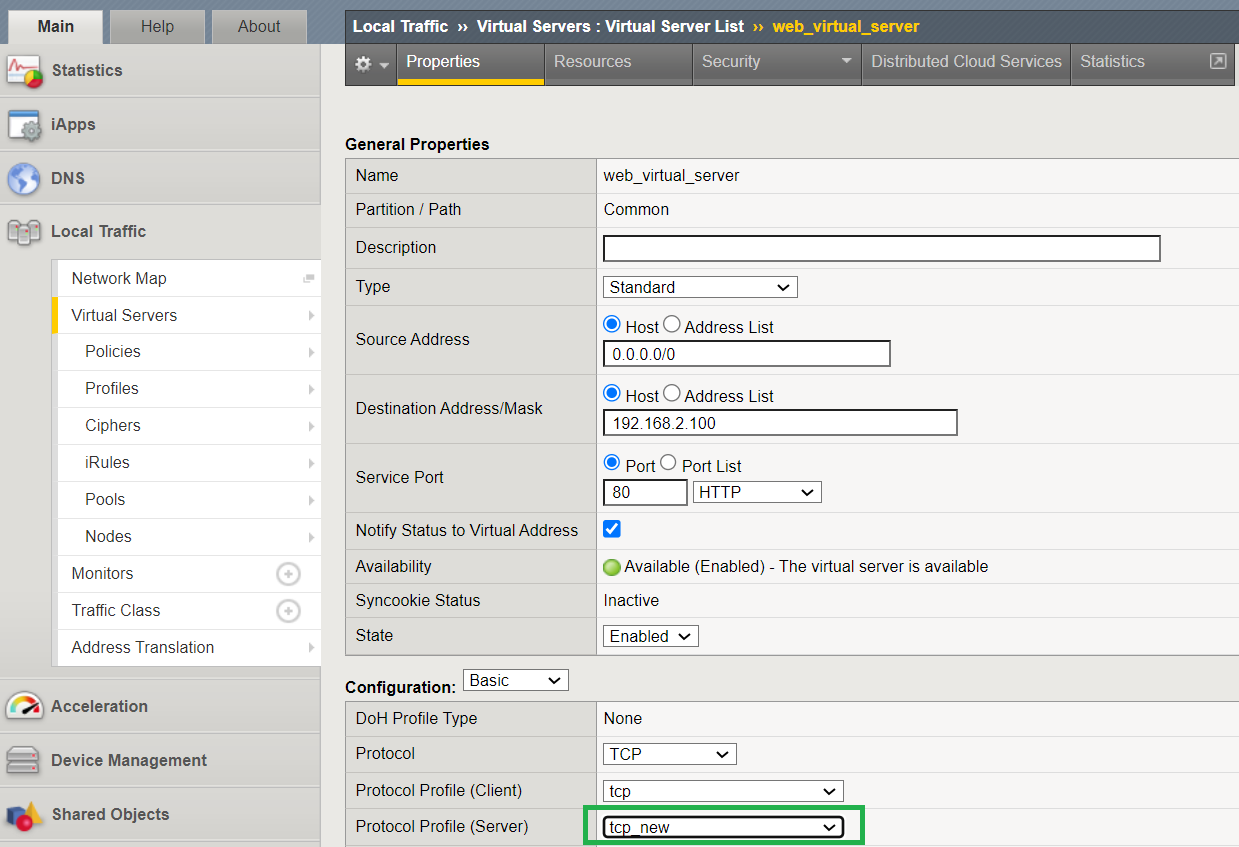
In the next step, we assign the new profile to the virtual server.
The profile will be assigned to the section, „Protocol Profile (Server)“.

assign tcp profile to virtual server
Again, we request access to the web server via virtual IP address and then use “pktcap-uw” to capture the traffic.
 
This time we save the captured traffic in a file called “withprofile.pcap”.
 
Again we download the capture file and check the contents of the packets using wireshark software.
 
Now you can see that DSCP field of traffic generated from web server to the client are changed to „0x04“ as we have defined in the profile.
packet capture after assigning profile to virtual server

Therefore, in this section, we could change the behavior of a specific traffic passing through the virtual server using the LTM profile.

LTM profile in tmsh

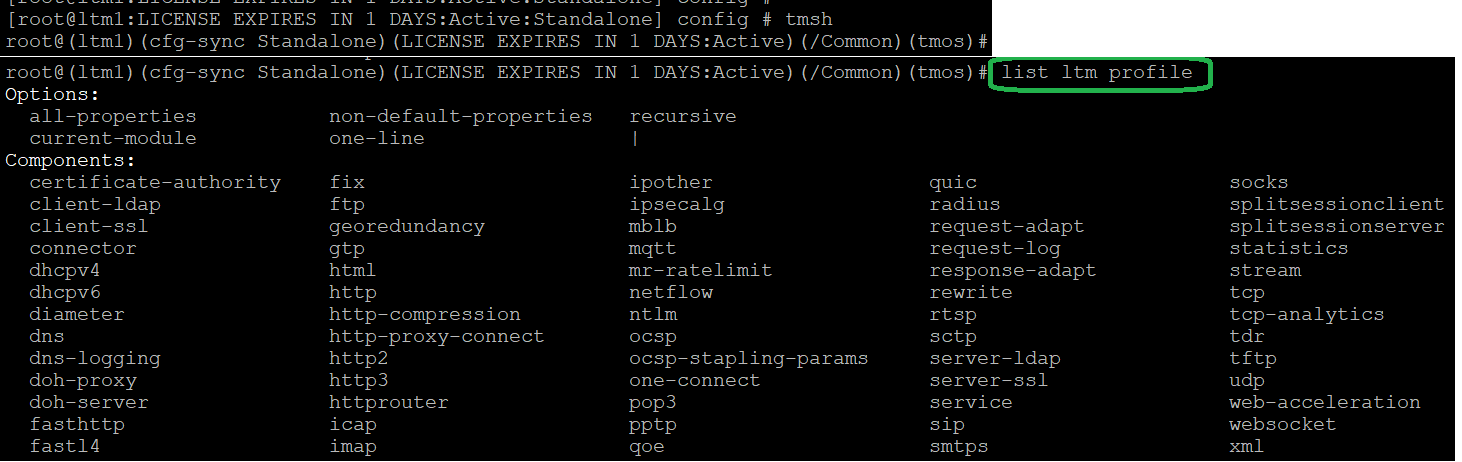
now let’s check to see what is the tmsh version of ltm profile.
With the command „list ltm profile“, we can check the list of supported LTM profiles.

check list of ltm profiles with tmsh

In the output we can also see the new tcp profile created in this section.

root@(ltm1)(cfg-sync Standalone)(LICENSE EXPIRES IN 1 DAYS:Active)(/Common)(tmos)# list ltm profile
...
ltm profile tcp tcp_new {
    app-service none
    defaults-from tcp
    ip-tos-to-client 4
}
root@(ltm1)(cfg-sync Standalone)(LICENSE EXPIRES IN 1 DAYS:Active)(/Common)(tmos)#

And with the command „list ltm virtual“, we can check how profile is assigned to to the virnetual server.

root@(ltm1)(cfg-sync Standalone)(LICENSE EXPIRES IN 1 DAYS:Active)(/Common)(tmos)# list ltm virtual
ltm virtual web_virtual_server {
    creation-time 2023-09-13:16:01:22
    destination 192.168.2.100:http
    ip-protocol tcp
    last-modified-time 2023-09-29:17:03:23
    mask 255.255.255.255
    pool we_server_pool
    profiles {
        tcp {
            context clientside
        }
        tcp_new {
            context serverside
        }
    }
    serverssl-use-sni disabled
    source 0.0.0.0/0
    translate-address enabled
    translate-port enabled
    vs-index 3
}
Back to: F5 BIG-IP LTM > F5 LTM Profiles

Leave a Reply

Your email address will not be published. Required fields are marked *


Post comment