This section will cover the logging capabilities of F5 AWAF, including remote logging to capture security events on a remote server, response logging to track web application response traffic, and content events logging, which ensures that application security events are logged in “/var/log/asm”. These logging features are essential for effective security monitoring and incident response.
F5 AWAF Remote and Content Logging
Throughout this course, we have always applied the log profile named “Log All Requests” to the web application virtual server to capture all web application requests, and we have reviewed the logs under “Security > Event Logs > Application :: Requests”.
In this section, we will extend our logging capabilities to include web application responses alongside requests. Additionally, we will configure logging to store copies of these logs in “/var/log/asm” and on a remote log server.
To enhance logging features in F5 AWAF, you should first create a log profile with the desired settings and then assign this profile to the web application virtual server.
Enable Application Data Guard Feature
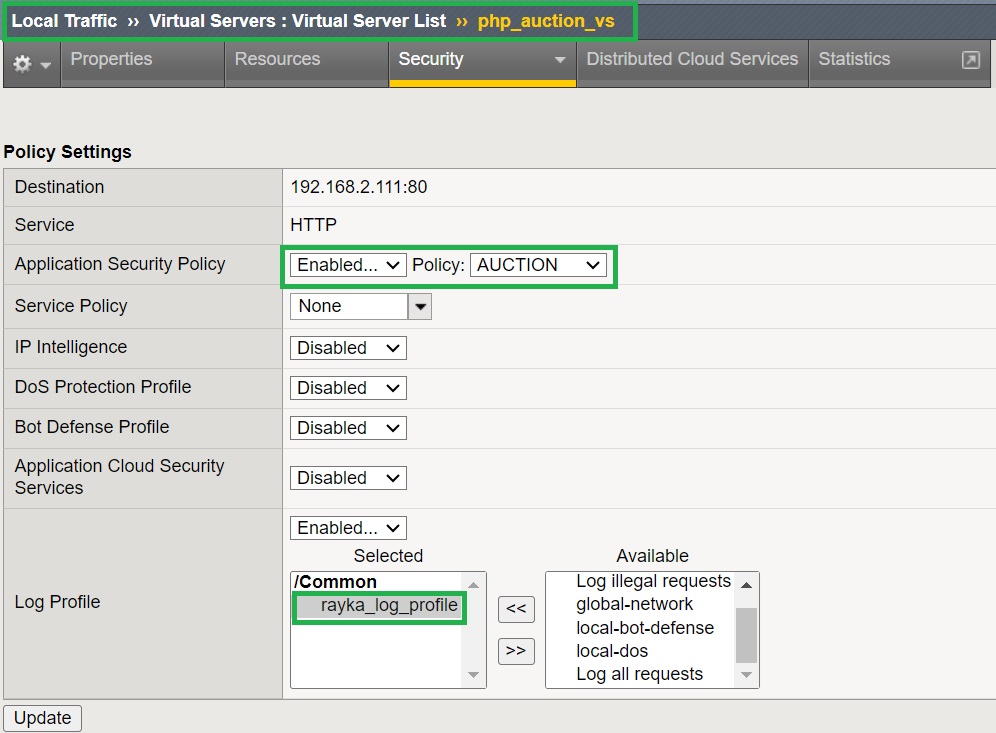
To start the demonstration, we will create a security policy utilizing Data Guard protection. This setup will enable us to generate sample data leak traffic and log the output to verify the desired features.
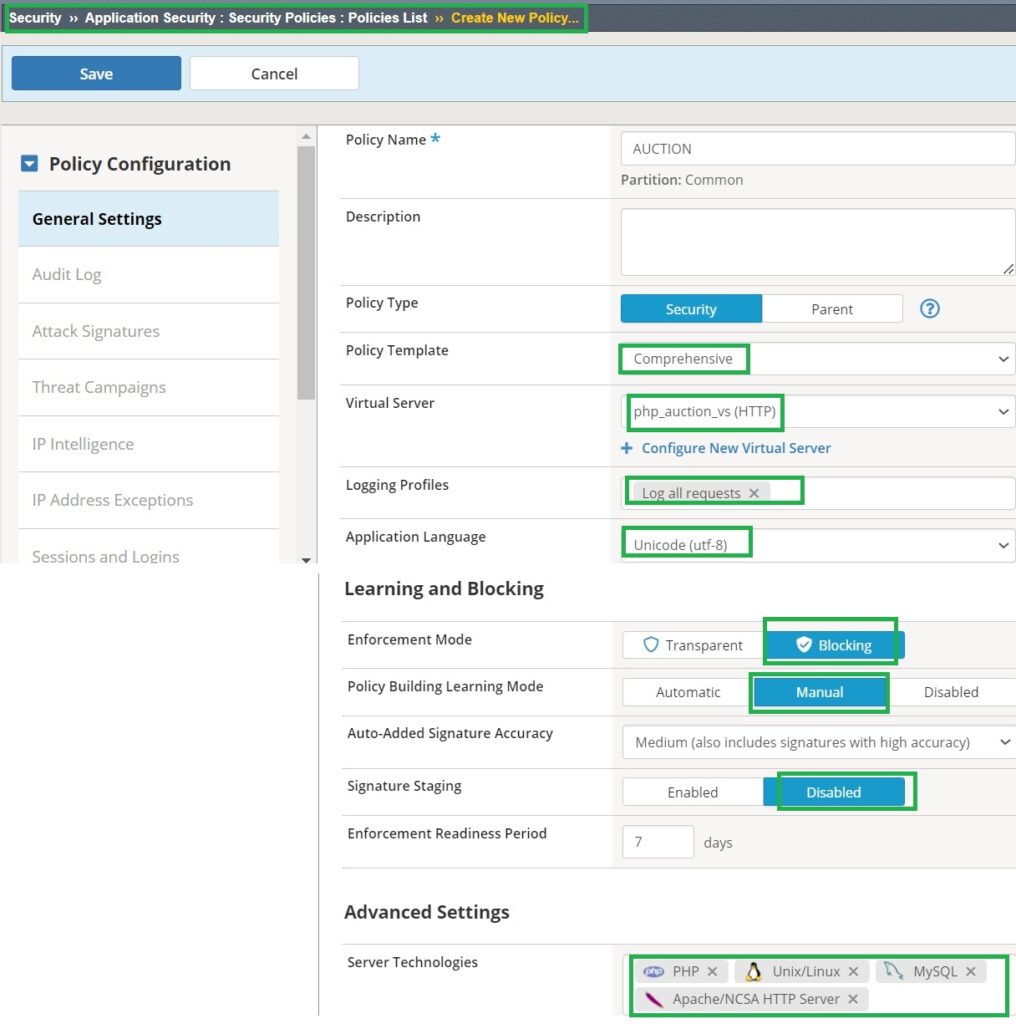
First, we will create a security policy based on a comprehensive security template, setting the enforcement mode to “blocking” and the staging mode to “disable.”
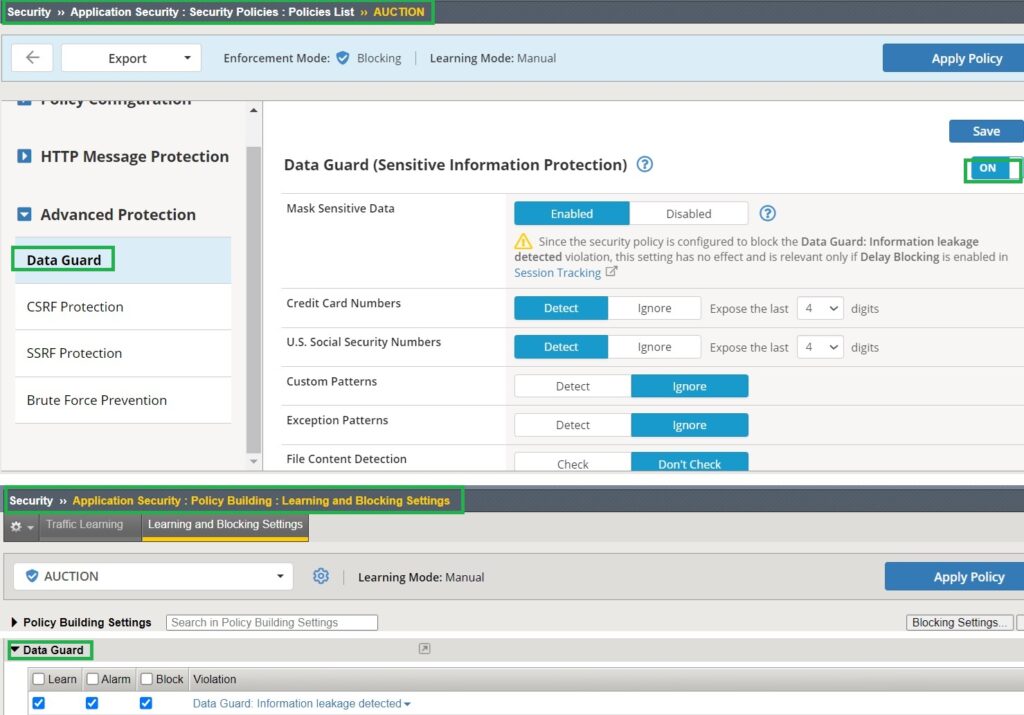
In the “Advanced Protection” section of the application security policy, we will enable the Data Guard feature without making additional changes.
Additionally, ensure that Data Guard’s learning, blocking, and alarm are activated in the learning and blocking settings.
We have already covered and demonstrated the Data Guard feature in previous lessons.
Create Logging Profile in F5 AWAF
In the next step, we will configure a logging profile and apply it to the web application virtual server.
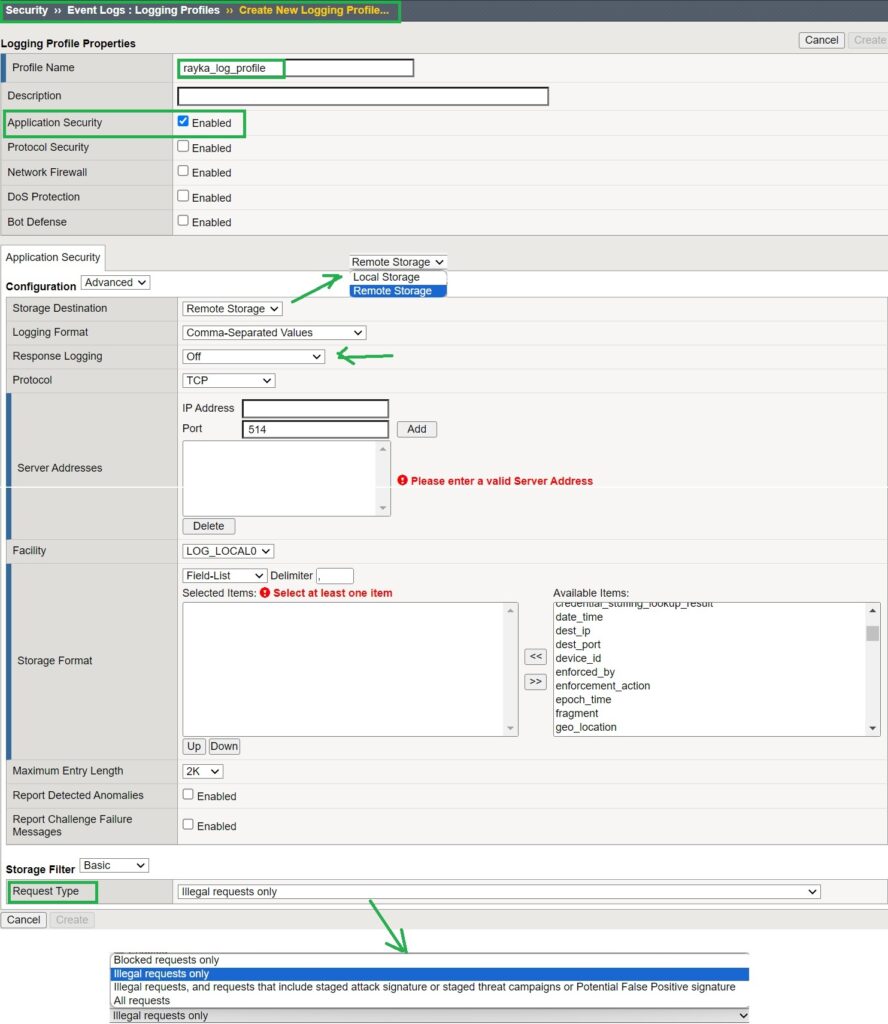
Navigate to “Security > Event Logs > Logging Profiles” to create a new logging profile for application security. While there are a few pre-configured logging profiles by default, we will create a new one.
In the new logging profile, enable the “Application Security” option and then select “Advanced.” Here, you can enable both remote logging and response logging.
For remote logging, choose “Storage Destination” as “Remote Storage.” This will allow you to configure the IP address, protocol, and port to send logs to a remote log server. In the “Storage Format” section, select the fields you want to log.
At the bottom of this page, under “Request Type,” choose the types of request traffic to be logged. The options include “All Requests,” “Blocked Requests Only,” “Illegal Requests Only,” and “Illegal Requests and Requests Triggering Staged Signatures.” For this demonstration, select “All Requests”.
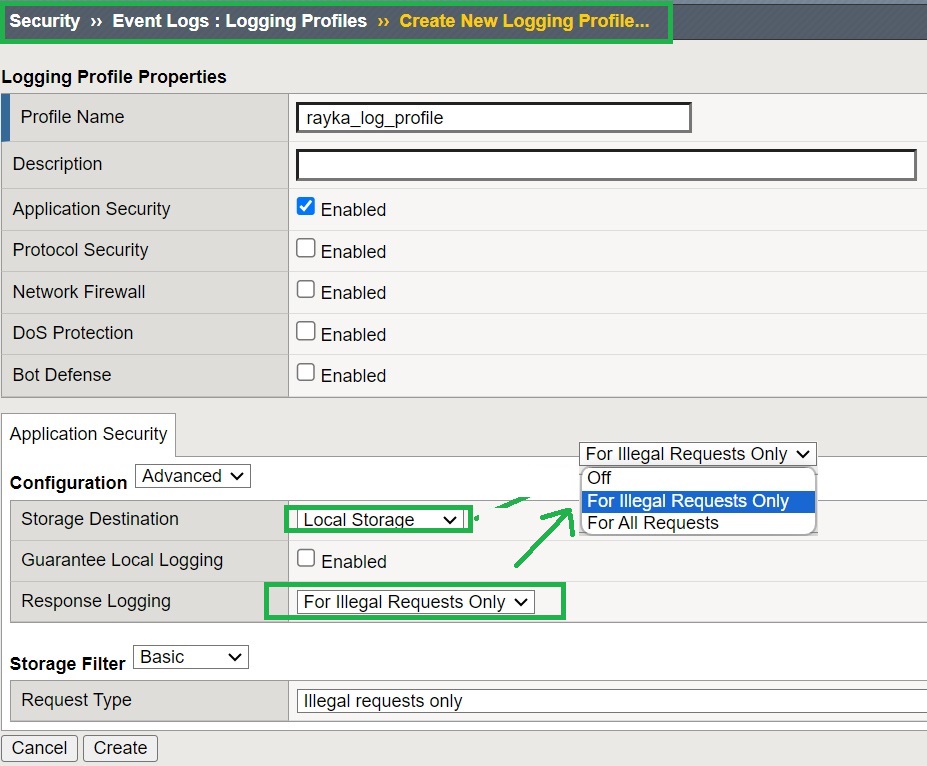
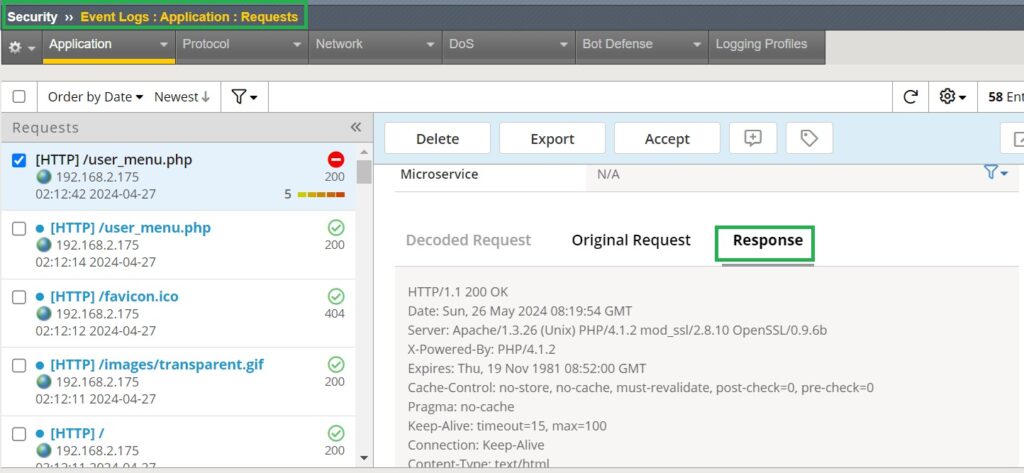
Since a remote log server is not available, I will use “Local Storage” as the storage destination. We will also enable “Response Logging” to log only the response traffic for illegal requests.
Finally, assign the new logging profile to the “hack-it-yourself” web application virtual server.
Test logging Profile
Now, we will generate data leak traffic to verify if the response traffic is logged.
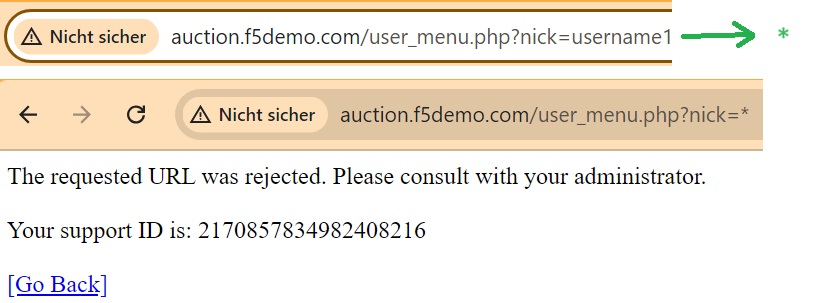
To do this, navigate to the “username1” control panel in the “hack-it-yourself” web application. In the URL, change the parameter “nick” from “username1” to “*” to attempt accessing detailed information for all users.
As expected, the traffic is blocked because the Data Guard feature is activated.
Next, we will check the application security event log to ensure that the response is logged in addition to the request.
F5 AWAF Content Events Logging
For the final logging demonstration, we will enable content events logging so that application security events are also logged in “/var/log/asm.” By default, only administrative and system logs are stored in this file.
To verify this in real-time, you can use the command “tail -f /var/log/asm”. If you generate data leak traffic again, as we did earlier, you will receive a message indicating “ASM application filtering applied”, showing that the traffic is blocked by the F5 AWAF or ASM module. However, this message does not specify the type of traffic blocked or the reason for blocking.
To enable content events logging, set the “send_content_events” system variable to “1” in the “Security > Options > Application Security > Advanced Configuration > System Variables” section.
After enabling the “send_content_events” system variable, the ASM module must be restarted using the command “tmsh restart sys service asm,” which takes a few minutes to complete.
Now, we will generate data leak traffic again. This time, it is expected that the application security event log will also be fully recorded in “/var/log/asm”.
Enabling the “send_content_events” system variable in F5 AWAF is generally not recommended due to its potential performance impact. However, it can be useful for troubleshooting purposes.
