F5 AWAF includes a robust brute force protection feature that employs multiple layers of security measures, such as CAPTCHA integration and IP blocking, to safeguard web applications from unauthorized access attempts. In this section, we will demonstrate how these security measures effectively protect against brute force attacks.
F5 AWAF Brute Force Mitigation Methods
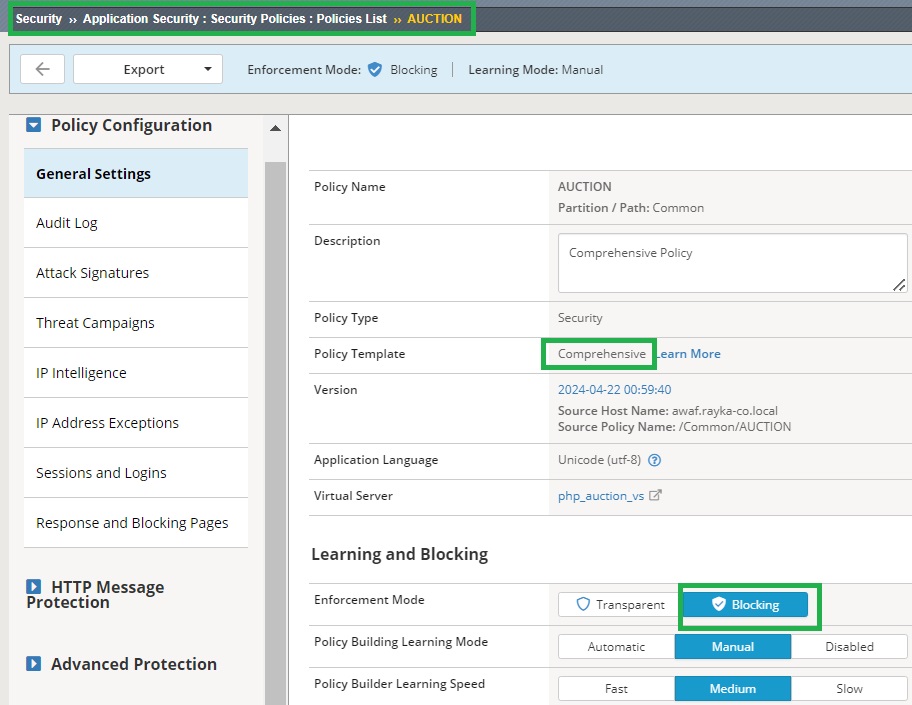
To begin the demonstration, I will use the security policy created in the previous lesson. This policy is based on the comprehensive security template and is assigned to the Hack-It-Yourself web application, with the enforcement mode set to blocking to block brute force attacks if necessary.
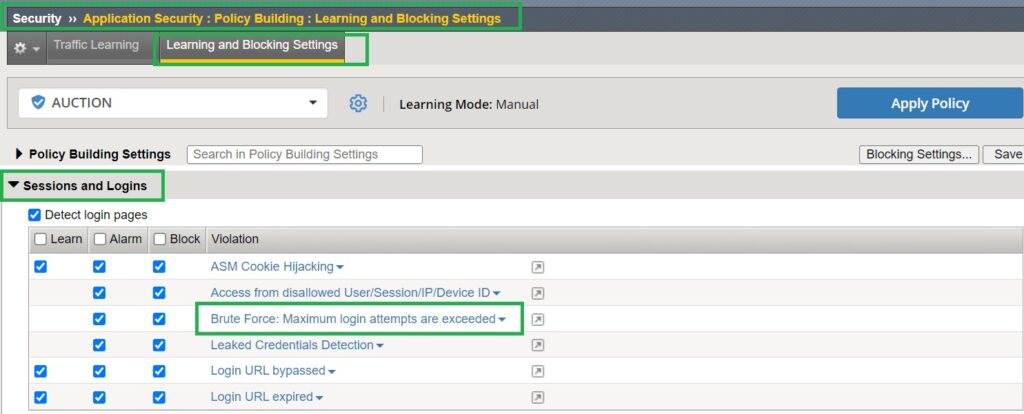
The learning and blocking settings were also configured in the previous lesson. For reference, under “Sessions and Logins” in the learning and blocking settings, there is a violation titled “Brute Force: Maximum login attempts are exceeded,” which is relevant to this demonstration. Ensure that both alarm and block options are enabled for this violation.
Configure Login Page
To configure brute force protection, we also need to inform F5 AWAF of the web application’s login pages. Although this was configured in the previous section, I will review it for clarity.
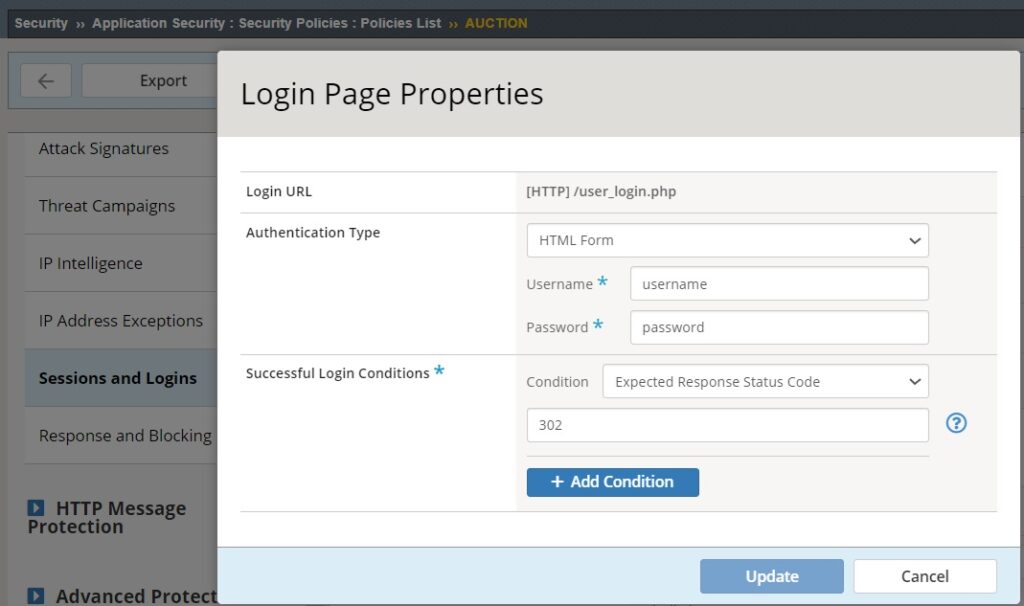
In the “AUCTION” security policy, under “Sessions and Logins” and “Login Page” properties, we have specified the login page URL address “/user_login.php”, as well as the username and password parameter names, which are “username” and “password” respectively for this web application. We identified these parameters name by inspecting the login page in the previous section.
Additionally, we have configured how F5 AWAF verifies a successful login process. If the login is successful, the user will receive an HTTP response status code 302, indicating a redirection to another page, which signifies successful authentication.
Configure brute force prevention page
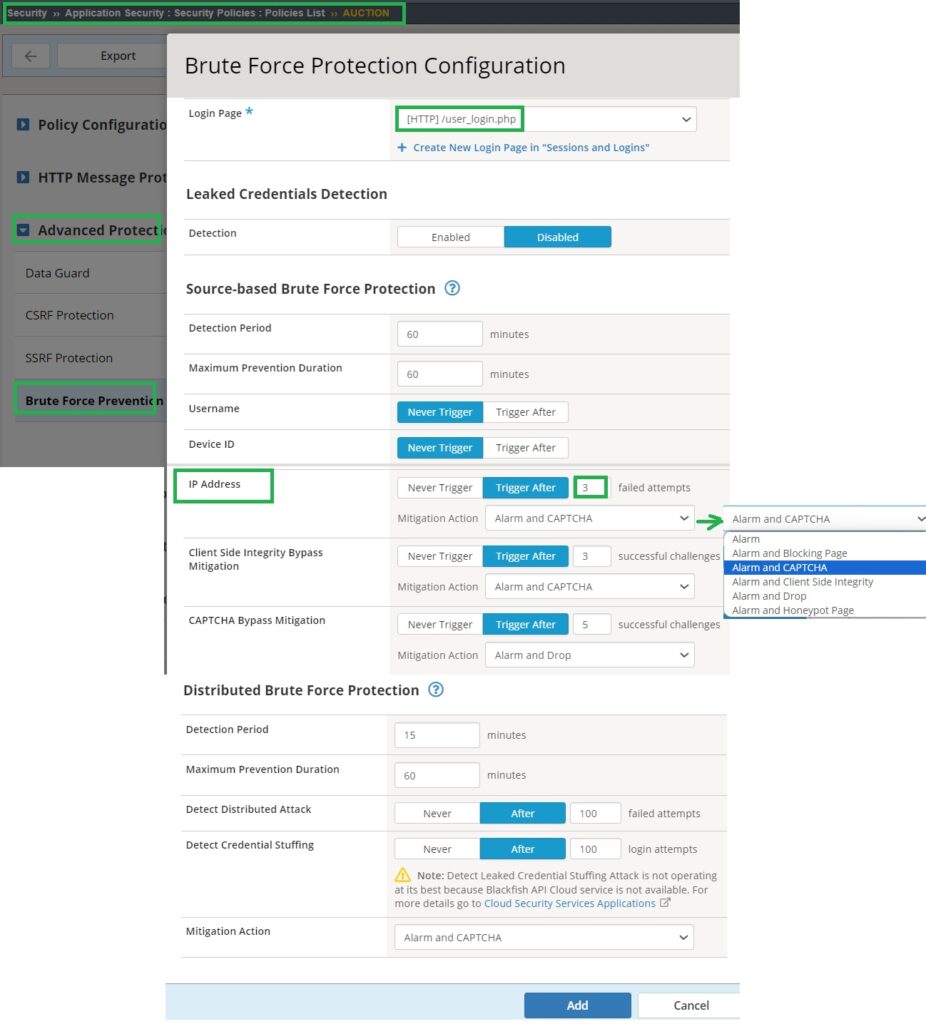
The core of brute force protection configuration takes place under the security policy settings, specifically in “Advanced Protection” and “Brute Force Prevention“. Here, you can configure brute force detection and prevention methods for each login page.
This section offers three main capabilities: “Leaked Credential Detection,” which I will not discuss here, and the focus of this demonstration, “Source-based Brute Force Protection” and “Distributed Brute Force Protection“.
You can configure the number of failed attempts per “username,” “Device ID,” and “IP Address” within a specific “Detection Period” that are considered a brute force attack.
Additionally, you can set how long preventive measures, such as CAPTCHA, will be enforced once a brute force attack, known as the “Maximum Prevention Duration” is detected.
For simplicity, I will disable brute force detection based on ‘username‘ and ‘device ID‘ and enable detection solely based on ‘IP Address‘ to simplify understanding. Additionally, I will adjust the number of allowed failed attempts to ‘3’ to make the demonstration easier.
When a brute force attack is detected, we have a few options available to mitigate against the attack, all of which we will demonstrate in this section.
With the “Alarm” action, an event log is generated to notify administrators of a detected brute force attack.
The “Blocking Page” action redirects the attacker to a blocking page, informing them that their access has been temporarily blocked.
The “CAPTCHA” action challenges the suspected attacker with a CAPTCHA to prevent automated scripts from continuing their brute force attack.
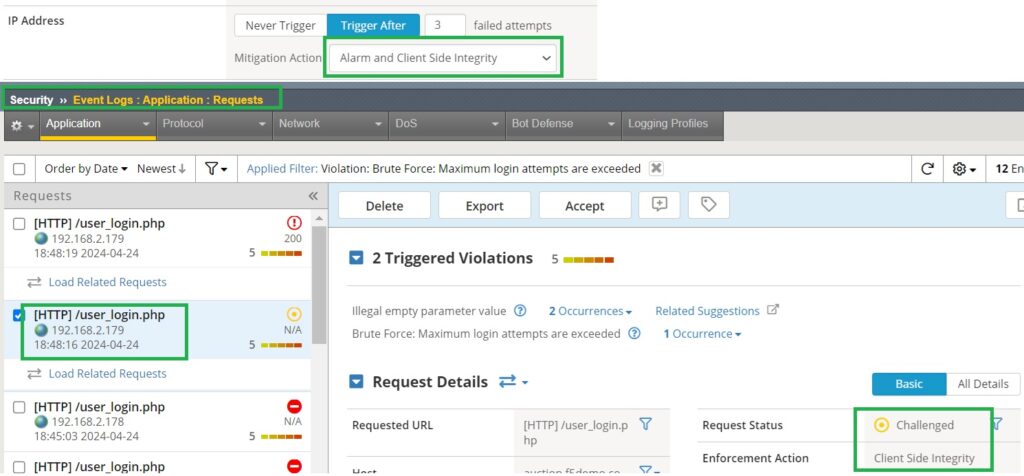
The “Client Side Integrity” action runs JavaScript code in your browser to ensure that interactions between your browser and the server haven’t been tampered with by malicious scripts. As a user, you typically won’t notice anything directly, but if there’s an issue such as a failed integrity check, you might encounter CAPTCHA or blocked actions.
The “Drop” action discards brute force attack traffic, preventing it from reaching the web application.
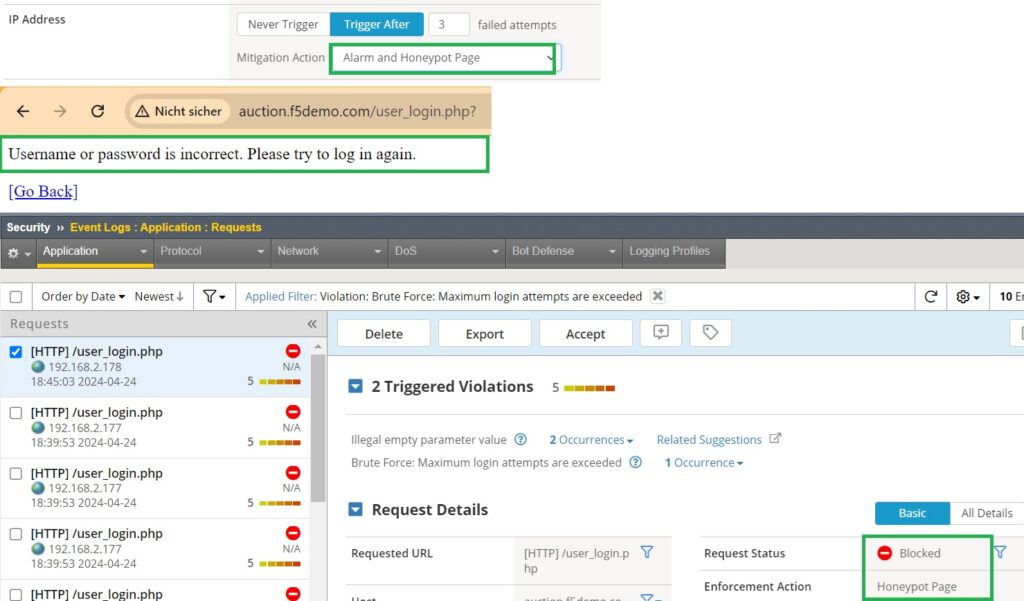
The “Honeypot Page” action redirects the attacker to a honeypot page instead of the actual login or target page. This fake page is designed to look legitimate to deceive attackers and gather information on their activities.
Demonstrate Brute Force Attack Mitigations
Alarm and CAPTCHA
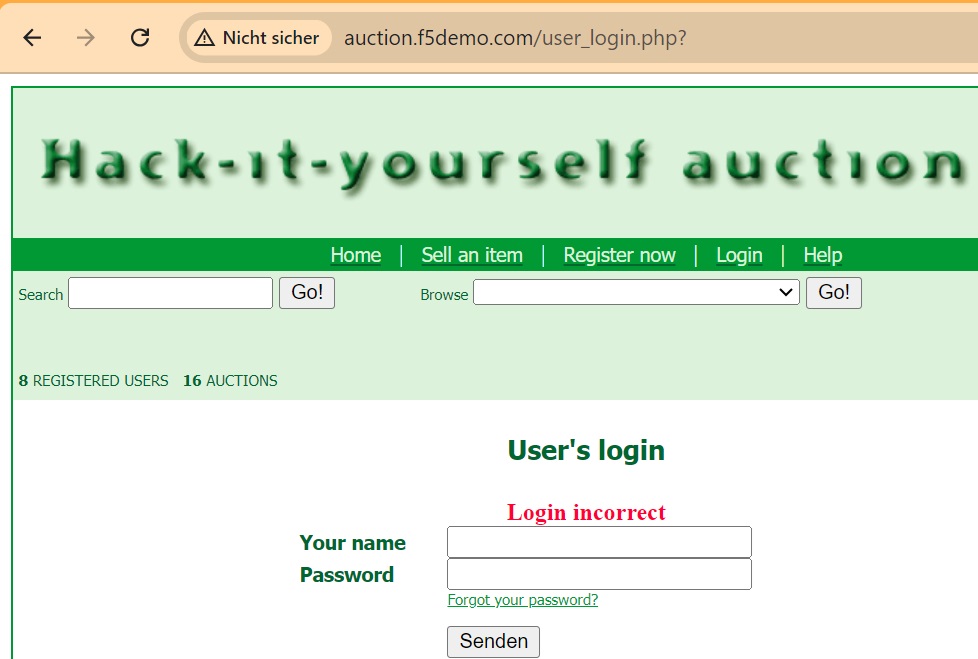
Now we will test each of these actions, starting with “Alarm and CAPTCHA“. For each action, we will also change the client’s IP address since we are monitoring brute force attacks based on IP address. To simulate login failures, we will send empty username and password fields.
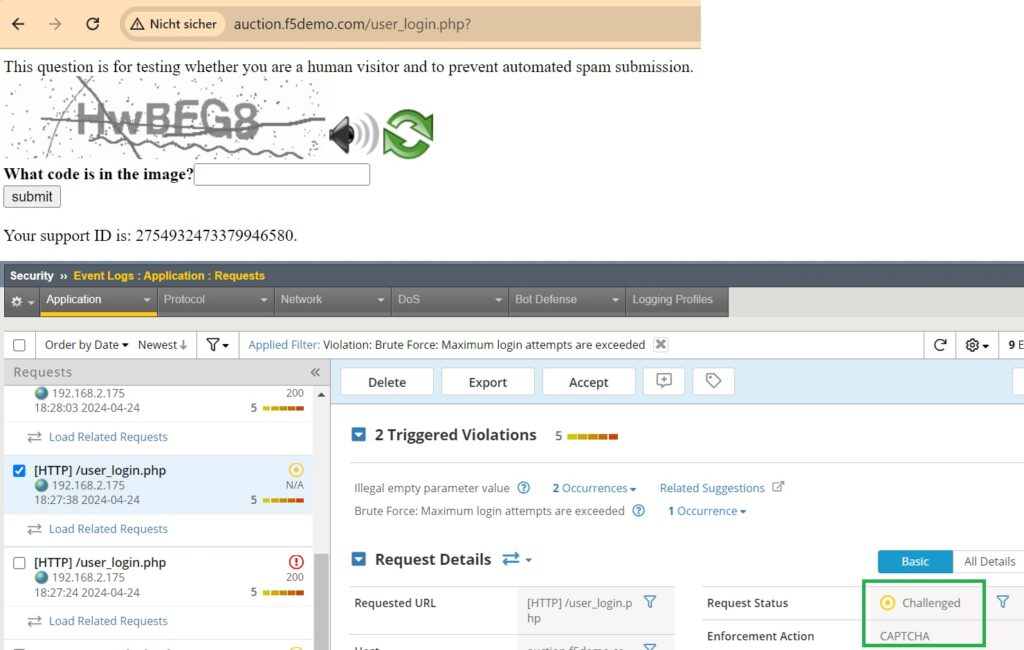
Now, we will submit an empty username and password multiple times to observe the result of the “Alarm and CAPTCHA” action. As expected, the user is prompted to complete a CAPTCHA. Additionally, if we check the event log and filter the logs based on brute force attacks, we can see that the violation “Brute Force: Maximum login attempts are exceeded” has been triggered, and the enforcement action taken is “CAPTCHA.”
Alarm and Blocking page
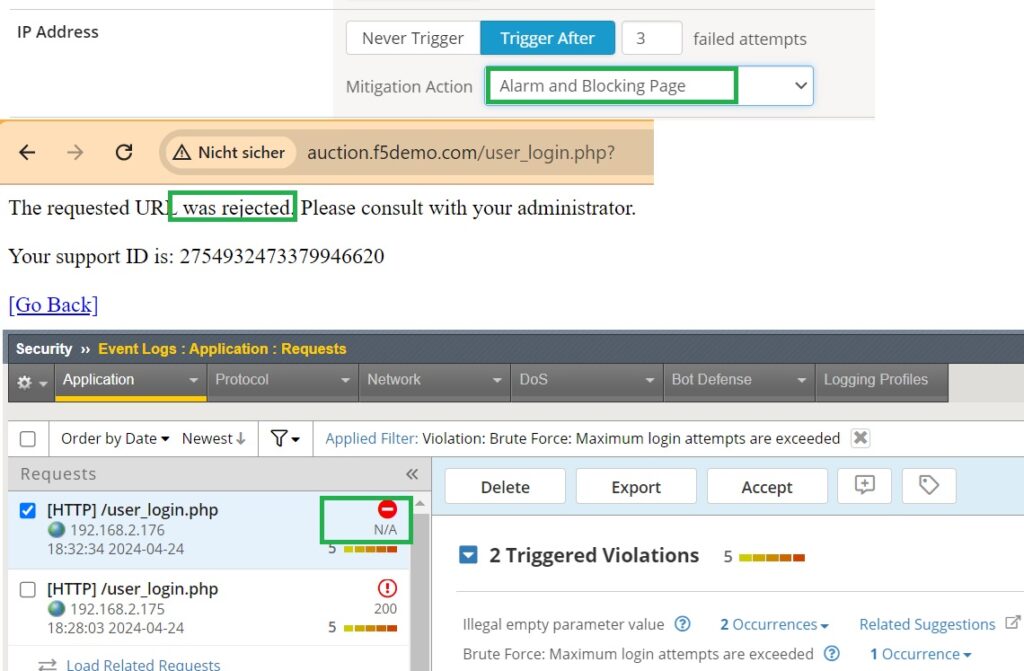
For the next demonstration, we will change the action to “Alarm and Blocking Page.”
After changing the client’s IP address, we will simulate a brute force attack by attempting to log in multiple times with an empty username and password.
As expected, the result of the brute force attack is a blocking page. We can verify this outcome also by checking the application event log.
Alarm and Drop
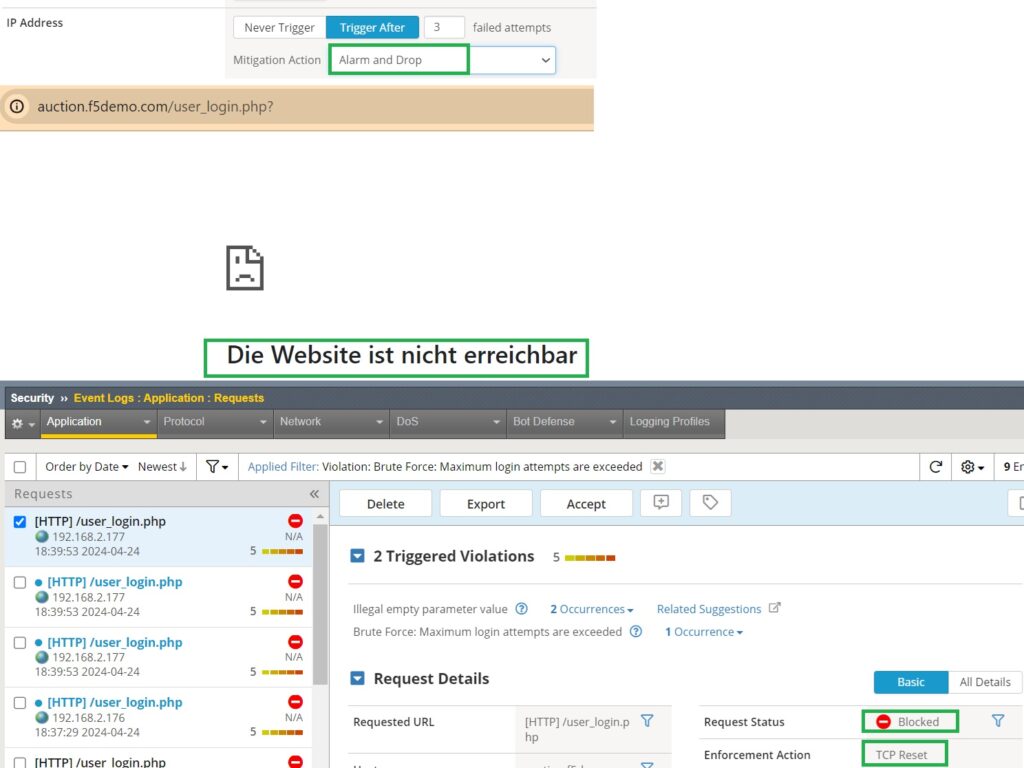
Next, we’ll demonstrate “Alarm and Drop“. After changing the client’s IP address, we’ll attempt a brute force attack by submitting multiple empty usernames and passwords on the login page. The result will be that you cannot access the web application because the brute force traffic is dropped.
In the event log, you can observe that the “enforcement action” taken is sending a “TCP Reset” to the client.
Alarm and Honeypot Page
For the next demonstration, we’ll select the “Alarm and Honeypot Page” as brute fore mitigation action and change the client’s IP address accordingly. We will then attempt a brute force attack by submitting multiple empty usernames and passwords on the login page.
As a result, you’ll encounter a page displaying the message “Username or password is incorrect. Please try to log in again“. It’s important to note that this page is not generated by the web application but rather by the honeypot functionality of F5 AWAF.
To verify this, we can check the application event log, where we should see the “enforcement action” listed as “Honeypot Page“.
Alarm and Client Side Integrity
As the final demonstration, we will change the brute force mitigation action to “Alarm and Client Side Integrity“. Before simulating the brute force attack, we will also change the client’s IP address.
The result may not be as visible as with other methods. Typically, you might notice the page pausing briefly without displaying anything, indicating that security measures are actively working in the background.
To confirm this, we can check the event log where the “enforcement action” should be logged as “Client Side Integrity“.
